When I first looked at my basement’s concrete floor, I knew something had to be done. Years of moisture, minor flooding, and general wear had left it stained, dusty, and frankly embarrassing. After researching countless flooring options, I decided to try epoxy paint. It seemed like the perfect solution for a basement that needed durability, moisture resistance, and a fresh new look without breaking the bank.
Choosing the Right Epoxy Paint System
I learned quickly that not all epoxy paints are created equal. My first mistake was almost buying the cheapest option at the hardware store. After talking to a contractor friend, I discovered that water-based epoxies work well for light traffic areas, but my basement needed something stronger. I ended up choosing a two-part solvent-based system that promised better adhesion and chemical resistance.
The key difference I found was in the solids content. Higher solids mean better durability and thickness. I chose a system with 100% solids, which meant no water or solvents would evaporate, leaving me with a thicker, more protective coating. This decision proved crucial when my water heater leaked six months later, and the floor wiped clean effortlessly.
Reading reviews became my obsession for weeks. I noticed that many DIYers complained about peeling and bubbling within a year. Most of these issues trace back to inadequate surface preparation or choosing the wrong product for their specific conditions. This research phase saved me from making expensive mistakes that would have haunted me for years.
Surface Preparation Was Everything
I cannot stress enough how critical proper surface preparation turned out to be. My concrete floor looked smooth, but I learned it needed to be porous enough for the epoxy to bond properly. I rented a concrete grinder for the weekend, and what seemed like a simple task became a full-day project with dust everywhere despite my plastic sheeting efforts.
The acid etching step came next, which frankly terrified me at first. Following the manufacturer’s instructions precisely, I mixed muriatic acid with water and applied it to the entire floor. The fizzing reaction told me it was working, but I made sure to have proper ventilation and wore full protective gear. This step opened up the concrete pores for better adhesion.
After etching, I spent another day thoroughly cleaning and dehumidifying the space. Any oil stains, dirt, or moisture would prevent proper bonding. I used a dehumidifier for three days straight to ensure the concrete was completely dry. Testing moisture levels with a plastic sheet taped to the floor for 24 hours confirmed I was ready to proceed.

My Application Process and Lessons Learned
Application day arrived, and I had everything planned like a military operation. I mixed the two-part epoxy according to instructions, knowing I had a limited working time before it started to set. Starting in the far corner and working toward the exit became crucial, as I learned from online tutorials. I definitely didn’t want to paint myself into a corner, literally.
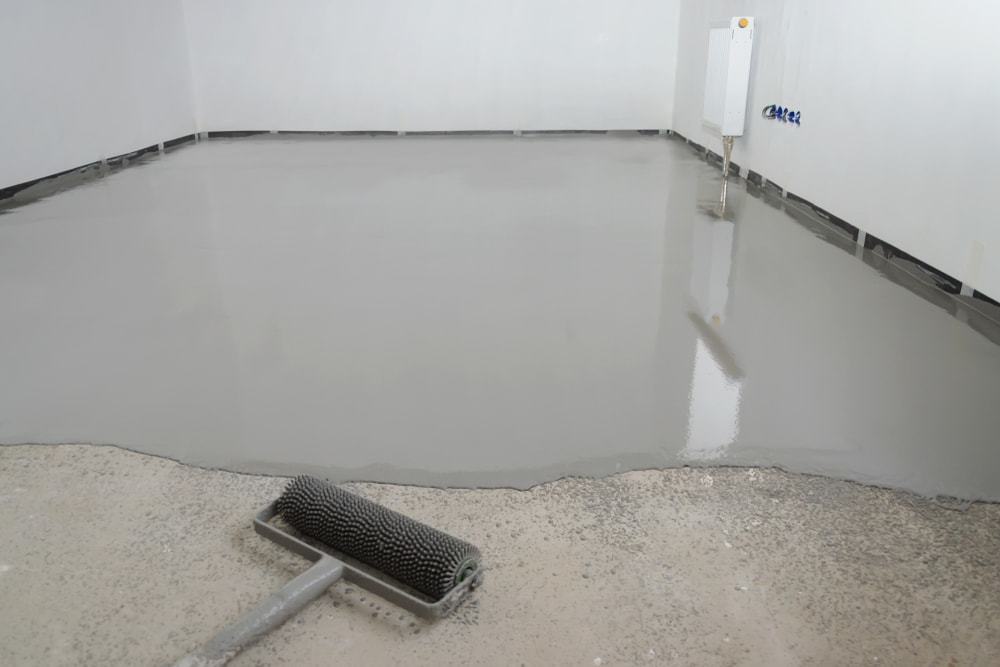
Rolling the epoxy went smoother than expected, but I quickly learned to maintain a wet edge to avoid lap marks. The key was working in manageable sections and keeping a consistent thickness. I used a high-quality roller with the recommended nap length, which made a huge difference in achieving an even finish. Back-rolling each section helped eliminate bubbles and ensure uniform coverage.
The most challenging part was waiting. The epoxy looked perfect going on, but I had to resist the urge to walk on it too soon. I waited the full 24 hours before light foot traffic and a full week before moving heavy items back. This patience paid off with a rock-solid finish that has held up beautifully through two years of basement life.
Dealing with Common Problems
Despite my careful preparation, I encountered a few issues that taught me valuable lessons. Small bubbles appeared in one corner, which I later realized was due to outgassing from the concrete. Next time, I would apply a primer coat first to seal the concrete and prevent this issue. Fortunately, light sanding and a touch-up coat fixed the problem.
Color matching became trickier than expected when I needed to do touch-ups months later. I learned to keep detailed records of the exact products and batch numbers used. Environmental conditions during application also affected the final color slightly, so I now know to maintain consistent temperature and humidity throughout the project.
The biggest surprise was how slippery the floor became when wet. I hadn’t considered adding anti-slip additives to my first coat, which became problematic near the utility sink. I solved this by adding fine sand to a small batch for high-traffic areas. This modification provided the traction needed without compromising the smooth finish elsewhere.

Maintenance and Long-term Performance
Two years later, I’m impressed with how well my epoxy floor has held up. Regular maintenance involves simple mopping with mild detergent, and the floor still looks nearly new. Spills wipe up instantly, which proved invaluable when my teenage son’s friends started using the basement for band practice. Oil, paint, and various teenage messes clean up without leaving stains.
I did notice some minor scuffing where we drag heavy storage boxes, but this was expected and doesn’t detract from the overall appearance. The high-gloss finish I chose shows every dust particle and footprint, so I’ve learned to sweep more frequently than with other flooring types. A semi-gloss finish might be more forgiving for those who prefer lower maintenance.
The moisture resistance has exceeded my expectations. During a particularly wet spring, my basement stayed dry and comfortable while neighbors dealt with musty odors and moisture issues. The epoxy coating created an effective vapor barrier that transformed my basement from a damp storage area into a comfortable living space we actually enjoy spending time in.

Cost Analysis and Return on Investment
Breaking down the costs, I spent approximately $400 on materials for my 600-square-foot basement floor. This included the epoxy system, primer, tools, and safety equipment. Professional installation would have cost nearly $1,200, so the DIY approach saved me significant money. The time investment was substantial, about 20 hours over four days, but the results justified the effort.
Comparing this to other basement flooring options, epoxy paint offered the best value for my situation. Ceramic tile would have cost three times more and required extensive subfloor preparation. Luxury vinyl planks seemed appealing, but couldn’t match epoxy’s moisture resistance and durability. Polished concrete was beautiful, but beyond my budget and skill level.
The return on investment became apparent immediately. My basement transformed from an embarrassing storage area into a functional space that added value to our home. When we had our house appraised last year, the appraiser specifically mentioned the beautiful basement floor as a positive feature. This upgrade paid for itself in increased home value alone.

How long does epoxy paint last on basement floors?
In my experience, a properly applied epoxy floor can last 10-15 years with normal use. Mine is going strong after two years with minimal wear. The key is proper surface preparation and choosing a high-quality product designed for your specific traffic levels and conditions.
Can I apply epoxy paint over existing basement floor paint?
I wouldn’t recommend it based on what I learned during my research. Existing paint creates a weak layer that can cause the epoxy to fail. I stripped all old paint and sealers before applying my epoxy coating. The extra prep work was worth it for long-term durability and proper adhesion.

Is epoxy paint slippery when wet?
Yes, it can be quite slippery, especially with high-gloss finishes. I learned this the hard way and added anti-slip additives to high-traffic areas during my second coat. You can also choose textured rollers or broadcast sand into the wet epoxy for better traction in areas prone to moisture.
How do I fix chips or scratches in epoxy paint?
Small chips and scratches can be touched up with leftover paint, though color matching can be tricky. For larger damage, I lightly sand the area, clean thoroughly, and apply a thin coat of epoxy. The key is blending the edges well. Keep detailed records of your original products for future touch-ups.

Can pets damage epoxy basement floors?
My dog’s nails haven’t caused any damage to the epoxy surface, and accidents clean up easily without staining or odor retention. The non-porous surface is actually ideal for pet areas. However, large dogs running and playing might eventually cause some minor scuffing in high-activity areas over time.
What’s the biggest mistake people make with basement epoxy floors?
From my research and experience, inadequate surface preparation causes most failures. Many people skip the grinding, etching, or proper cleaning steps to save time. I also see people applying epoxy in poor weather conditions or over damp concrete. Taking time for proper preparation is absolutely critical for long-term success.

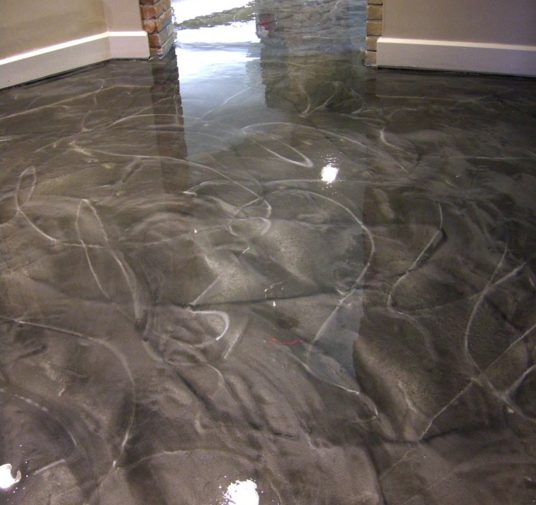
Entire Basement Coated – Black Epoxy Floor Installation
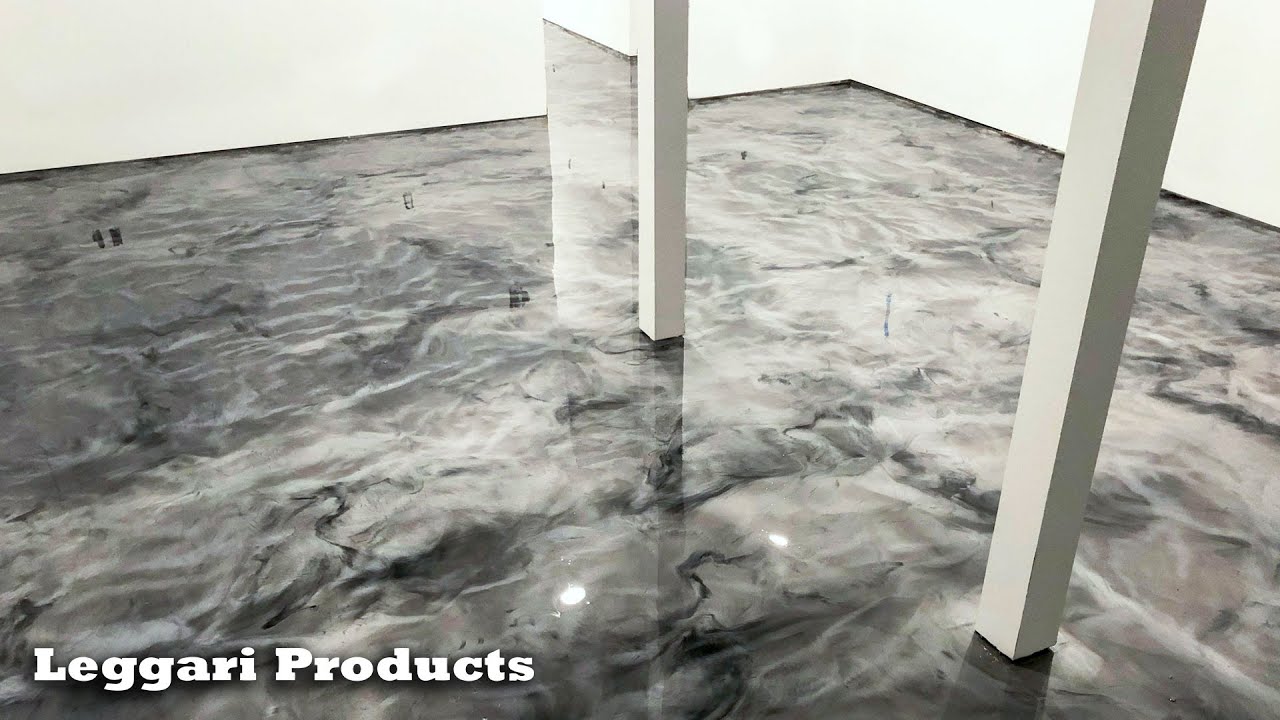
Basement Floor Paint Ideas

Reasons Why You Should Epoxy Your Basement Floor – Epoxy Central

Do-It-Yourself Epoxy Floor Coating
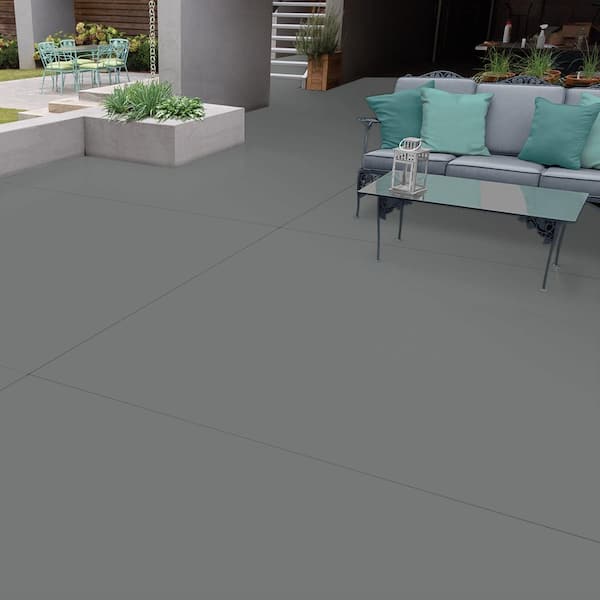
BEHR PREMIUM 1 gal. Slate Gray Self-Priming 1-Part Epoxy Satin
Related Posts: