Since 1890 the first Congregational Church found Chicago has experienced their cork floor that shows amazing durability. By this point you ought to comprehend that cork is an eco friendly products and good for the environment. It's practically a pity to miss any ability to operate it green information each day. The floor will not absorb dust or perhaps allow some molds or fungi to grow.
Images about How To Replace Damaged Cork Floor Tiles
How To Replace Damaged Cork Floor Tiles
This implies you are able to be worry absolutely free in case you opt for this flooring option in the bathroom of yours, basement or kitchen area. Cork as being a flooring solution has still been with us for a huge number of years. The hottest flooring could be utilized instantly and afterwards refinished when necessary. Cork flooring concept is merely another addition to the list.
Should You Refinish Or Replace Your Cork Floors? – Aspen Wood Floors

Not only does it have the elegance and durability of traditional wood flooring items however, it is also an eco-friendly floor solutions. You will want to stay away from installing cork as the flooring of yours of choice in areas which are susceptible to flood or perhaps drainage troubles. These resistant properties generate cork utilizable in nearly every area of your household.
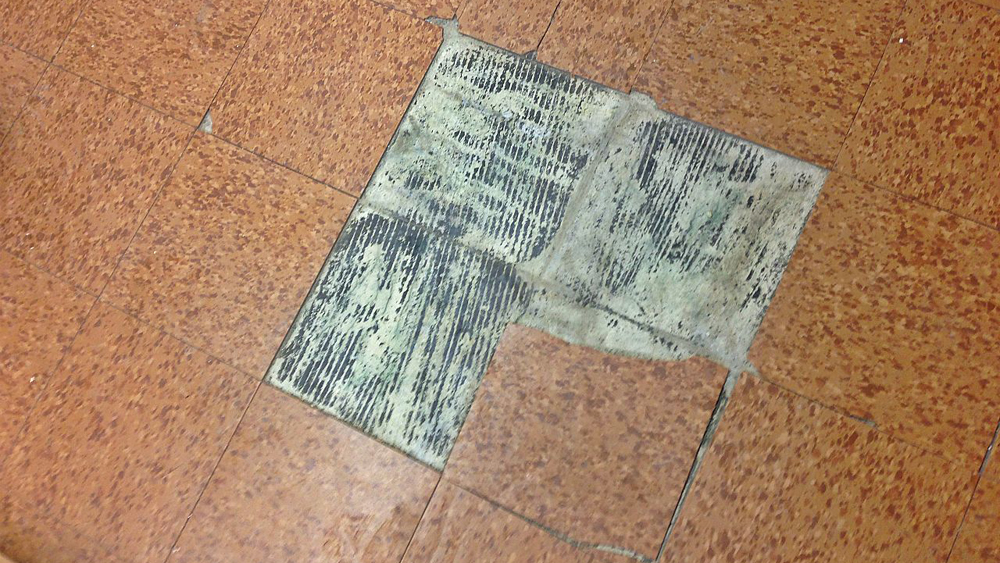
Repair Cork Floor – How To Patch A Cork Floor – Cancork

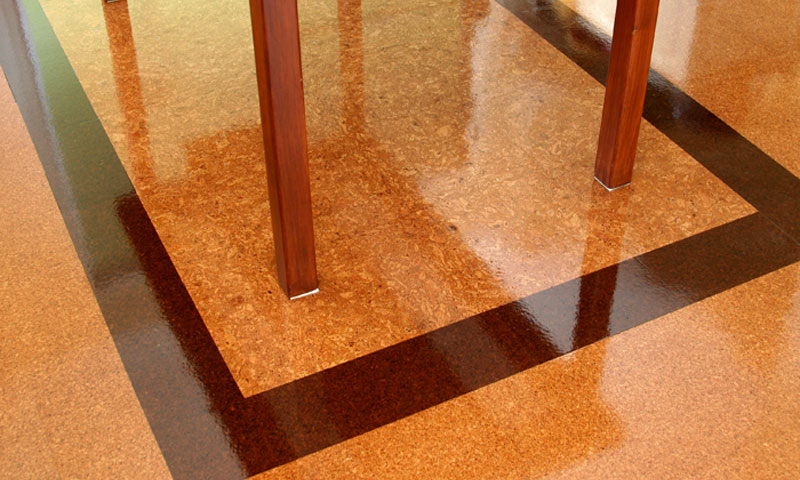
Refinishing old cork floors u2013 tips from the professionals
Resanding and Resurfacing by Cork Interiors

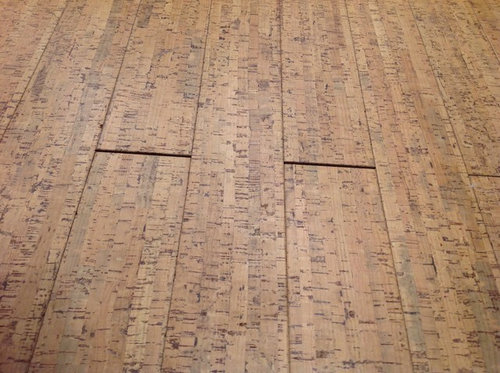
Cork floor has started to warp – what gives? : r/HomeImprovement

Repair Cork Floor – How To Patch A Cork Floor – Cancork
Refinishing old cork floors u2013 tips from the professionals
Removing Cork Tiles from Floors and Walls DIY Doctor
Refinishing old cork floors u2013 tips from the professionals
Problem with cork floor
How to Install a Cork Floor – This Old House
/cdn.vox-cdn.com/uploads/chorus_asset/file/19495909/h1006handbook08.jpg)
Repair Cork Floors: A How-To Guide Hunker

WeCork brand Cork Floors – Denting? All cork floors dent?

Related Posts:
- Cork Flooring Colors
- Cork Flooring Dining Room
- Light Cork Flooring
- Engineered Cork Flooring
- Cork Flooring In Kitchen
- Cork Flooring Modern
- Cork Flooring White
- Herringbone Cork Flooring
- Outdoor Cork Flooring
- Cork Flooring Bathroom
How To Replace Damaged Cork Floor Tiles
Cork flooring is a popular choice for many homeowners due to its durability, affordability, and sound insulation qualities. But like any other type of flooring, cork flooring is prone to wear and tear over time and may need to be replaced occasionally. Replacing damaged cork floor tiles is a relatively easy job that can be done in a few hours with the right tools and materials. In this article, we’ll provide step-by-step instructions for how to replace damaged cork floor tiles.
Tools and Materials Needed
Before replacing damaged cork floor tiles, make sure you have all the tools and materials you will need to complete the job. These include:
– Utility knife or scissors
– Putty knife
– Hammer
– Nails or screws
– Level
– Replacement cork tiles
– Adhesive
– Grout
– Caulk
– Sandpaper
– Vacuum cleaner
– Safety glasses
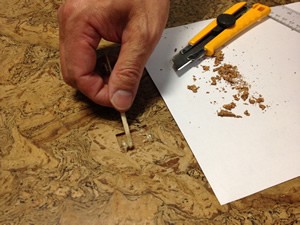
Step 1: Remove the Damaged Tile
The first step in replacing damaged cork floor tiles is to remove the damaged tile. Carefully use a putty knife to pry up the edges of the tile, then use either a utility knife or scissors to cut through the remaining adhesive holding it in place. Once all of the adhesive has been removed, take a hammer and gently tap around the edges of the tile until it comes loose. Be careful not to damage any of the surrounding tiles when doing this.
Step 2: Clean Up the Area
Once you have removed the tile, use a vacuum cleaner to remove all of the debris from the area. Then use a damp cloth or sponge to wipe away any remaining adhesive or grout residue. Allow the area to dry completely before proceeding with the next step.
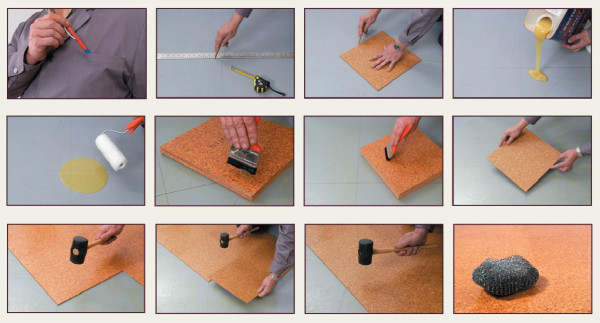
Step 3: Install New Tile
Now it’s time to install your new tile. Start by laying down your replacement tile in the space where you removed the old tile. Make sure that it is level and that all of the edges are lined up correctly. Once you are satisfied with its position, apply adhesive to the back of the tile and press it firmly into place. Allow the adhesive to dry completely before proceeding with the next step.
Step 4: Re-Grout Around Tile
Once your new tile is in place, it’s time to re-grout around it. Use a grout float to apply grout around the edges of the tile, making sure that you fill all gaps between it and its surrounding tiles. Allow the grout to dry completely before proceeding with the next step.
Step 5: Apply Caulk Around Edges
Once your grout has dried, it’s time to apply caulk around all of the edges of your new tile. This will help seal out moisture and keep your floor looking good for years to come. Apply a thin bead of caulk around all of the edges of your new tile, using a caulk gun for best results. Allow the caulk to dry completely before proceeding with any further steps.
Step 6: Sand Down Edges
Now that your caulk has dried, use sandpaper to sand down any rough edges on your new tile if necessary. This will help ensure that your new tile fits in seamlessly with your existing flooring and looks as good as possible once installed. Once you have finished sanding down any rough edges, vacuum up any dust or debris that may have been created during this process.
FAQs About Replacing Cork Floor Tiles
Q: What tools do I need for replacing cork floor tiles?
A: The basic tools needed for replacing cork floor tiles include a utility knife or scissors, putty knife, hammer, nails or screws, level, replacement cork tiles, adhesive, grout, caulk, sandpaper and a vacuum cleaner. Safety glasses are also recommended for safety reasons.
Q: How do I make sure my new cork tile fits in seamlessly