I never imagined I’d be so interested in concrete floors, but after changing my dull basement into a lovely area with rich, earth-toned stained concrete, I’ve become quite the enthusiast. Staining concrete is not just inexpensive; it is also an art form that has the potential to radically transform a room. Whether you want to update a garage, cellar, or even your main living quarters, I’ve learnt through trial and error how to breathe new life into old concrete. I will discuss my own experience with the process, from preparation to final touches, so you can get professional-looking results without paying the professional price.
Assessing Your Concrete Canvas
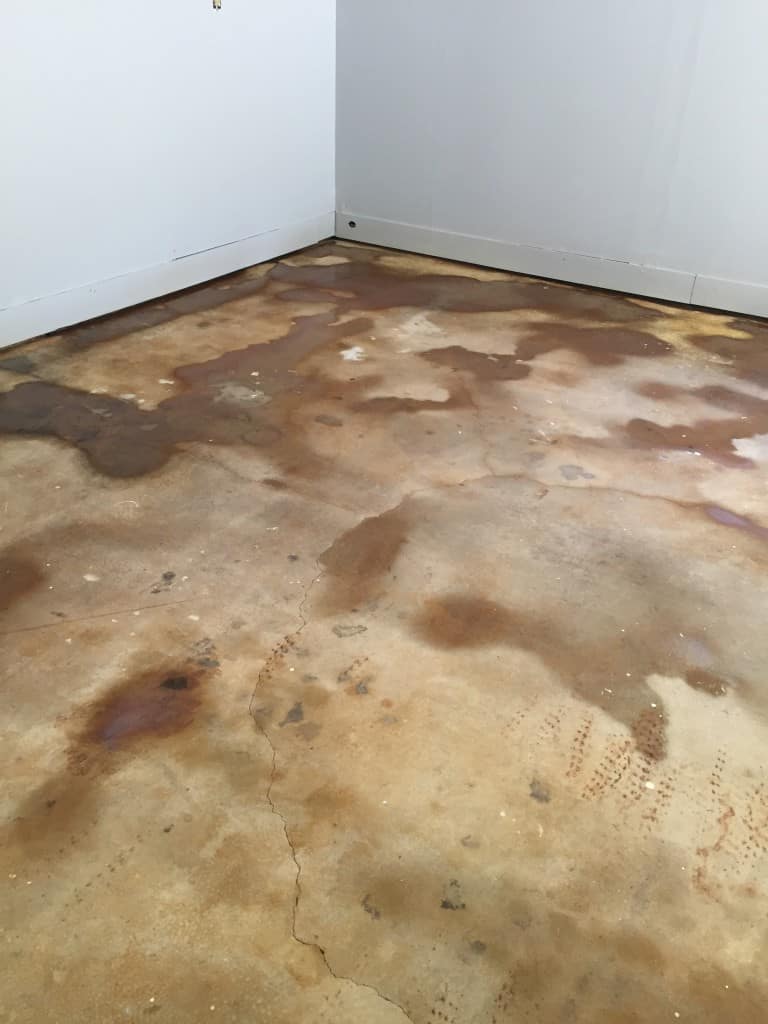
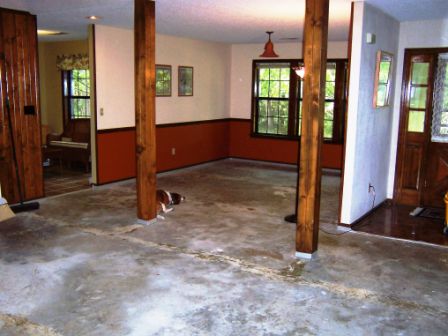
When I started working on my basement floor, I quickly realized that not all concrete is the same. My floor had decades of paint splatters, adhesive residue, and mystery stains that needed to be removed before the main work began. I realized that accurate assessment is critical, as concrete must be porous enough to receive stain. I tested this by sprinkling water in several locations; if it absorbed after a few minutes, I knew I had usable concrete. Water-repelling areas indicated the presence of sealants or other barriers that needed to be removed.
Surface concerns reveal critical information about what remedies your floor requires. Cracks, spalling (flaking), and efflorescence (white mineral deposits) are not only cosmetic issues; they are indicators of your concrete’s state. In my instance, I had many hairline fractures that, when stained, improved the character, but larger structural cracks required professional repair. Remember that stain enhances rather than conceals, so any existing patterns or defects will become part of the final design. This isn’t necessarily a bad thing—some of my floor’s most attractive spots are where the concrete has natural diversity.
With concrete staining, age can be an advantage. My basement floor was approximately 40 years old, giving it a worn look that complemented the stain well. Newer concrete (less than 28 days old) frequently has to cure completely before staining, although older surfaces have typically attained the ideal porosity. The trick is to ensure that your concrete has not been sealed recently. My floor had spots with old polyurethane that needed to be ground down before the process could move forward. The work was worthwhile, however, because thorough assessment prevented disappointment when applying the actual stain.
Gathering Supplies and Safety Equipment
I rapidly found that efficient concrete staining necessitates specialized instruments that I hadn’t anticipated. Aside from the obvious acid or water-based stains, I required a plastic pump sprayer for application, several brushes for pushing the stain into edges and corners, and plastic sheeting to cover nearby surfaces. I didn’t realize how useful a good extension pole for my brushes and rollers was until halfway through the project, when it saved my back from hours of hunched-over effort. I also discovered that having many buckets with different solutions and clean water made the process much more efficient.
Safety equipment proved to be non-negotiable, especially when dealing with acid stains. My first effort at application without appropriate protection resulted in sore skin and a headache from the fumes. Following that encounter, I purchased chemical-resistant gloves that extended up my forearms, safety goggles that provided a complete seal around my eyes, and a respirator rated for chemical vapors. The safety regulations for water-based stains were less rigorous, but I still used adequate ventilation and protection. Remember that concrete preparation frequently requires grinding or scraping, which generates fine dust that you don’t want to inhale.
Budget planning was another important preparation stage that I had overlooked at first. While staining is less expensive than many other flooring options, quality products make a big difference in the end result. I discovered that saving money on the stain itself was a false economy, as higher brands provided superior color uniformity and penetration. Similarly, investing in a high-quality sealer increased the longevity of all of my hard work. My entire supply cost for a 500-square-foot basement was around $500, which included tools that I could reuse on future jobs. This was much less than the $3,500 figure I got from a professional contractor.
Readying Your Concrete Surface
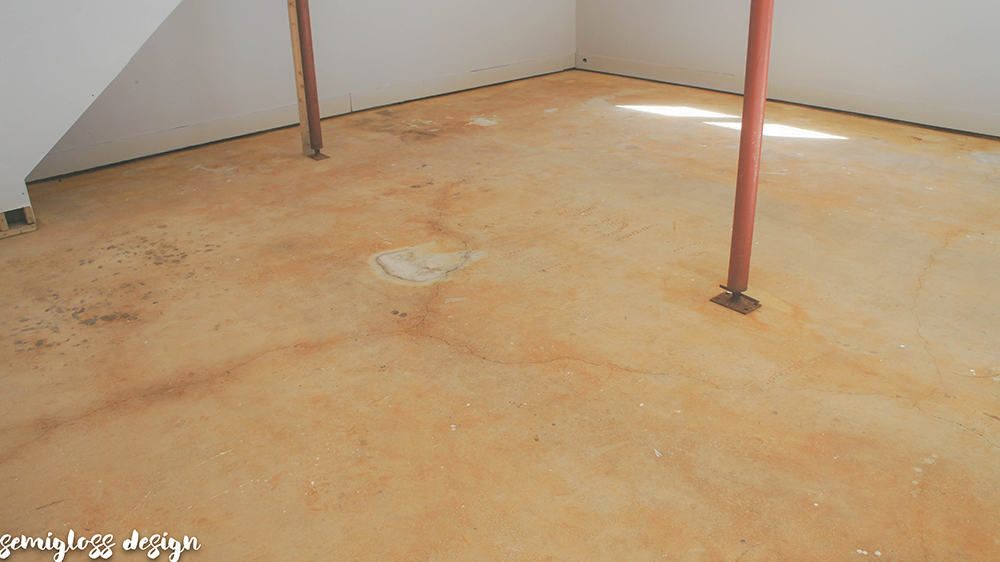
Cleaning my concrete floor was probably the most difficult but necessary component of the entire process. I began by removing all furniture and properly clearing up loose debris. The next step was degreasing, which required a specialist concrete cleaner to remove years of embedded oils that would have prevented stain penetration. I observed that oil stains are especially persistent, necessitating numerous applications of degreaser and scrubbing with a stiff-bristled brush. One especially persistent grease patch from an old workshop area required treatment with a kitty litter and acetone poultice before it could be removed from the concrete.
After basic cleaning, I needed to remove surface barriers such as old paint, adhesives, and sealers. This was frightening at first because it involved renting a concrete grinder from my local home improvement store. Despite having a vacuum attachment, the machine was quite strong and produced a lot of dust. I worked slowly across the floor, taking care not to cause uneven depressions. For spots near walls that the grinder couldn’t reach, I used my angle grinder’s portable diamond cup wheel. This technique took two full days but fully converted the surface from a sealed, painted patchwork to a homogenous, slightly rough canvas ready for staining.
Etching the concrete was my final preparation process, which was very important because parts of my floor had been troweled quite smooth during the original construction. I used a weak solution of muriatic acid, which reacted with the concrete to form microscopic pores for enhanced stain adhesion. The fizzing reaction was fascinating to witness, like a science experiment unfolding on my floor. After etching, I neutralized the acid with a baking soda solution and rinsed several times, using a wet vacuum to remove any moisture. The floor needed to dry completely for 24 hours before I could begin staining, which was a struggle of patience given my eagerness to observe color metamorphosis.
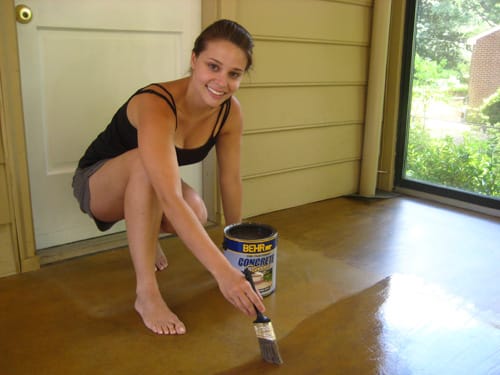
Using the Stain Effectively
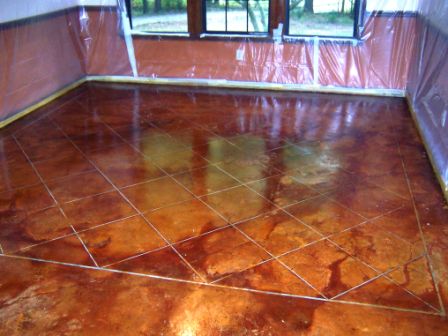
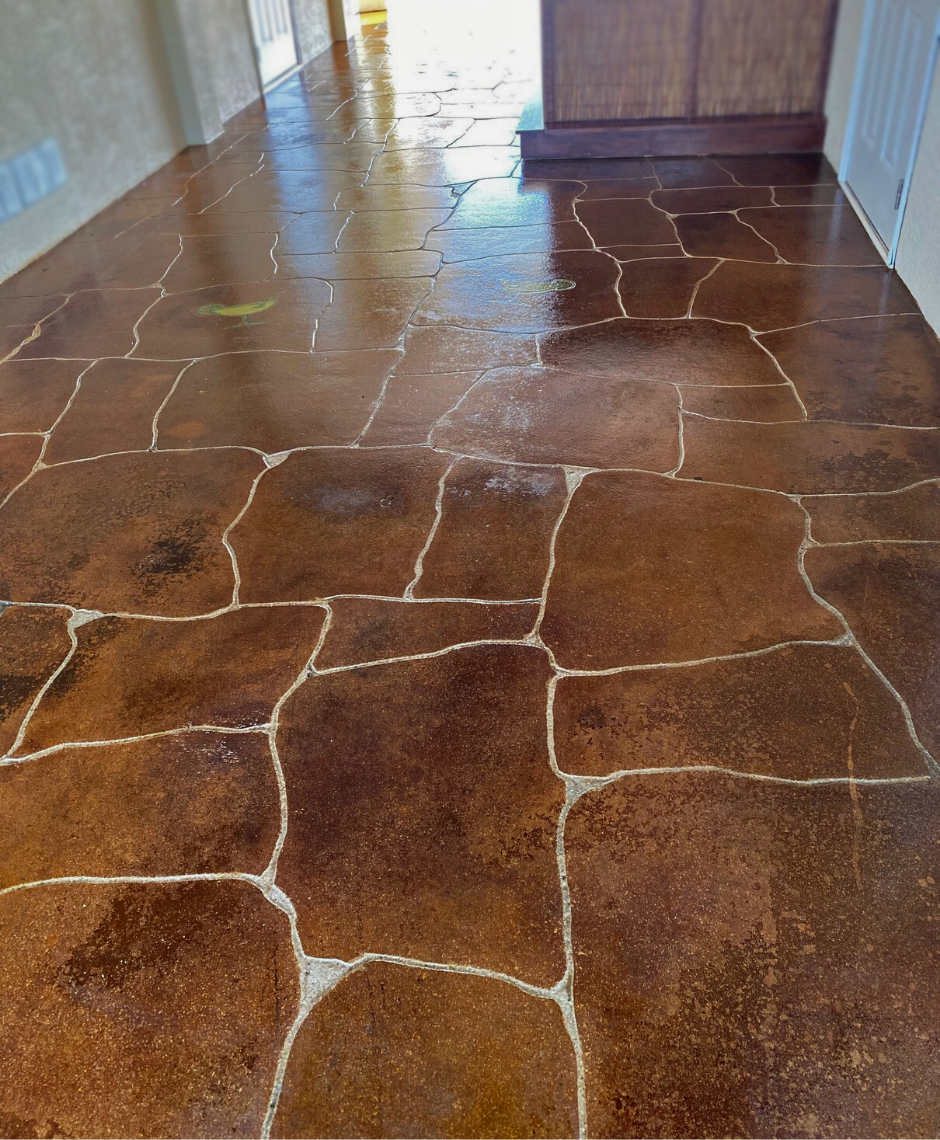
My initial application decision was whether to use acid or water-based stains, and I ultimately chose acid for its translucent, variegated effect. I first tested numerous colors in inconspicuous locations, only to realize that the same stain created different results on different regions of my floor due to changes in concrete composition. The application process was almost meditative, using a pump sprayer in little parts of around 25 square feet at a time. I learned to spray in a circular motion rather than straight lines to avoid visible patterns or streaks, and I maintained the portions slightly overlapping for a natural blend.
Working time varies greatly between acid and water-based stains. My acid stain required at least 4 hours to react with the concrete minerals, generating a richer color over time. I discovered that spraying the surface with water on periodically throughout this period kept it from drying out too quickly and extended the reaction time. Over the course of 24 hours, the color progressed from a disappointing light wash to the deep, mottled amber I desired. Each piece responded slightly differently, resulting in natural variety that improved the overall image rather than looking like mistakes.
Neutralizing and washing the acid stain was both vital and time-consuming. After the stain had set, I had to neutralize the acid using an ammonia and water solution, washing it throughout the entire surface. Then came several rounds of rinsing, with each rinse water becoming increasingly clearer. I used a shop vacuum to remove the rinse water, taking care not to leave any lingering puddles that could cause water marks. This technique was repeated until the rinse water was clean and the pH testing strips indicated a neutral result. Only then was my floor ready for sealing, which would keep the color and provide protection.
Sealing for Protection and Sheen
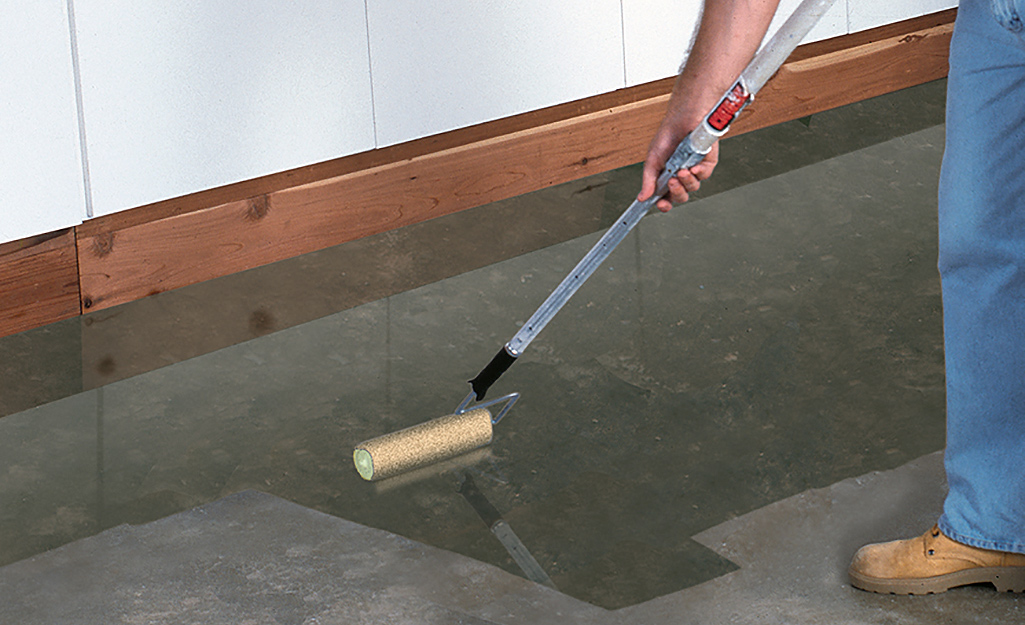
Choosing the correct sealant was critical for both the appearance and lifespan of my tinted concrete. I picked a solvent-based acrylic sealer since it is long-lasting and improves the color depth of the stain. Before full application, I examined a tiny area to check that it produced the desired satin finish without the undesirable amber tones that certain sealers sometimes add. Timing is really important when applying sealer, as I needed to ensure the floor was absolutely dry but not too dusty. I discovered that waiting 24 hours after the last rinse and then vacuuming and damp-mopping with clean water resulted in the best surface for sealant application.
The application procedure has a considerable impact on the sealer’s appearance and performance. I used a microfiber applicator linked to an extension pole, applying thin, even coatings rather than large ones that could cause bubbling or cloudiness. Working in 3-foot chunks in a regular pattern let me to avoid missing spots and producing lap marks. The first coat soaked in fast, appearing to disappear in some parts, whereas the second coat produced a more uniform appearance. Between coats, I needed to wait about 4 hours and lightly sand any defects using fine-grit sandpaper, followed by a thorough dusting with a microfiber cloth to remove any particles.
Protection while curing presented an unanticipated challenge. The sealer felt dry to the touch after about 6 hours, but I discovered that full curing takes much longer. I waited 48 hours before permitting light foot traffic and kept furniture, carpets, and pets off the surface for an entire week. Even so, I used felt protectors under all furniture legs to prevent scratches. Maintenance has been surprisingly simple, requiring only regular dust mopping and the odd cleaning with a neutral pH solution. The effort of appropriate sealing has paid off handsomely, as my floor has retained its beauty for years with no upkeep, making it far more practical than I had anticipated.
Troubleshooting Common Issues
My staining effort was not without difficulties, and color inconsistency was the first major setback. Some sections absorbed the stain well, while others appeared patchy or refused it completely. I noticed that this was frequently due to inconsistency in etching or leftover sealers. My answer was to apply a second coat of stain to the lighter regions, focusing on them and feathering outward to mix with the darker sections. Before reapplying stain, I lightly sanded the surface and applied another round of etching solution to particularly stubborn areas. This problem-solving method required patience, but it resulted in a more natural, varied appearance that complemented the concrete’s nature.
Efflorescence, or white mineral deposits on concrete, appeared in one corner of my basement after staining. This happens when moisture transports salts to the surface of the concrete, and it necessitated urgent action to avoid destroying my work. I used a moderate acid wash on the afflicted area, neutralized it carefully, and sealed it more thoroughly than the rest of the floor. I also located and addressed the source of moisture, which was coming from an adjacent window well. This experience showed me that concrete staining necessitates treating not only the surface, but also any environmental conditions that may alter the concrete’s quality.
Sealer difficulties presented my final set of challenges, largely in the form of bubbles and streaks while applying. Following stress and frustration, I discovered that applying sealer at colder temps and working more slowly dramatically reduced bubble formation. For locations where bubbles had already developed, I needed to wait until the sealer had fully set before sanding and applying another, thinner coat. Streaks were typically created by using too much sealer or working in parts that were too large. The remedy required comparable treatment: gentle sanding of the problematic areas and cautious reapplication. These teachings showed me that patience and meticulous labor are vital for producing professional-looking products.

Can all concrete floors be dyed, or are some beyond repair?
Most concrete floors can be tinted, however the results vary greatly depending on the condition. I’ve discovered that even badly stained or previously sealed concrete may typically be salvaged with adequate preparation. The objective is to remove any impediments between the stain and the concrete pores. Depending on what is currently on your floor, you may need to use harsh cleaning, grinding, or chemical stripping. Age isn’t usually a barrier, as older concrete generally receives stain well. True limiting variables are structural integrity and moisture concerns. If your concrete is disintegrating or has active water seeping through, you must fix these issues before staining. Testing tiny areas initially reveals everything—if, following adequate preparation, the test area receives stain nicely, your project has a high possibility of success.
How long does stained concrete endure against other flooring options?
Concrete floors that have been properly stained and sealed can last for decades, outlasting many alternatives. In my experience, the stain’s endurance is due to the fact that it enters the concrete rather than generating a top layer that wears away. The sealer is often the weak link in the system, requiring reapplication every 2-5 years depending on traffic and the substance used. This type of maintenance requires significantly less effort than refinishing hardwood floors or replacing aged carpet. My basement floor receives moderate usage and has remained in good condition for more than four years, with only some dulling in high-traffic areas. The key to lifetime is good initial application, sealer selection based on your individual usage patterns, and easy routine maintenance such as dust sweeping and spill cleaning.
What is the actual cost difference between DIY staining and paying professionals?
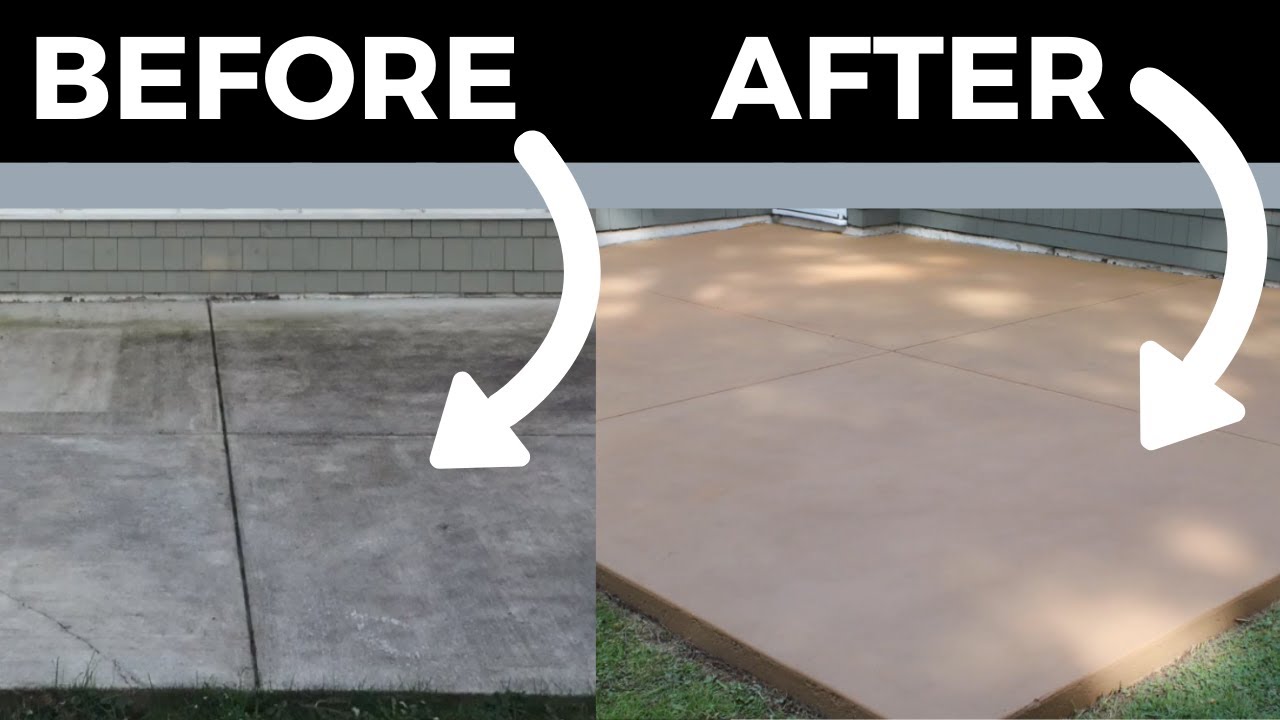
The cost reductions from DIY concrete staining are significant, but they come with trade-offs. Professional rates for my 500-square-foot basement were from $3,500 to $5,000 ($7-10 per square foot), whereas my DIY costs were under $800, which included tool rentals and all supplies ($1.60 per square foot). However, I committed about 40 hours of labor over two weekends. Professionals bring specialized equipment, especially for the grinding and cleaning processes, which dramatically shortens project timelines. They also have experience negotiating frequent challenges that would require hours of research to address. The quality difference between DIY and professional work is usually visible in the consistency of color and finish. However, with adequate research and attention to detail, a dedicated DIYer may produce results nearly identical to professional work, making this one of the most satisfying cost-saving home renovation tasks accessible.
How do I keep my stained concrete floor looking its best for as long as possible?
Daily maintenance for tinted concrete is surprisingly simple, requiring simply dust cleaning to keep abrasive particles from damaging the surface. For further cleaning, I use a pH-neutral cleaner designed specifically for sealed concrete, avoiding harsh chemicals such as ammonia, chlorine, or vinegar, which can damage the sealer over time. Spills, especially those containing acidic liquids such as wine or citrus juice, should be cleaned up immediately. I’ve installed entry mats at doorways to absorb outside dirt and moisture before it reaches the main floor areas. The most essential maintenance operation is resealing when the finish begins to wear, which occurs every 2-5 years depending on traffic. Signs that resealing is required include water no longer beading on the surface, dull spots appearing in high-traffic areas, and increased cleaning difficulty. Resealing takes only a simple cleaning, sanding of the old sealer, and the application of a new coat.
Can I alter the color if I don’t like the results or need to update later?
Changing the color of stained concrete is doable, but it involves some effort. When I mistakenly generated an overly dark tone in one portion of my floor, I learned that removing or lightening an existing stain entails grinding down the concrete surface to remove the layer containing the penetrating stain. This is dusty, labor-intensive activity that effectively resets the whole process. A more practical method for color changes is to add a fresh stain layer in a comparable color to adjust the overall tone. For example, applying amber stain over existing blue can result in a greener appearance. The most dramatic and straightforward color changes result from applying concrete dyes to existing stained surfaces, albeit they usually necessitate additional coats of sealer for protection. If you’re unsure about your color choice, starting with lighter stain applications provides you more flexibility in future alterations without necessitating complete removal.

What are the differences between concrete stain, dye, paint, and epoxy finishes?
The primary difference is how these compounds interact with concrete. I used stains, which permeate the concrete surface and provide a lasting chemical response that does not flake or peel. They provide a translucent, varied color that highlights the concrete’s intrinsic differences. Dyes also penetrate, but they are more uniform and bright, allowing for colors that stains cannot match. Concrete paint merely lays on the surface, producing opaque coating that conceals the concrete’s character but is more likely to chip and flake over time. Epoxy applies a thick, glossy coating on concrete that is extremely durable and moisture-resistant while entirely masking the concrete’s natural appearance. I chose stain for its natural appearance and durability, but each approach has its uses. Epoxy generally outperforms other materials in garages exposed to oil. Combining dyes and stains allows for the most inventive designs with vibrant hues. Your choice should be in line with both aesthetic and functional requirements for the floor.

Old concrete floor is not taking stain

How to Stain Concrete
How To Stain Old Concrete The Complete Guide
Related Posts: