When I bought my 1950s colonial home last year, the original oak hardwood floors were hidden beneath layers of worn carpet and decades of neglect. After pulling up the musty carpeting, I discovered beautiful wood floors that were scratched, stained, and desperately needed attention. Professional refinishing quotes exceeded four thousand dollars, which simply wasn’t in my renovation budget. Armed with determination and countless YouTube tutorials, I embarked on my first hardwood floor refinishing project. Three weeks later, my floors looked absolutely stunning, though the journey taught me valuable lessons about patience, preparation, and the importance of quality tools.
Assessing Your Floor’s Condition
My initial floor inspection revealed the true extent of work required for a successful refinishing project in my 1200 square foot home. I discovered that most scratches were surface-level, but several areas near doorways showed deeper gouges that would require more aggressive sanding techniques. Water damage around the kitchen entrance created dark stains that penetrated deep into the wood grain, requiring special attention during the restoration process.
Testing the wood thickness became crucial before starting any sanding operations that could potentially damage thin flooring materials. I used a small chisel in an inconspicuous corner to measure the wear layer, discovering I had solid 3/4-inch oak with plenty of material for refinishing. Engineered floors require different approaches and have limited refinishing opportunities, making this assessment critical for project success and avoiding costly mistakes.
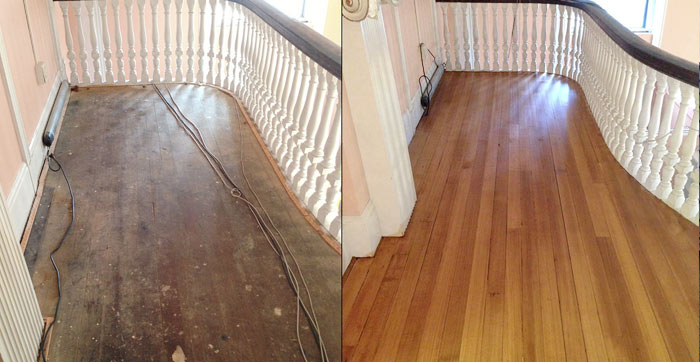
Previous refinishing attempts left uneven surfaces and finish buildup that complicated my restoration efforts significantly throughout the project. I found areas where someone had spot-sanded without feathering edges, creating visible ridges that would telegraph through any new finish application. Understanding these existing problems helped me plan appropriate sanding sequences and set realistic expectations for the final results I could achieve with careful work.
Essential Tools and Material Selection
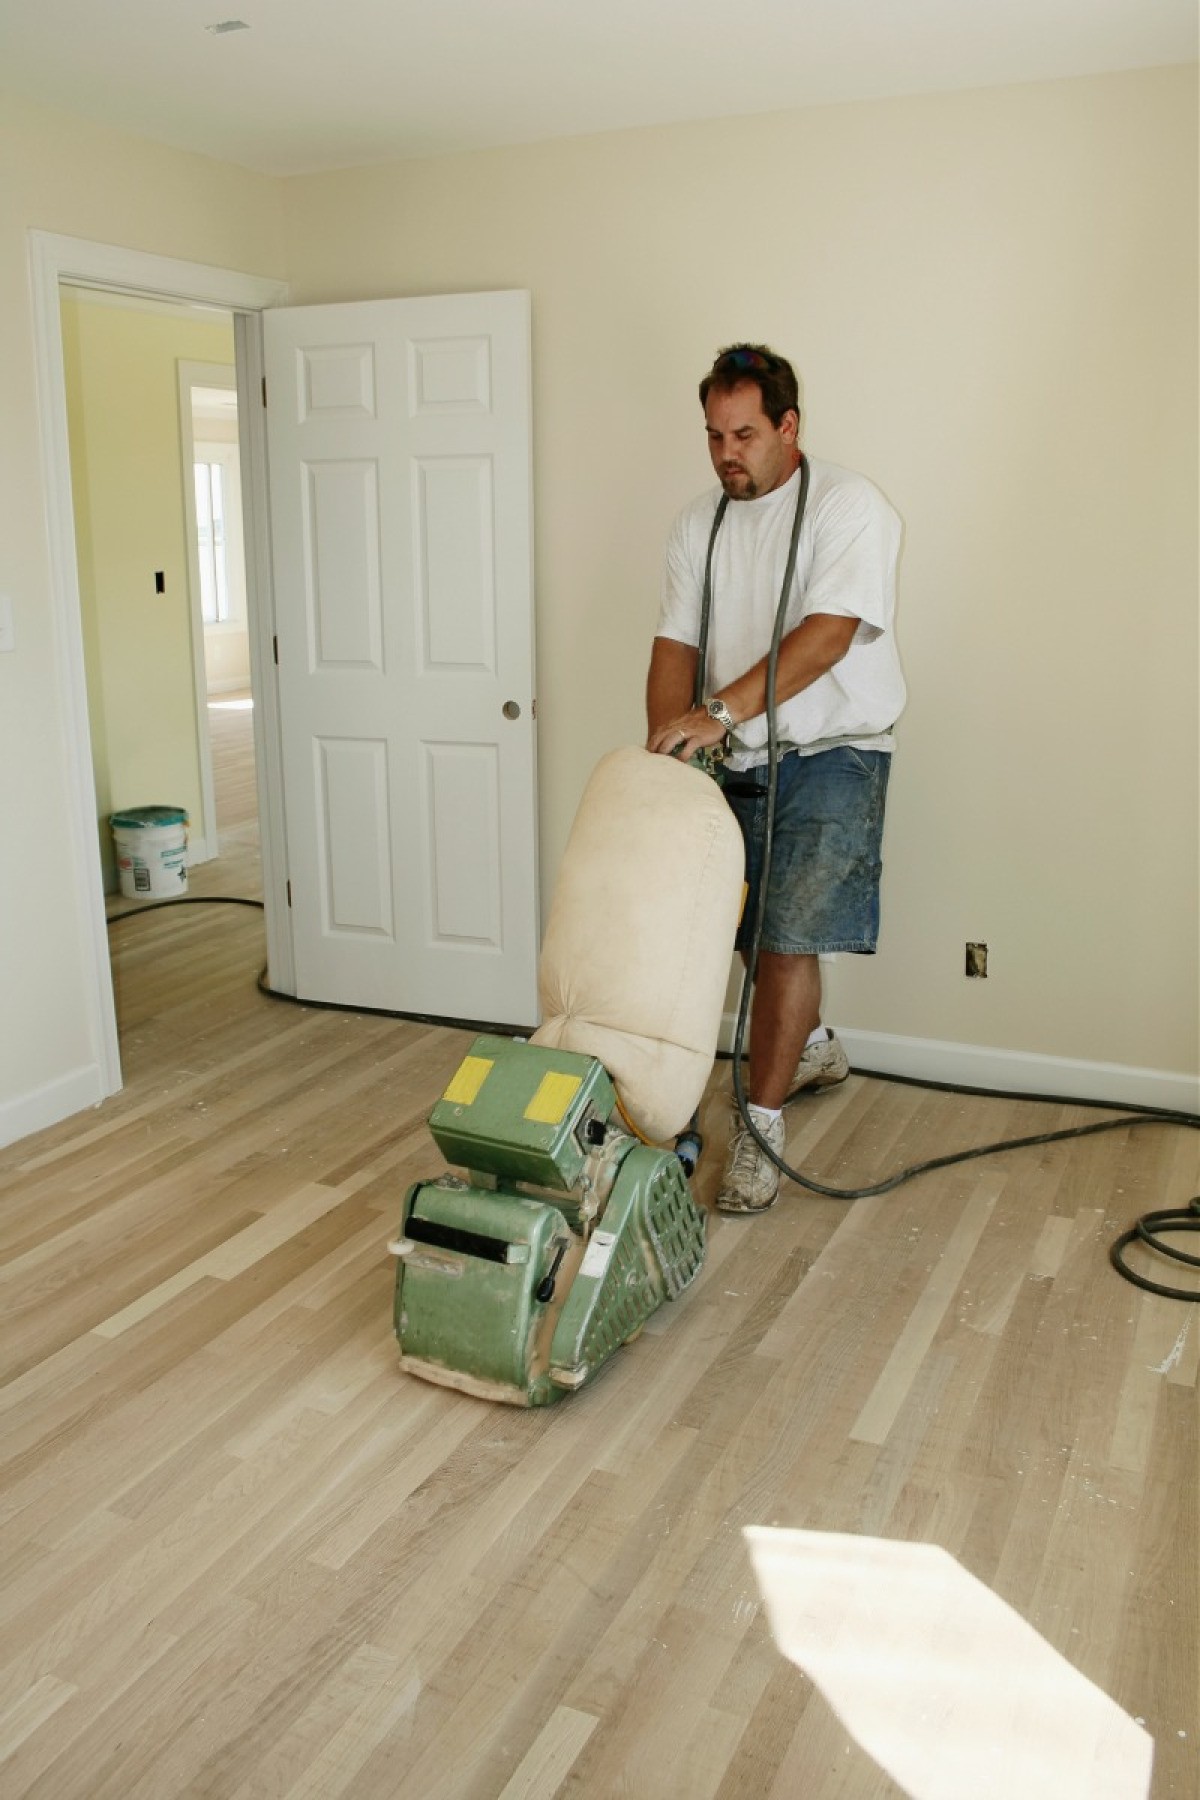
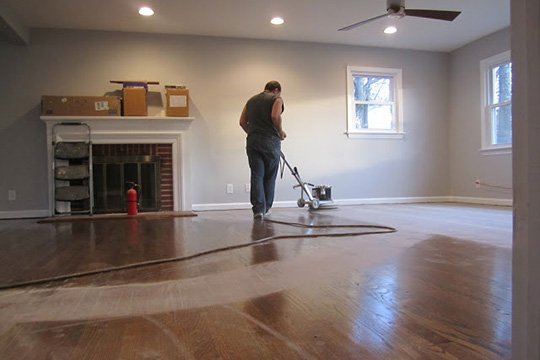
Renting professional-grade sanders became my first major expense but proved absolutely essential for achieving smooth, even results across the entire floor surface. I chose a drum sander for the main areas and an edge sander for perimeter work, along with a palm sander for detail areas around radiators and built-ins. The rental cost seemed steep initially, but buying equivalent equipment would have cost thousands more than my entire project budget allowed.
Sandpaper selection required understanding grit sequences and matching paper types to my specific sanding equipment for optimal performance results. I started with 36-grit for removing old finish and deep scratches, progressed through 60-grit and 80-grit for smoothing, then finished with 100-grit for preparation before stain application. Buying paper in bulk reduced costs significantly compared to individual sheet purchases from the rental center.
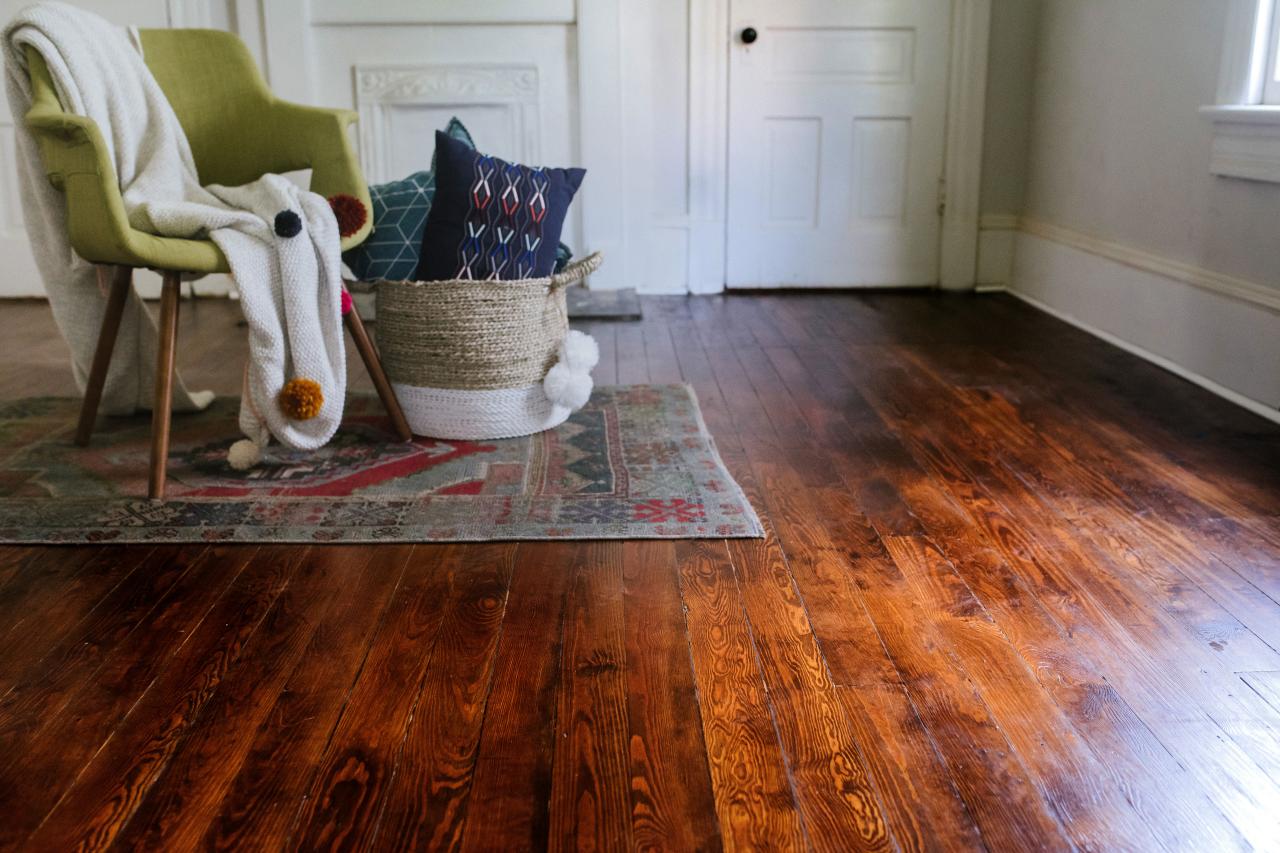
Stain and finish choices overwhelmed me initially until I focused on durability requirements and maintenance preferences for my high-traffic home. I selected water-based polyurethane for its low odor, quick drying time, and excellent durability characteristics compared to oil-based alternatives. The clear finish allowed the natural oak grain to show through beautifully while providing protection against daily wear and moisture exposure from normal household activities.
Preparation and Room Setup
Clearing furniture and preparing the space took longer than expected and required careful planning for temporary storage throughout the multi-day project. I moved everything to the basement and garage, covering items with plastic sheeting to protect from the inevitable dust that would migrate throughout the house despite my sealing efforts. This preparation phase consumed an entire weekend but proved essential for efficient workflow once sanding operations began.
Dust containment became my obsession after reading horror stories about refinishing dust infiltrating every corner of homes during similar projects. I sealed doorways with plastic sheeting and tape, covered air vents, and set up negative pressure ventilation using box fans in windows. Despite these precautions, fine dust still found its way into adjacent rooms, requiring extensive cleanup after the project completion.
Safety equipment became non-negotiable once I understood the health risks associated with wood dust exposure and chemical fumes from finishing products. I invested in a high-quality respirator rated for fine particles, hearing protection for the loud sanders, and knee pads for the extensive floor-level work ahead. These items added to my project cost but protected my health throughout the intensive three-week refinishing process.

Sanding Techniques and Common Mistakes
My first sanding pass with the drum sander taught me respect for these powerful machines that can quickly ruin floors with improper technique. I practiced on scrap wood first, learning to keep the machine moving constantly and maintain consistent pressure to avoid creating deep gouges or uneven surfaces. The learning curve was steep, but patience and practice helped me develop the steady rhythm necessary for professional-looking results.
Edge work proved more challenging than anticipated, requiring different techniques and careful blending where the edge sander met drum sander areas. I discovered that feathering cuts and overlapping passes helped eliminate visible transition lines between different sanding methods. Hand-sanding remained necessary for tight corners and detailed areas that power tools couldn’t reach effectively, adding significant time to the overall project schedule.
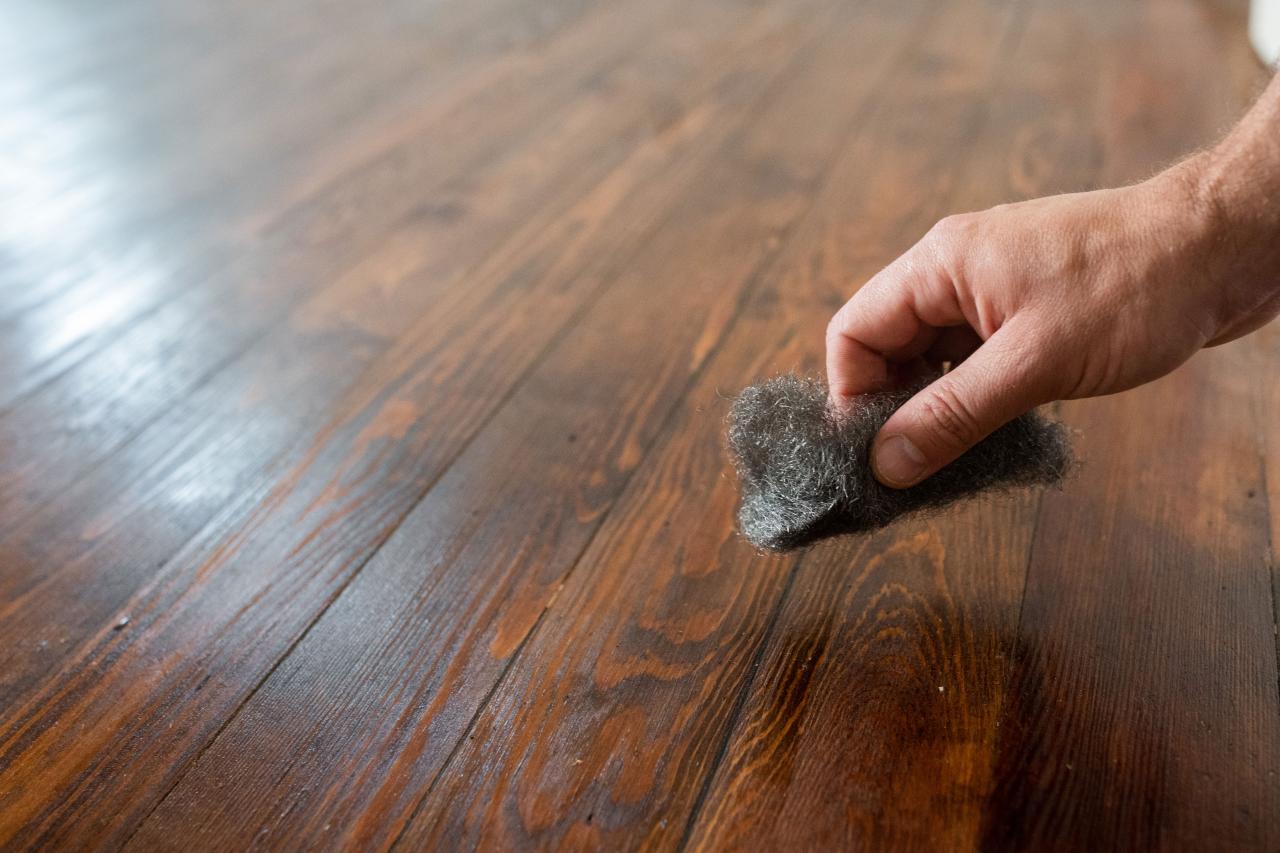
Dust removal between sanding grits became critical for achieving smooth finishes and proper stain absorption throughout the entire floor surface. I used a shop vacuum followed by tack cloths to remove all debris before progressing to finer grits or applying stain. Rushing this step resulted in visible scratches and uneven stain penetration that required additional sanding to correct, teaching me the value of thorough preparation between each process stage.

Staining and Finishing Application
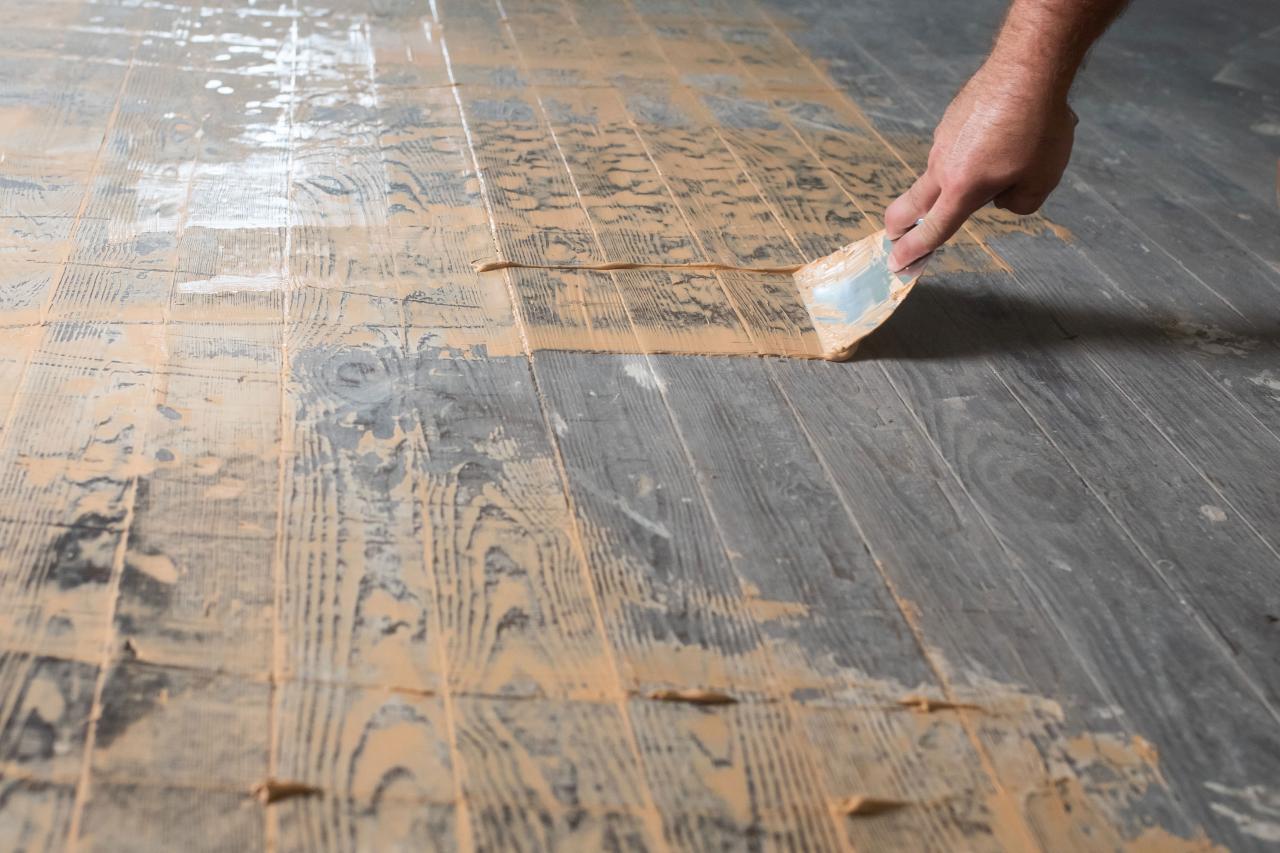
Stain application required perfect timing and consistent technique to achieve even color distribution across the entire floor without visible lap marks. I worked in manageable sections, maintaining wet edges and using long, smooth strokes following the wood grain direction. Temperature and humidity affected stain penetration and drying times significantly, forcing me to adjust my schedule based on daily weather conditions for optimal results.
My first polyurethane coat went on too thick, creating bubbles and brush marks that required light sanding before the second application. I learned that multiple thin coats produce superior results compared to fewer thick applications, though this approach extended my project timeline considerably. Each coat needed complete curing before foot traffic, requiring careful planning for family access through the house during the finishing phase.
Between-coat sanding with fine-grit paper became essential for achieving the smooth, professional finish I desired for my restored hardwood floors. I used 220-grit sandpaper to lightly scuff each cured coat, removing imperfections and creating proper adhesion for subsequent applications. This tedious process consumed additional days but resulted in a flawless final surface that rivaled professional installations I had seen in other homes.

Curing Time and Final Results
Patience during the curing process tested my resolve as I waited two weeks before moving furniture back onto my beautiful new floors. While the surface felt dry after 24 hours, full chemical cure required extended time for maximum durability and scratch resistance. I used this waiting period to complete other home improvement projects and thoroughly clean the house of residual dust from the sanding operations.
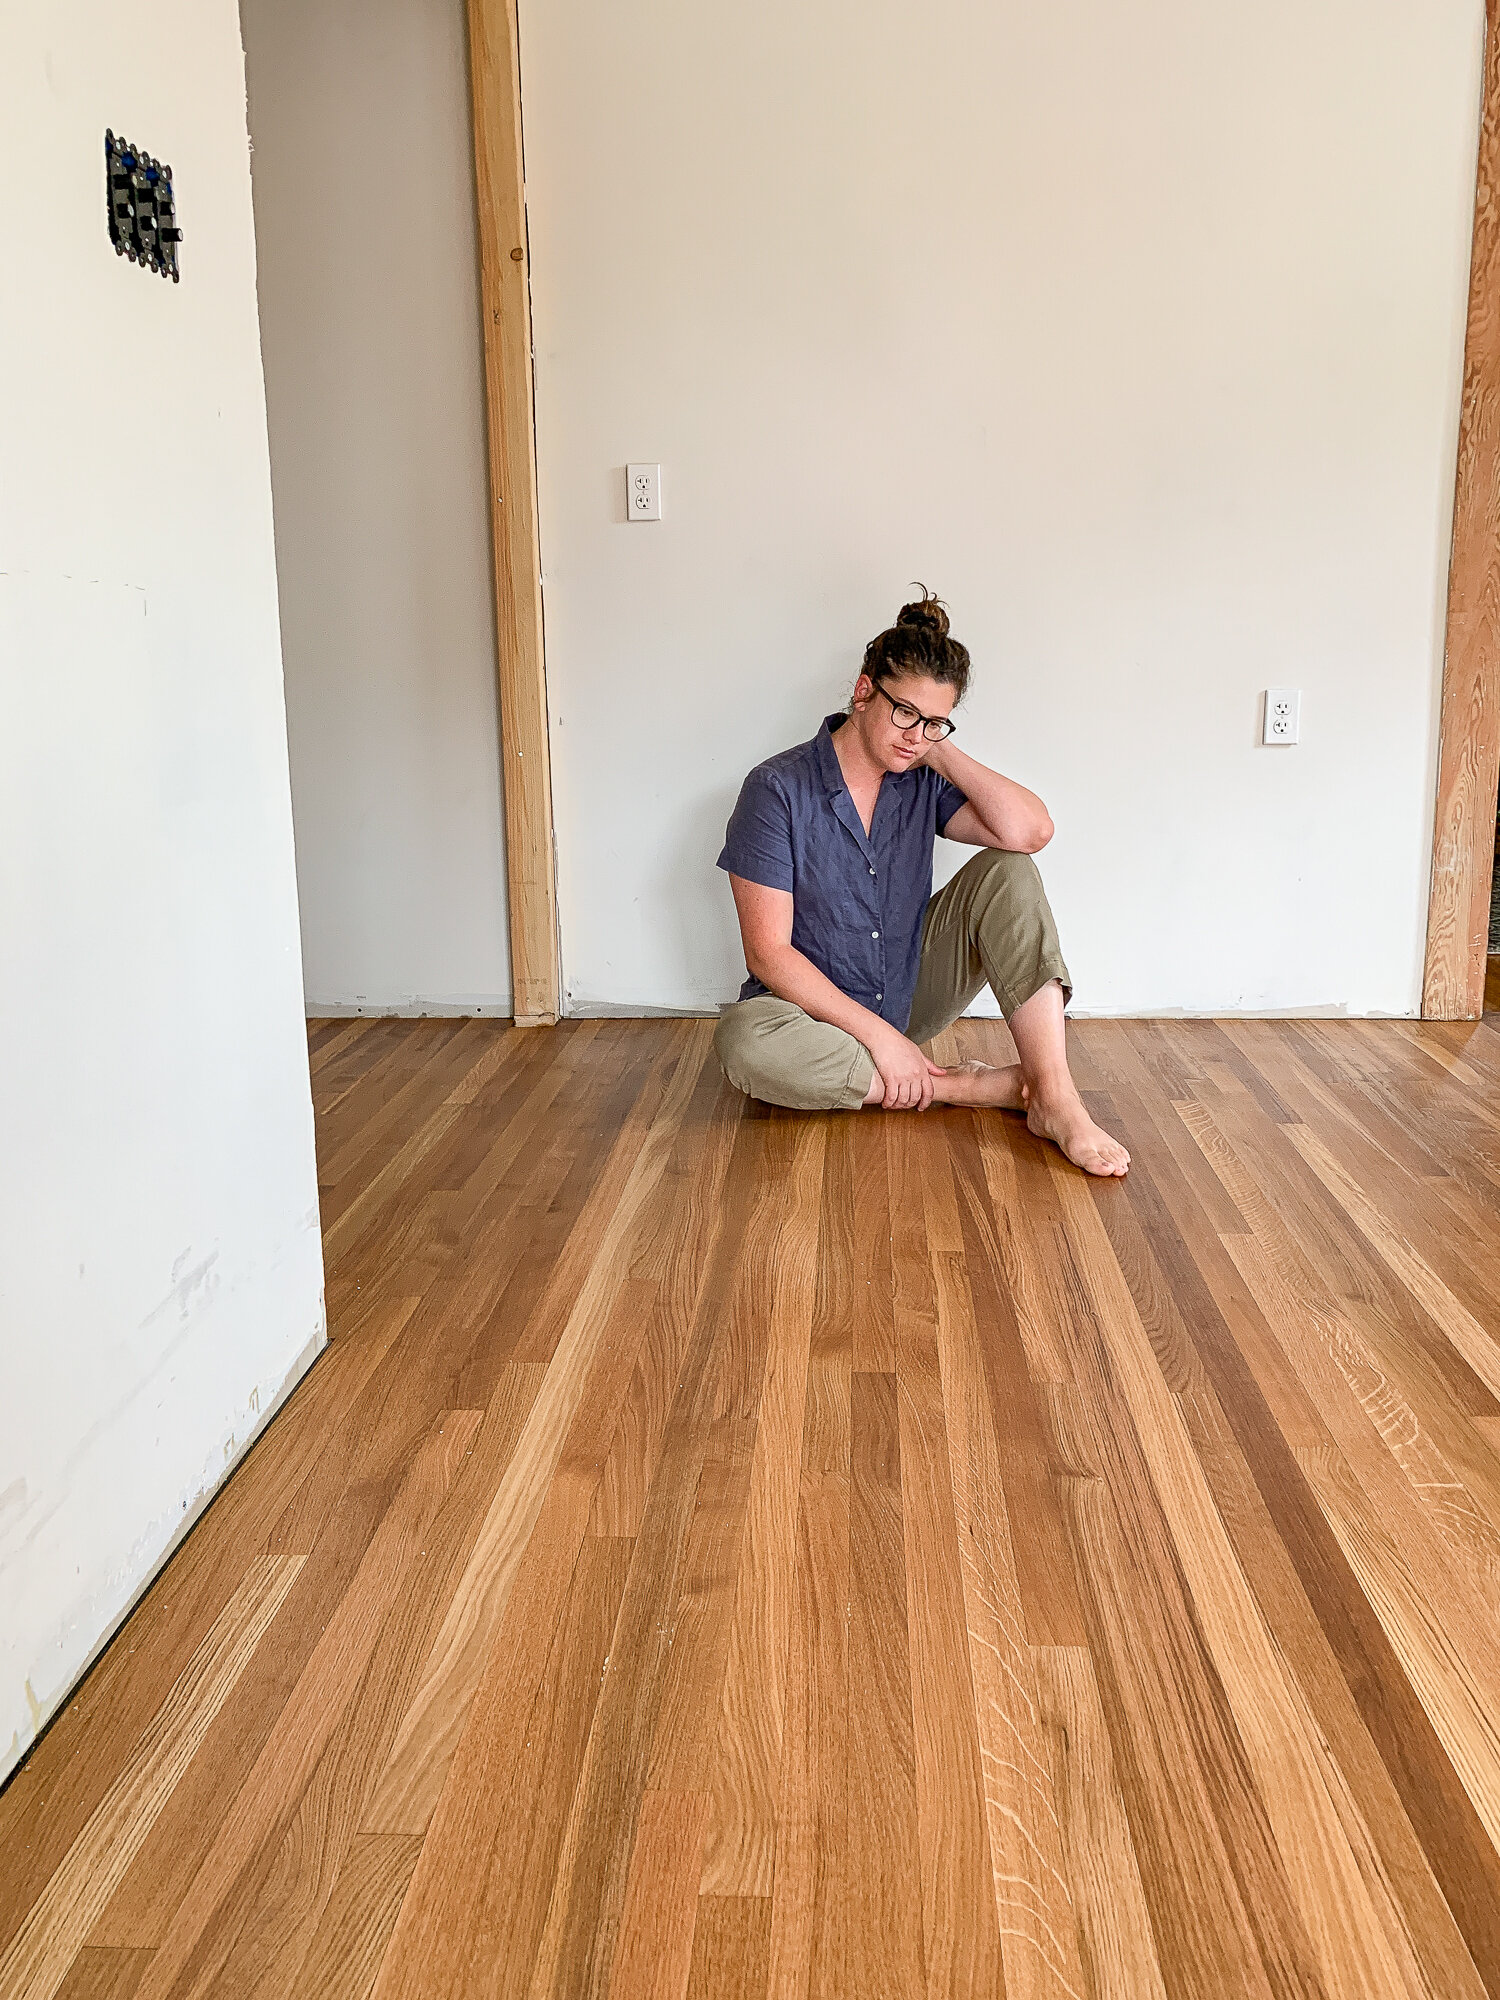
My finished floors exceeded all expectations, transforming the entire character and value of my home with their rich, warm appearance. The natural oak grain showed beautifully through the clear finish, and the smooth surface reflected light in ways that made rooms feel larger and brighter. Friends and neighbors consistently compliment the professional appearance, never guessing that I completed the work myself with rented equipment.
Long-term maintenance involves simple cleaning routines and periodic recoating to preserve my investment and maintain the floors’ stunning appearance. I sweep daily to prevent abrasive debris from scratching the surface, mop weekly with appropriate hardwood cleaners, and plan to apply a fresh topcoat every five years. The satisfaction of walking on floors I restored makes every step a reminder of this successful DIY accomplishment.
How long does a complete DIY hardwood floor refinishing project take from start to finish?
My 1200 square foot refinishing project took three weeks total, including preparation, sanding, staining, and curing time for multiple finish coats. Active work occurred over about eight days, but curing periods between coats and final cure required patience between intensive work sessions. Weather conditions significantly affected timing, as humidity and temperature impact drying times for both stain and finish applications. I recommend planning around favorable weather and having alternative living arrangements if refinishing high-traffic areas. The timeline varies based on room size, wood condition, and desired finish quality, so allow extra time for unexpected complications or learning curves.
What’s the realistic cost breakdown for DIY hardwood floor refinishing compared to professional installation?
My DIY project cost approximately $800 for 1200 square feet, including tool rental, sandpaper, stain, finish, and safety equipment for professional-quality results. Professional refinishing quotes ranged from $3500 to $5200 for the same area, representing substantial savings through personal labor investment. However, professionals provide experience, warranties, and guaranteed results that DIY projects cannot match completely. Tool rental consumed about $400 of my budget, while materials accounted for the remainder. Consider your skill level, available time, and tolerance for potential mistakes when evaluating the true cost difference between professional and DIY approaches for your specific situation.
Can I refinish engineered hardwood floors the same way as solid hardwood, or do they require different techniques?
Engineered floors have thin wear layers that limit refinishing opportunities compared to solid hardwood, requiring careful assessment before starting any project. I discovered my floors were solid oak, but engineered products typically allow only one or two light sandings during their lifetime. The veneer thickness determines refinishing possibilities, with thicker wear layers providing more options for restoration work. Professional assessment helps determine feasibility and appropriate techniques for engineered products. Some engineered floors can be screen-and-recoated without full refinishing, while others require complete replacement when worn. Always verify your floor type and wear layer thickness before renting equipment or beginning any sanding operations.
What safety precautions and protective equipment are essential for DIY hardwood floor refinishing projects?
Safety became my top priority throughout the refinishing process due to dust exposure, chemical fumes, and equipment operation risks throughout the project. I used a high-quality respirator rated for fine particles, hearing protection for loud sanders, safety glasses, and knee pads for extended floor work. Adequate ventilation through open windows and fans prevented chemical fume accumulation in enclosed spaces. Dust masks alone provide insufficient protection against fine wood particles that can cause respiratory problems with prolonged exposure. I also wore work gloves when handling chemicals and maintained emergency contact information readily available. Never compromise on safety equipment costs, as protecting your health is more valuable than any potential savings on the project.
How do I know if my hardwood floors are good candidates for DIY refinishing or need professional replacement?
Floor assessment became crucial for determining refinishing feasibility and avoiding wasted effort on floors beyond restoration in my home inspection process. Solid hardwood with adequate thickness (at least 1/4 inch wear layer) can typically be refinished multiple times throughout its lifespan. Deep gouges, extensive water damage, or structural problems may require board replacement before refinishing becomes worthwhile. I tested wood thickness in inconspicuous areas and evaluated stain penetration depth to determine restoration possibilities. Cupping, crowning, or loose boards indicate moisture or structural issues requiring professional evaluation. If more than 30% of boards need replacement, full floor replacement often makes more economic sense than refinishing efforts.
What’s the best strategy for managing dust and protecting the rest of my house during floor refinishing?
Dust containment became my biggest challenge despite extensive preparation efforts throughout the three-week refinishing project in my home. I sealed doorways with plastic sheeting and tape, covered air vents and returns, and used box fans for negative pressure ventilation through windows. Despite these precautions, fine dust migrated throughout the house, requiring extensive cleanup afterward. Professional-grade dust collectors attached to sanders help significantly but don’t eliminate all airborne particles during the process. I recommend removing or covering all belongings in adjacent rooms, sealing HVAC systems completely, and planning for thorough house cleaning after project completion. Consider temporary relocation for family members with respiratory sensitivities during sanding operations for their health and comfort.

Frugal DIY Hardwood Floor Refinishing for Beginners – Pretty Passive

How To Refinish Hardwood Floors – DIY Home Improvement
We Hit A Snag And Had to Refinish Our Floors Twice – DIY Fail
Refinishing Hardwood Floors DIY Wood Floor Refinishing Tips
Related Posts: