Transforming my garage into a workspace three years ago led me down the path of concrete staining, and I haven’t looked back since. What started as a budget-friendly flooring solution became an obsession with creating beautiful, durable surfaces throughout my home. The process seemed intimidating at first, but I discovered that with proper preparation and patience, anyone can achieve professional-looking results. My concrete floors now rival expensive hardwood in beauty while offering superior durability.
Preparing Your Concrete Canvas for Success
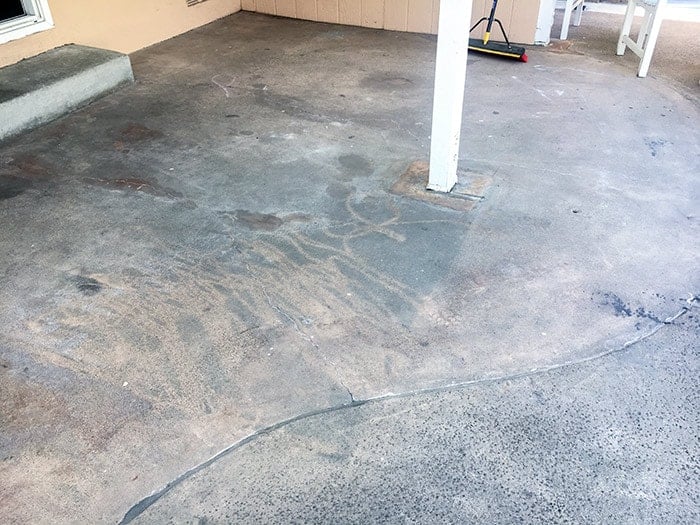
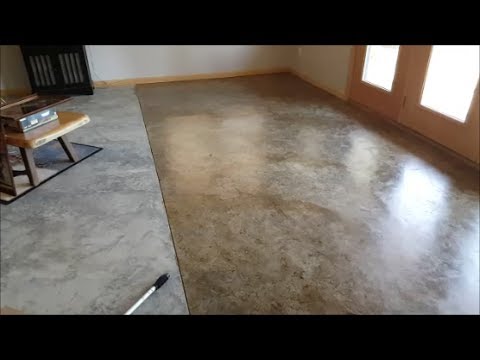
Surface preparation determines whether your staining project succeeds or fails spectacularly. I learned this lesson the hard way during my first attempt when I skipped proper cleaning steps. Oil stains, paint drips, and existing sealers prevent stain penetration, creating blotchy, uneven results. I now spend twice as long on prep work as actual staining, using degreasers, acid etching solutions, and mechanical grinding when necessary to achieve pristine surfaces ready for transformation.
Testing your concrete’s porosity saves countless headaches later in the process. I sprinkle water droplets across different areas and observe absorption rates. Concrete that doesn’t absorb water within minutes requires additional etching or grinding. Dense, troweled surfaces often need aggressive preparation, while rougher finishes accept stain more readily. Understanding your specific concrete’s characteristics allows you to adjust preparation methods and stain application techniques accordingly.
Moisture content must be checked thoroughly before beginning any staining project. I use plastic sheeting taped to the floor overnight, checking for condensation underneath the next morning. Excess moisture causes stain rejection and creates permanent discoloration patterns. Climate conditions during application matter too; I avoid staining during humid periods or when temperatures exceed 90 degrees. Proper preparation creates the foundation for stunning, long-lasting results that exceed expectations.
Choosing the Right Stain for Your Vision
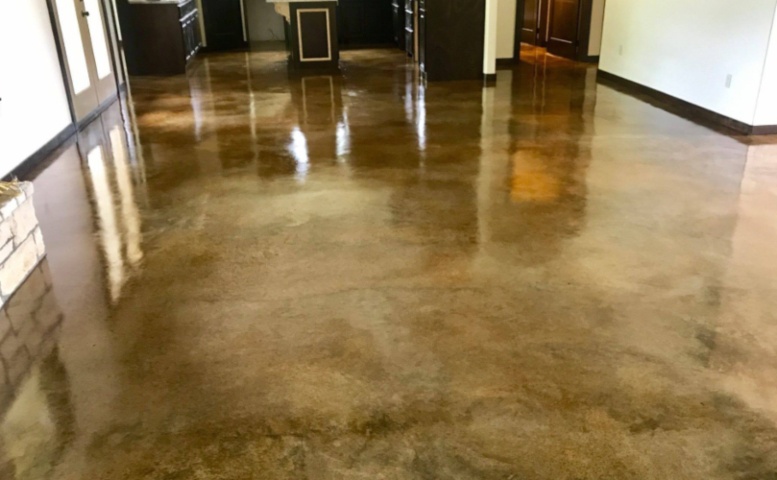
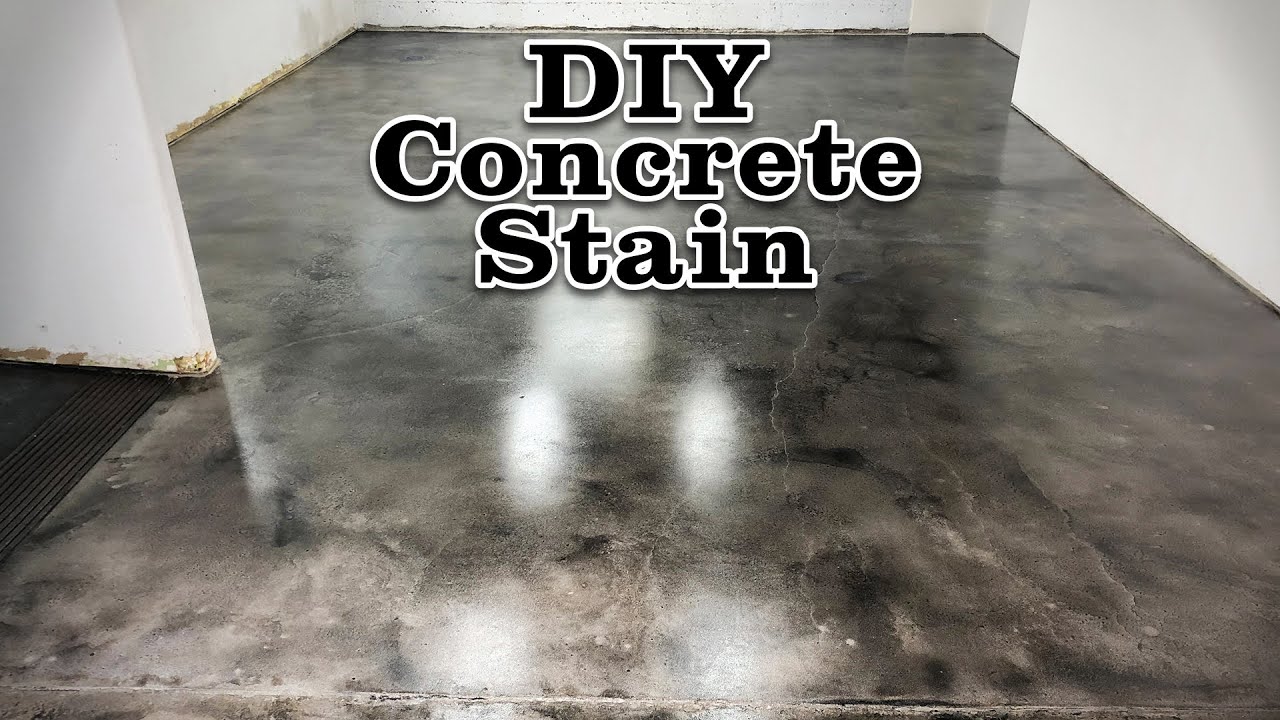
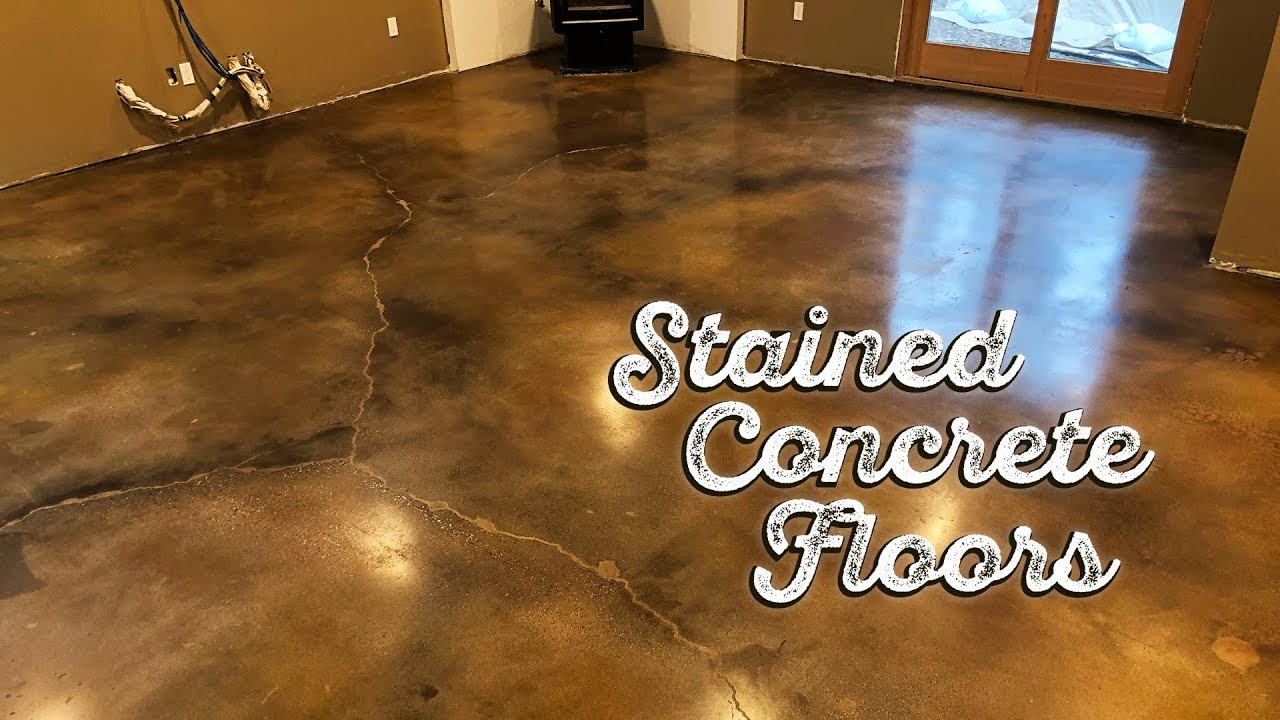
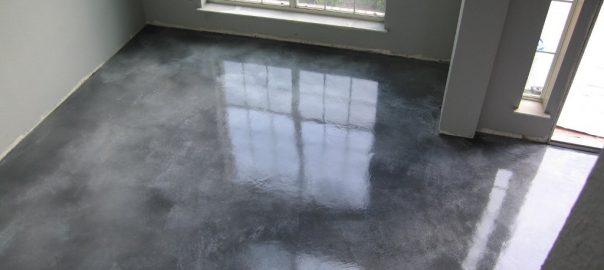
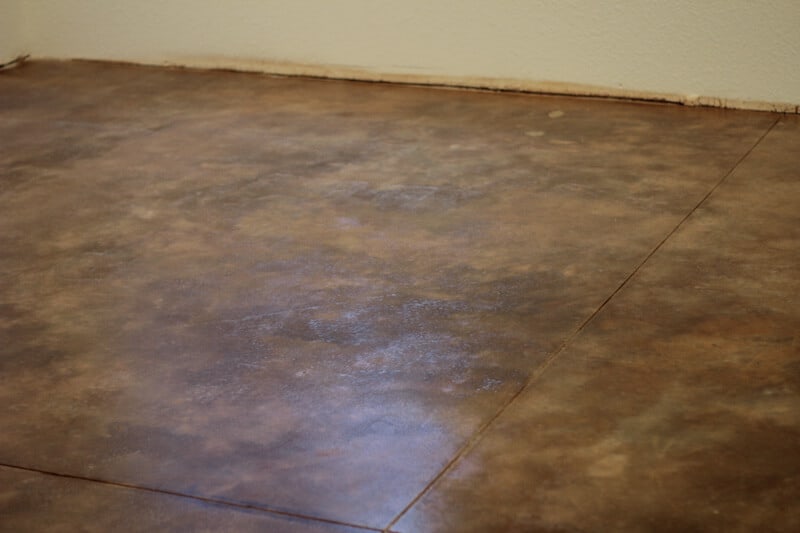
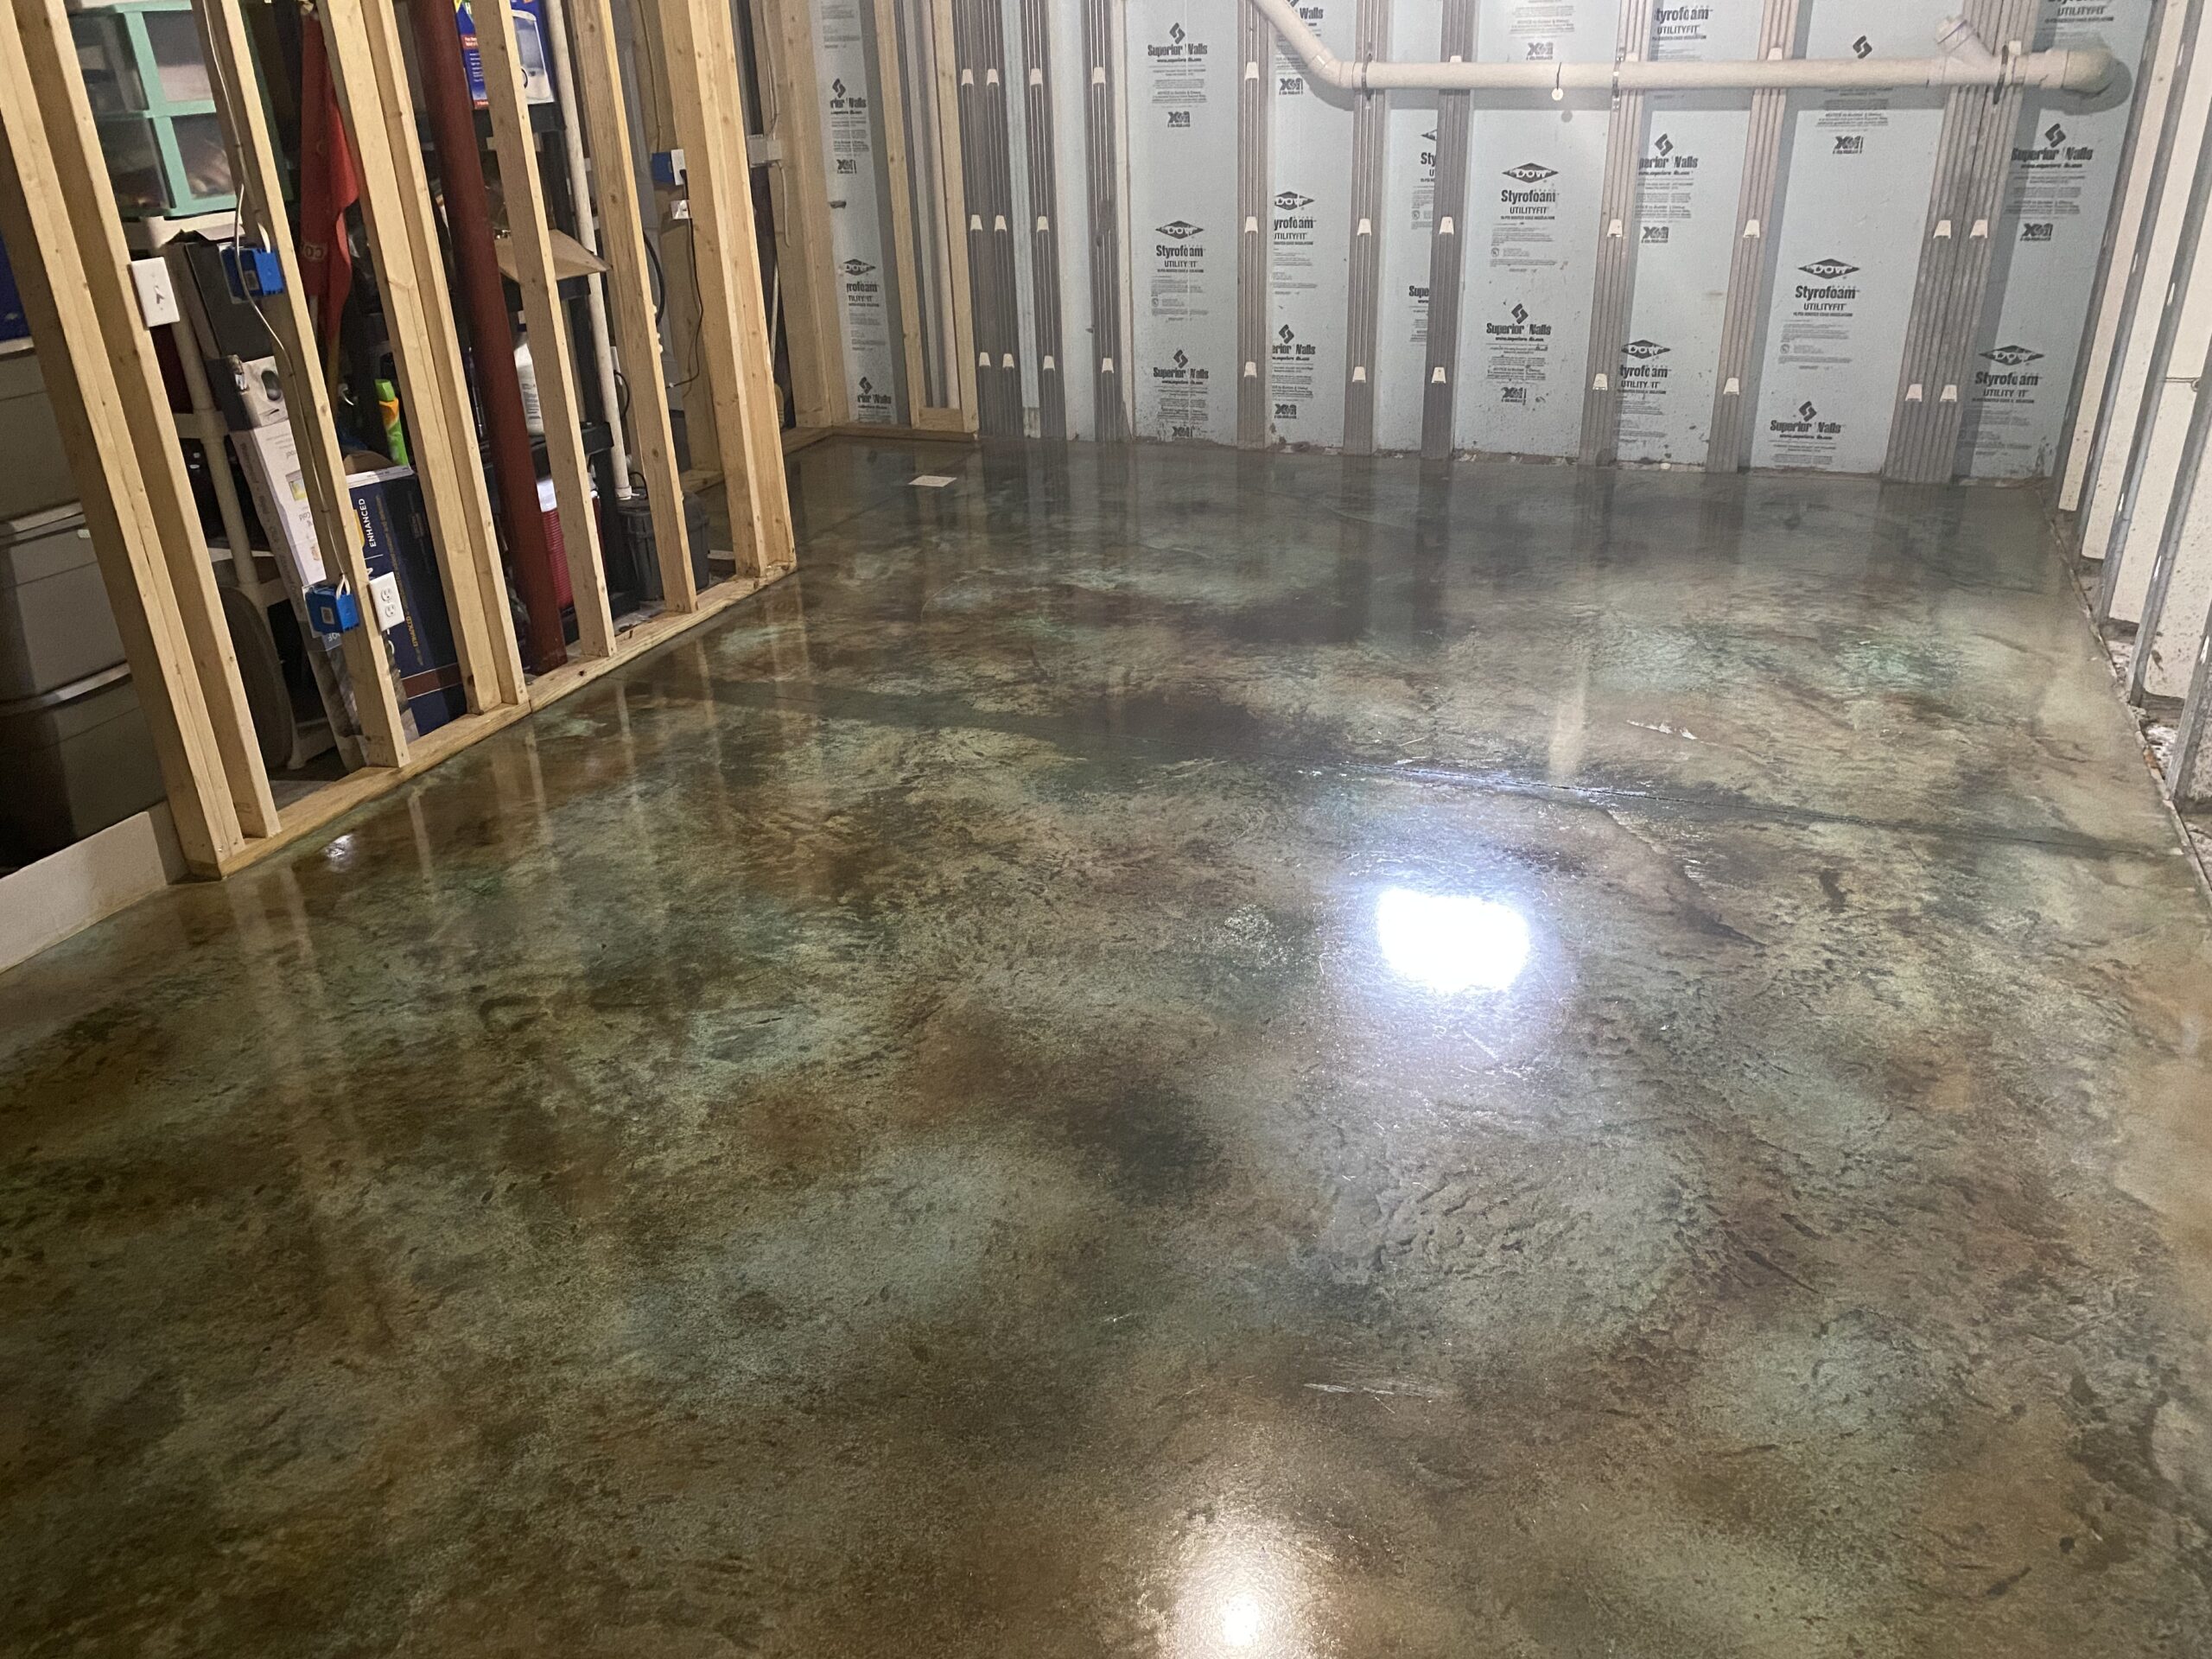
Acid-based stains create my favorite organic, variegated looks through chemical reactions with concrete minerals. These penetrating stains produce permanent color changes that won’t peel or chip like surface coatings. Earth tones dominate the available palette, ranging from warm browns and ambers to cool grays and greens. The unpredictable nature creates unique patterns and subtle variations that make each project one-of-a-kind, though controlling the final appearance requires experience and skill.
Water-based stains offer more predictable color outcomes and a broader palette of options, including vibrant blues, reds, and purples. I use these when clients want specific color matches or a uniform appearance across large areas. Application is more forgiving than acid stains, making them ideal for beginners. However, they don’t penetrate as deeply and may require multiple coats to achieve the desired intensity. The trade-off between predictability and character defines the choice between systems.
Combination approaches yield the most sophisticated results in my experience. I often apply acid stain first to create organic base patterns, then selectively add water-based accents for color pops or design elements. This layering technique produces complex, custom appearances impossible with single-stain applications. Testing combinations on sample areas prevents expensive mistakes and helps visualize final results before committing to large areas. Patience during testing pays dividends in final satisfaction.
Essential Tools and Materials for Professional Results
Quality brushes and sprayers make dramatic differences in application ease and final appearance. I invested in acid-resistant pump sprayers specifically designed for concrete staining after ruining two general-purpose units. Natural bristle brushes work better than synthetic for acid stains, while foam brushes excel for detailed work and edges. Protective equipment, including respirators, chemical-resistant gloves, and eye protection, isn’t optional; these materials demand respect and proper safety measures.
Neutralizing agents and cleaning supplies are crucial for proper stain removal and surface preparation. I keep ammonia-based neutralizers, TSP substitutes, and various degreasers in my kit. Different contaminants require specific removal methods, so having options available prevents project delays. Quality drop cloths protect surrounding surfaces, while plastic sheeting creates controlled work areas. Organization and preparation prevent costly mistakes and material waste during application.
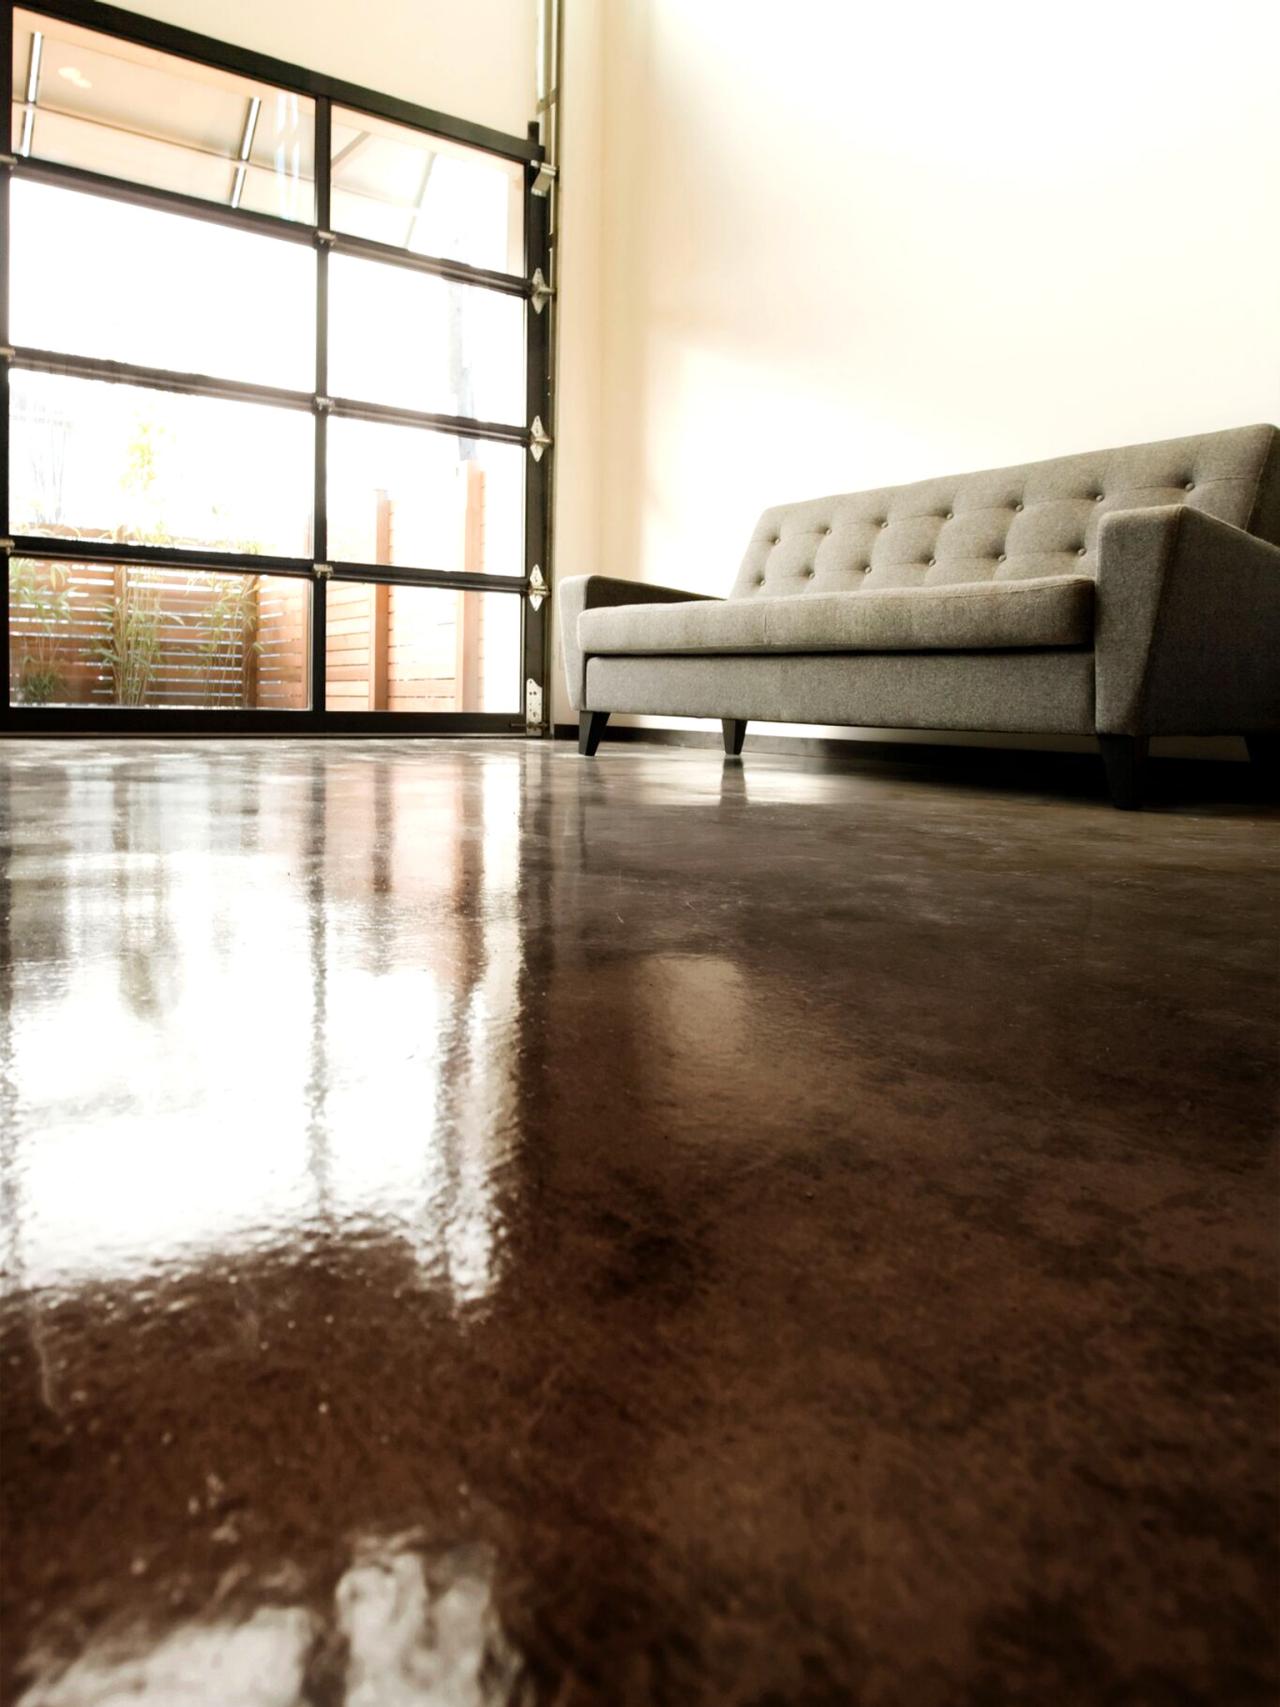
Sealing products determine the long-term durability and maintenance requirements of finished floors. I prefer penetrating sealers that enhance color while protecting without creating slippery surfaces. Topical sealers offer higher gloss levels but require more maintenance and eventual refinishing. Testing sealers on stained samples helps predict final appearance and performance characteristics. Investing in quality materials throughout the process ensures results that last for decades with minimal maintenance.
Step-by-Step Application Techniques That Work
Surface cleaning begins every successful staining project in my workshop. I start with mechanical cleaning using stiff brushes and appropriate cleaners for specific contaminants. Oil stains require degreasers, while efflorescence needs acid-based removers. After initial cleaning, I acid etch using muriatic acid solutions to open concrete pores for optimal stain penetration. Thorough rinsing removes all residues that could interfere with stain bonding and chemical reactions.
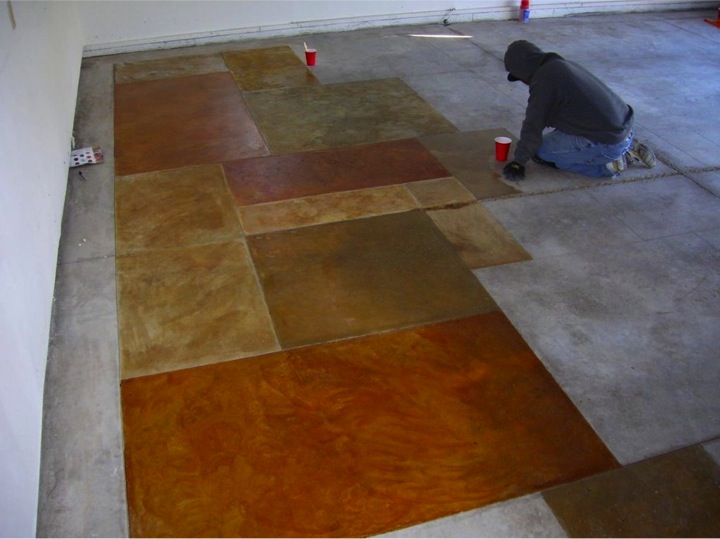
Stain application requires steady hands and consistent technique for uniform coverage. I work in manageable sections, maintaining wet edges to prevent overlap marks. Acid stains need time for chemical reactions, so I avoid overworking areas during application. Cross-hatching spray patterns ensure even coverage, while backrolling with brushes eliminates streaks and ensures penetration. Environmental conditions affect working time, so I adjust techniques based on temperature and humidity levels.
Neutralization and cleanup steps are critical for achieving intended colors and preparing for sealing. I neutralize acid stains using ammonia solutions, checking pH levels to ensure complete neutralization. Inadequate neutralization causes continued color development and potential sealer adhesion problems. Final rinsing removes all residues and loose particles before sealing. I allow complete drying, typically 24-48 hours, before applying protective sealers. Patience during these final steps ensures professional-quality results.
Troubleshooting Common Problems and Mistakes
Blotchy color application plagued my early projects until I mastered proper surface preparation and application techniques. Inconsistent absorption creates uneven stain penetration, resulting in a splotchy appearance. I now test absorption rates across entire surfaces, addressing problem areas with additional etching or grinding. Consistent spray patterns and proper dilution ratios prevent application-related blotchiness. When problems occur, additional stain coats or spot treatments can often salvage projects.
Stain rejection happens when concrete surfaces aren’t properly prepared or contain invisible contaminants. I’ve encountered this with old garage floors that had years of accumulated oil and grease penetration. Deep grinding or shot blasting may be necessary to reach clean concrete. Sometimes, complete stain removal and starting over provides better results than attempting repairs. Prevention through thorough preparation always beats correction after application begins.
Color intensity issues occur when stain concentration or dwell time isn’t optimized for specific concrete conditions. Dense concrete requires stronger solutions or longer reaction times to achieve desired colors. I keep detailed records of dilution ratios and timing for different concrete types in my projects. Multiple light coats often produce better results than single heavy applications. Understanding that each concrete surface behaves differently helps set realistic expectations and achieve consistent results.
Protecting Your Investment with Proper Sealing
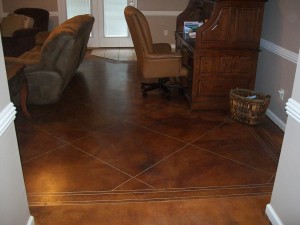
Sealer selection dramatically impacts both appearance and longevity of stained concrete floors. I prefer penetrating silane/siloxane sealers for most applications because they provide excellent protection while maintaining natural concrete texture. These sealers prevent water and oil penetration without creating slippery surfaces or altering appearance significantly. Acrylic sealers offer more dramatic color enhancement but require regular maintenance and can become slippery when wet.
Application timing affects sealer performance and bonding to stained surfaces. I wait a minimum of 24 hours after staining before sealing, allowing complete moisture evaporation and color stabilization. Environmental conditions during sealing matter as much as during staining, avoiding high humidity or extreme temperatures. Thin, even coats applied with quality rollers or sprayers prevent puddling and ensure uniform coverage. Second coats may be necessary for optimal protection and appearance enhancement.
Maintenance schedules preserve sealer effectiveness and floor appearance for decades. I recommend annual inspection and touch-up of high-traffic areas, with complete resealing every 3-5 years depending on usage and environmental conditions. Simple cleaning with pH-neutral cleaners maintains appearance without degrading sealer performance. Avoiding harsh chemicals and abrasive cleaning methods extends sealer life significantly. Proper maintenance makes stained concrete floors practically maintenance-free compared to other flooring options.
How long does the concrete staining process take from start to finish?
Complete concrete staining projects typically require 3-5 days from preparation through final sealing. Surface preparation takes 1-2 days, depending on existing conditions and required treatments. Stain application and neutralization require another day, followed by a 24-48-hour drying time before sealing. Weather conditions, concrete porosity, and project complexity affect timing significantly. I always plan extra time for unexpected issues or additional preparation requirements that commonly arise during projects.
Can I stain concrete that already has paint or existing coatings?
Existing coatings must be completely removed before successful staining can occur. I use mechanical grinding, chemical strippers, or shot blasting, depending on coating type and thickness. Paint prevents stain penetration, creating patchy, unsatisfactory results if not properly removed. Testing small areas helps determine the most effective removal method for specific coatings. Complete removal is essential; any remaining residue will show through the final finish and compromise long-term durability and appearance.

What’s the difference between indoor and outdoor concrete staining requirements?
Outdoor concrete requires more aggressive preparation due to weather exposure and typically needs UV-resistant sealers for color stability. Indoor projects benefit from controlled environments but may require different ventilation considerations during application. Drainage and freeze-thaw resistance become important factors for exterior applications. I use different sealer systems for indoor versus outdoor projects, prioritizing durability and weather resistance for exterior surfaces while focusing on appearance and comfort for interior applications.
How do I achieve uniform color across large concrete areas?
Consistent application technique and proper surface preparation ensure uniform color development across large areas. I maintain wet edges during application and use systematic spray patterns to prevent overlap marks. Testing absorption rates throughout the surface identifies areas needing additional preparation. Working in manageable sections while maintaining continuity prevents visible seams. Environmental conditions must remain consistent during application, so I avoid starting large areas late in the day when temperature changes might affect results.
Can concrete staining hide existing cracks or surface imperfections?
Staining won’t hide structural cracks or significant surface defects, though it can minimize minor imperfections through color variation and pattern development. I repair major cracks with appropriate concrete patching compounds before staining, though perfect matches are difficult to achieve. Acid stains create organic patterns that help disguise minor surface variations better than water-based alternatives. Setting realistic expectations about existing conditions helps avoid disappointment with final results and ensures customer satisfaction.
Is it possible to change colors after concrete has been stained?
Changing stained concrete colors requires significant effort and may not achieve perfect results. Acid stains create permanent chemical reactions that resist easy removal. I’ve successfully applied darker colors over lighter ones, but going lighter requires aggressive surface preparation or complete removal of existing stain. Grinding or acid washing can remove some color, though complete restoration to natural concrete isn’t always possible. Planning carefully and testing thoroughly prevents expensive color correction attempts later.

How to Acid Stain Concrete Floors
How to Apply an Acid-Stain Look to Concrete Flooring
Acid Stained Concrete Floors – Stained Concrete Outdoors or Indoors
How to Acid Stain a Concrete Floor – Plank and Pillow

DIY Stained Concrete – How To Revitalize Any Concrete Surface
DIY Concrete Stained flooring – A Thrifty Mom – Recipes, Crafts
Related Posts: