When I bought my house four years ago, the basement had that telltale musty smell and mysterious damp spots on the concrete floor that everyone warned me about. I ignored the problem for two years, thinking it wasn’t that serious, until I found mold growing behind some stored boxes and realized I had to take action. My basement waterproofing project turned into a six-month learning experience that taught me more about home maintenance than I ever wanted to know, but the results were worth every frustrating moment.
Identifying the Real Source of My Moisture Problems
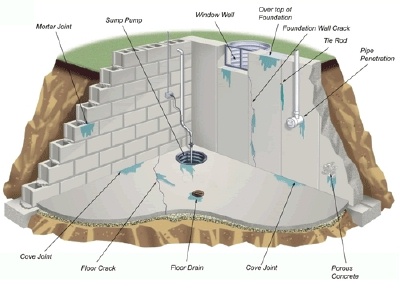
I initially assumed my basement moisture was coming from outside, but I learned that water problems can have multiple sources that aren’t always obvious. My first step was conducting what I called my “detective work” phase, where I taped plastic sheets to different sections of the basement walls and floor to see where condensation appeared. This simple test revealed that most of my moisture was coming from inside the basement, not seeping through the walls like I’d assumed.
The plastic sheet test showed me that my biggest problem was poor ventilation and high humidity levels, not major structural water infiltration. I bought a digital hygrometer and discovered my basement humidity was consistently above 70%, which explained the mold growth and that persistent musty smell. Understanding this helped me prioritize ventilation improvements alongside waterproofing, rather than just focusing on sealing the concrete floor.
I also discovered that my gutters and downspouts were contributing to the problem by directing water too close to the foundation. A simple walk around my house during a rainstorm revealed that water was pooling near the basement walls, creating hydrostatic pressure that pushed moisture through the concrete. Fixing these drainage issues became just as important as treating the basement floor itself, and addressing both problems together gave me much better long-term results.
Choosing Between DIY Solutions and Professional Help
My initial plan was to handle everything myself to save money, but I quickly realized that some aspects of basement waterproofing require professional expertise. I decided to tackle surface-level waterproofing and ventilation improvements myself while hiring professionals for more complex issues like foundation repairs and exterior drainage work. This hybrid approach gave me the best balance of cost savings and effective results.
For the DIY portions, I focused on interior moisture control and surface treatments that didn’t require specialized equipment. I installed a high-capacity dehumidifier, improved ventilation with exhaust fans, and applied penetrating concrete sealers to the floor and lower walls. These projects were manageable for someone with basic home improvement skills and made an immediate difference in the basement environment.
The professional work included repairing some foundation cracks that were allowing water infiltration and improving the exterior drainage around my house. While this cost more than I initially budgeted, the professionals identified issues I never would have found on my own and used specialized equipment and materials that aren’t available to homeowners. The combination of professional structural fixes and my DIY moisture control created a comprehensive solution that has held up perfectly for two years.

Surface Preparation and Concrete Treatment Options
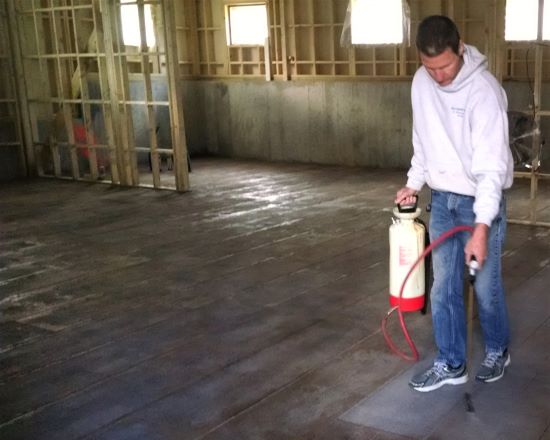
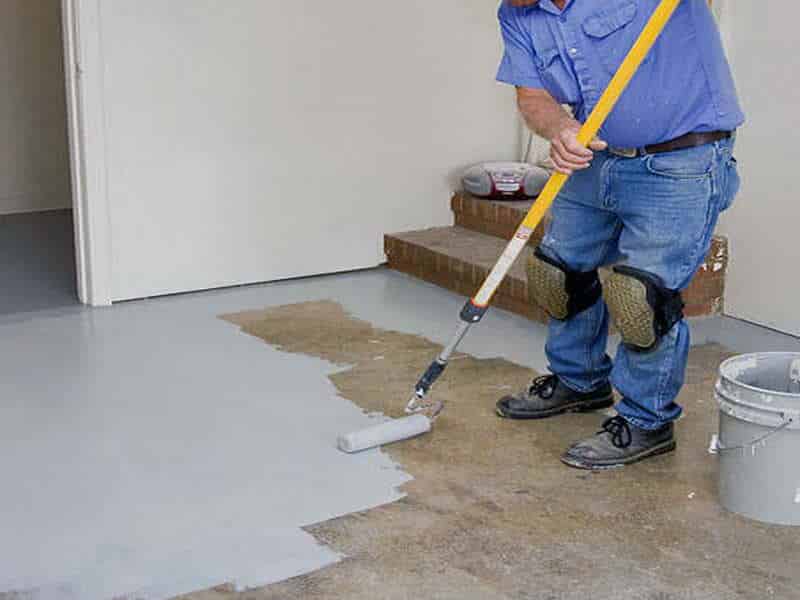
Preparing the concrete floor properly turned out to be much more involved than I expected, and skipping steps here would have compromised all my other efforts. I started by thoroughly cleaning the entire basement floor with a degreasing solution and power washing to remove years of accumulated dirt and potential contaminants. The floor had to be completely dry before I could apply any treatments, which meant running dehumidifiers for several days.
I discovered that my concrete floor had several small cracks that needed attention before waterproofing. Using a concrete crack filler, I sealed these openings to prevent water from seeping up through the floor. Some cracks were hairline thin, but I learned that even tiny openings can allow significant moisture infiltration over time, so being thorough with crack repair was essential for long-term success.
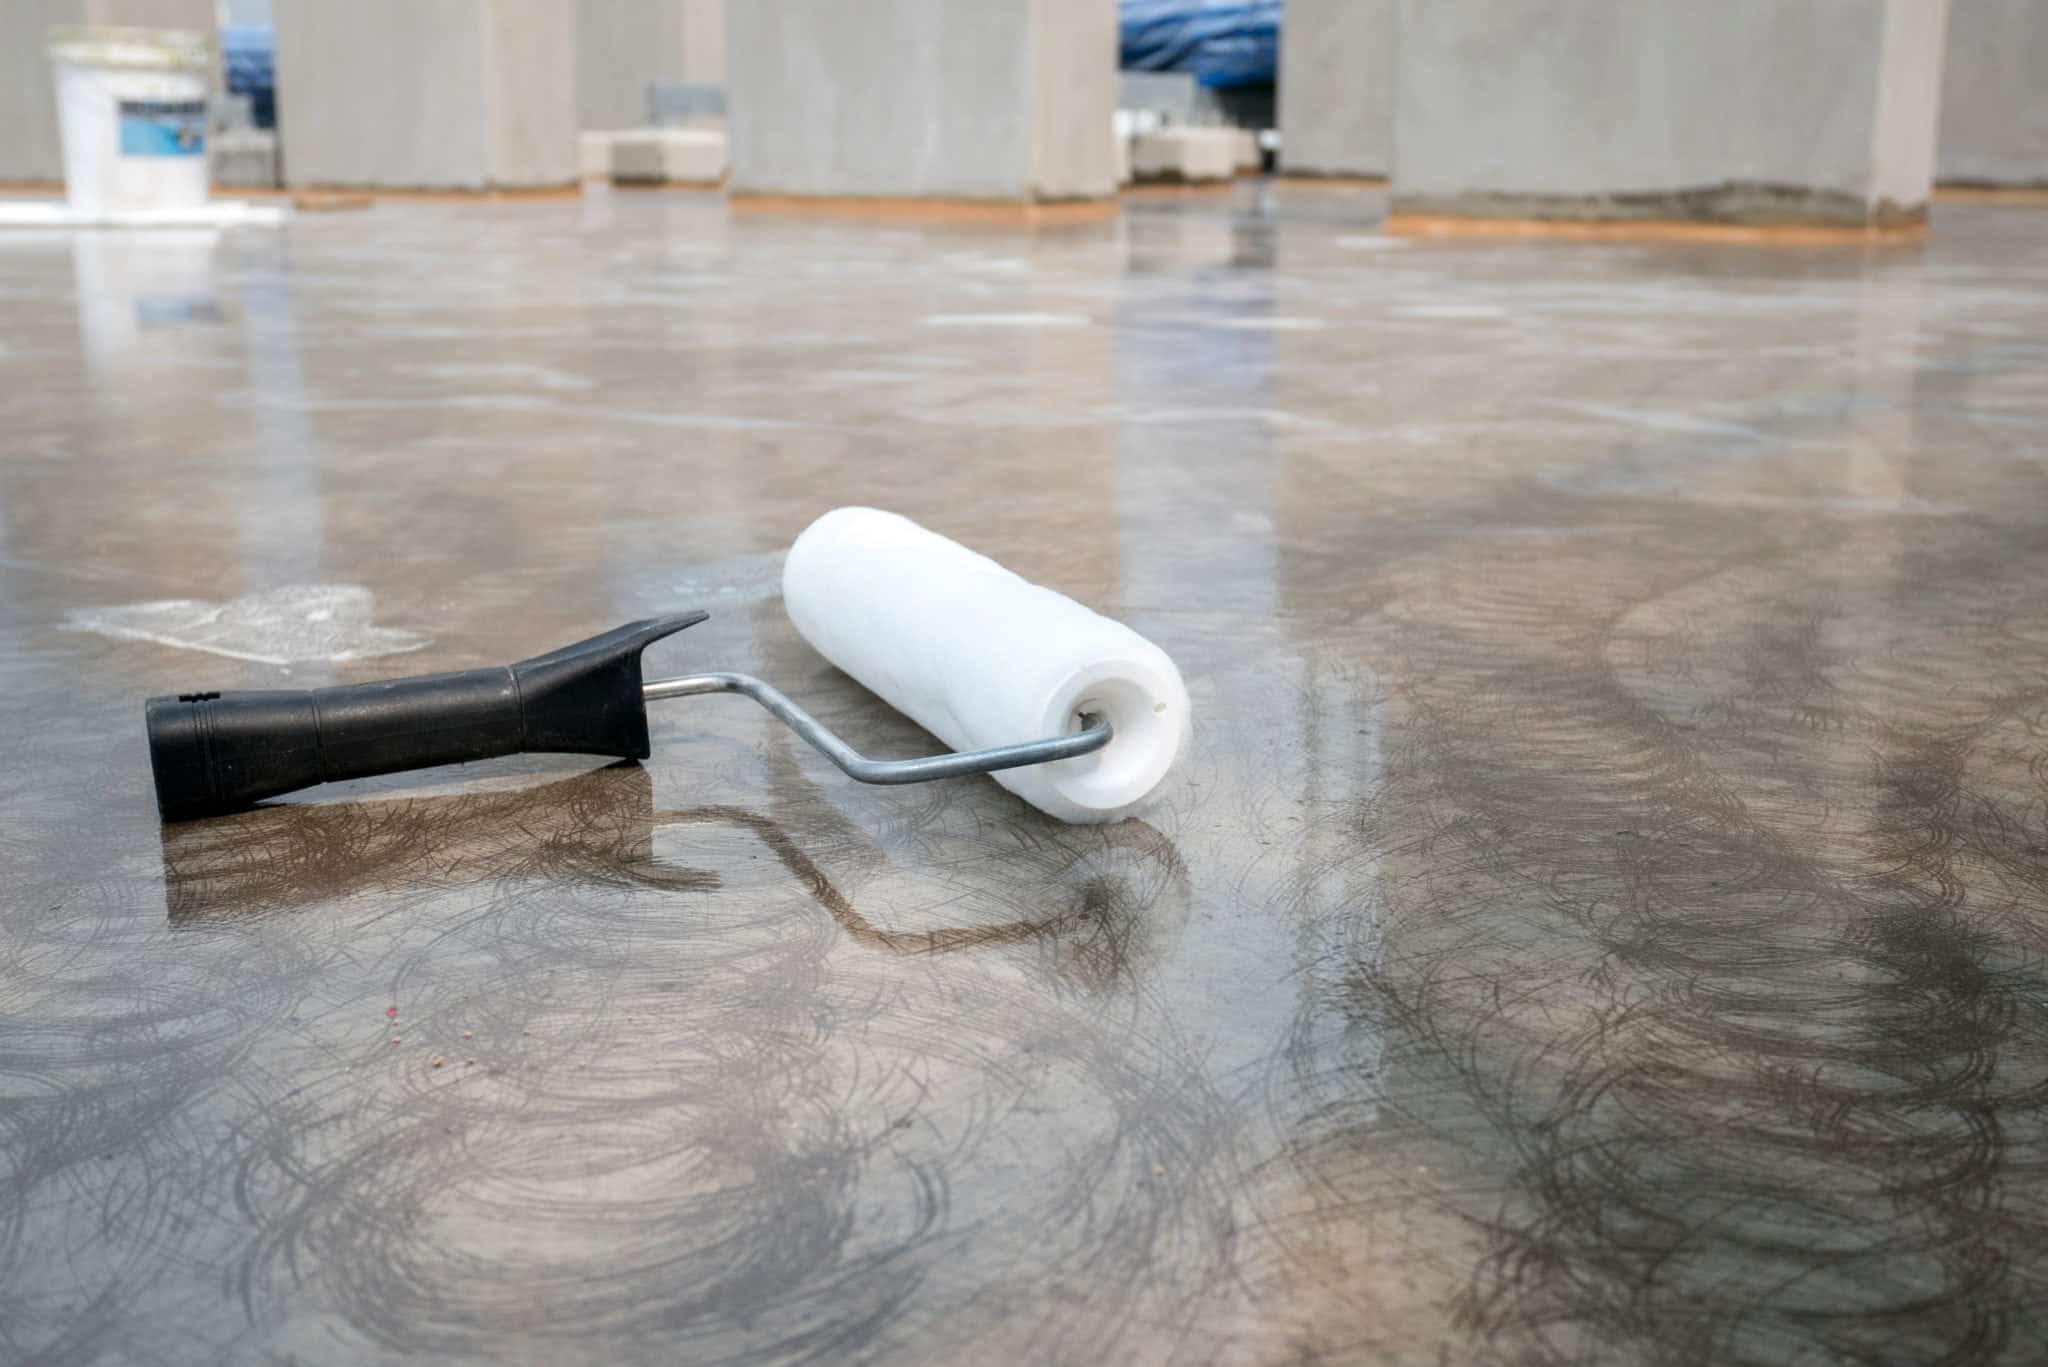
The concrete sealer application was more complex than just rolling on paint, requiring multiple thin coats applied in specific weather conditions. I chose a penetrating sealer rather than a surface coating because it soaks into the concrete and provides protection from within rather than just sitting on top. Each coat needed to cure for 24 hours, and I had to maintain proper ventilation and temperature control throughout the process to ensure proper adhesion and effectiveness.
Moisture Control Systems That Work
Installing proper ventilation was the game-changer in my basement moisture battle, and I wish I’d understood its importance from the beginning. I added two exhaust fans strategically placed to create cross-ventilation and connected them to a humidity controller that automatically runs them when moisture levels get too high. This system prevents humid air from stagnating and creating conditions where condensation and mold can develop.
My dehumidifier became the workhorse of my moisture control system, but choosing the right size and type made all the difference. I initially bought a standard residential unit, but it couldn’t keep up with the moisture load in my basement. Upgrading to a commercial-grade dehumidifier with a built-in pump allowed me to maintain consistent humidity levels below 50% year-round, which eliminated the conditions that support mold growth and that musty basement smell.
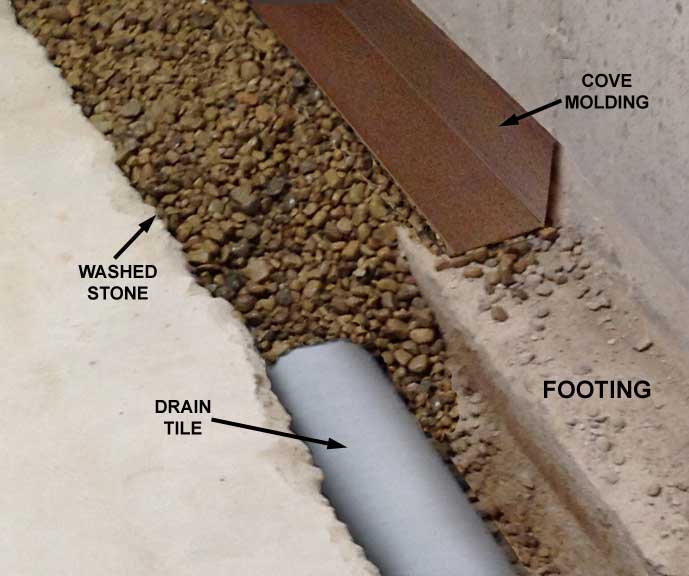
I also installed a simple but effective floor drainage system using a sump pump in the lowest corner of the basement. While I didn’t have major water infiltration issues, having this backup system gives me peace of mind during heavy rains and provides a way to remove any moisture that does occasionally seep in. The sump pump has only activated a few times in two years, but knowing it’s there helps me sleep better during severe weather.
Cost Breakdown and Budgeting Reality
My total basement waterproofing project cost about $4,500, which was significantly more than my initial $2,000 budget, but the expense breakdown taught me valuable lessons about home improvement planning. The professional foundation work and exterior drainage improvements accounted for about 60% of the total cost, while my DIY materials and equipment purchases made up the remainder. Understanding these proportions helped me prioritize the most critical improvements first.
The DIY portion of my project cost around $1,800, including the commercial dehumidifier ($600), concrete sealers and crack fillers ($400), ventilation fans and controls ($500), and various tools and supplies ($300). While this seemed expensive at the time, comparing it to professional quotes for the same work showed I saved at least $2,000 by handling these aspects myself, making the investment in tools and materials worthwhile.
I learned to budget for unexpected discoveries during the project, which added about $700 to my total cost when I found additional foundation issues that needed immediate attention. Setting aside 20-30% of your initial budget for surprises is essential in basement waterproofing because you often don’t know the full scope of problems until you start investigating. This extra cushion prevented financial stress and allowed me to address issues properly rather than cutting corners.

Long-Term Results and Maintenance Routine
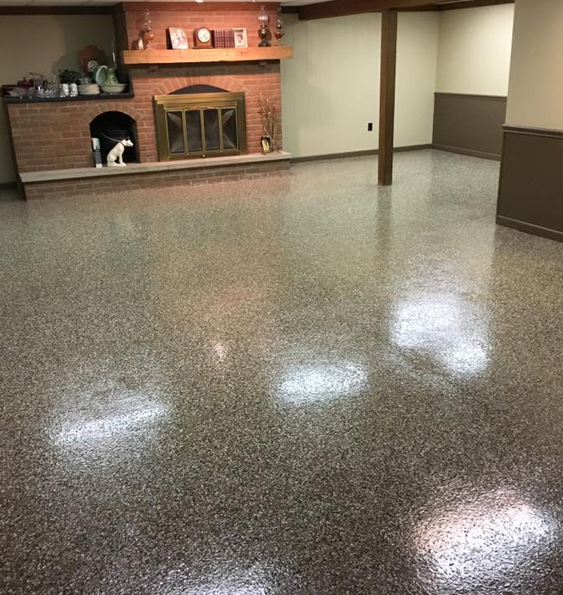
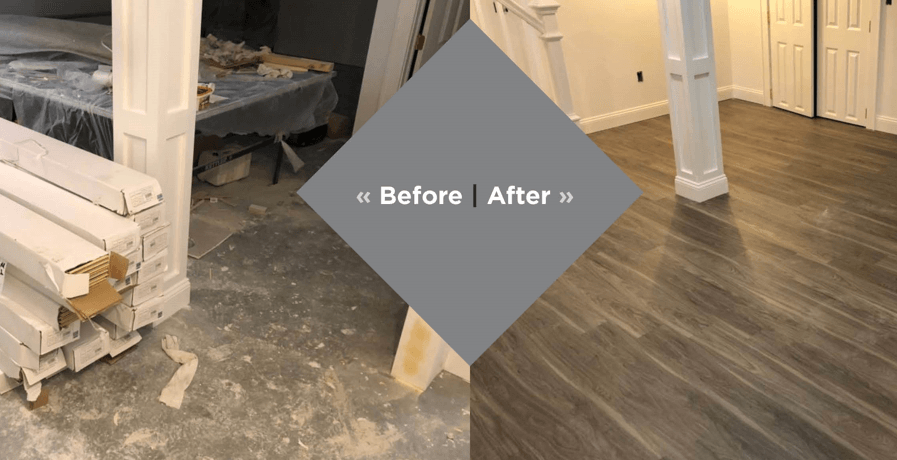
Two years after completing my waterproofing project, my basement has transformed from a damp, musty storage area into a comfortable, dry space that I enjoy spending time in. The humidity stays consistently between 45-50% year-round, there’s no musty smell, and I haven’t seen any signs of mold regrowth. Most importantly, I can store items in the basement without worrying about moisture damage, which has given me valuable additional storage space.
My maintenance routine is surprisingly simple and takes maybe 30 minutes per month to keep everything running smoothly. I check and clean the dehumidifier filter monthly, test the sump pump quarterly by pouring water into the pit, and visually inspect the sealed areas for any signs of new cracks or moisture penetration. The ventilation system runs automatically, but I check the fans periodically to make sure they’re operating efficiently.
The best part about my waterproofing success is the peace of mind it provides during heavy rains and spring snowmelt. I used to worry constantly about basement flooding or water damage, especially when traveling, but now I’m confident that my systems will handle normal moisture challenges. The investment has also added value to my home and made the basement a usable part of my living space rather than just a necessary evil for housing utilities.

How do you know if your basement moisture is coming from inside or outside sources?
I used the plastic sheet test, taping plastic to walls and floors overnight to see where condensation formed. Condensation on the basement side indicates internal humidity issues, while moisture on the concrete side suggests external infiltration. This simple test helped me identify that my main problem was poor ventilation rather than major water seepage.
What’s the most cost-effective DIY solution for basement moisture control?
Installing proper ventilation and a good dehumidifier gives you the biggest bang for your buck. I spent about $1,100 on these items, and they solved 80% of my moisture problems. Many basement moisture issues are humidity and air circulation problems that don’t require expensive structural work to fix effectively.
How long does basement waterproofing typically last before needing maintenance?
The systems I installed have worked perfectly for two years with minimal maintenance. The concrete sealers should last 5-10 years, the dehumidifier needs annual maintenance, and the ventilation system should run trouble-free for many years. Most components have long lifespans when installed properly and maintained regularly.
Should you waterproof a basement yourself or always hire professionals?
It depends on the scope of your problems. I handled moisture control and surface treatments myself, but hired pros for foundation issues and exterior drainage. If you just have humidity and minor seepage, DIY solutions work great. Major water infiltration or structural problems need professional assessment and repair.
What are the warning signs that basement waterproofing isn’t working properly?
Return of musty odors, visible mold growth, high humidity readings above 60%, or actual water pooling are all red flags. I monitor humidity levels monthly and do visual inspections quarterly. Catching problems early makes repairs much easier and less expensive than waiting until major issues develop.
How much should you budget for a complete basement waterproofing project?
My project cost $4,500 total, with about $2,700 for professional work and $1,800 for DIY materials and equipment. Budget $3-8 per square foot, depending on your basement’s condition and problems. Always add 20-30% extra for unexpected issues, because basement projects often reveal additional problems once you start investigating.
Epoxy Paint And Your Waterproofed Basement Floors
Best Basement Waterproofing Specialists Fairfield County Concrete
RadonSeal Plus 5 Gal. Deep Penetrating Concrete Sealer for
![]()
Liquid Rubber Basement Waterproofing Liquid Rubber Basement

Waterproof Flooring for Basements: Pictures, Ideas & Expert Tips
Related Posts: