Painting my concrete floors was one of the most satisfying DIY projects I’ve tackled. It completely changed the mood of my space, adding color, pattern, and personality where there was only dull gray before. With the right tools and a bit of patience, I discovered that painted concrete floors can be both durable and beautiful, making them a smart and creative choice for any room in the house.
Prepping for Success
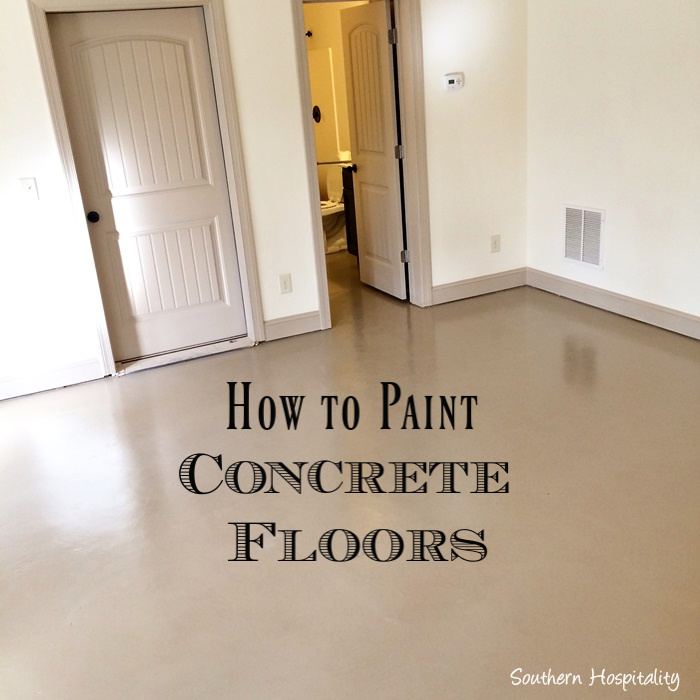
Preparation is everything when it comes to painting concrete floors. I started by removing any old flooring, sweeping up dust, and scrubbing away any residue or stains. Filling cracks and smoothing rough spots with patching compound helped create a flawless base. Once the floor was clean and dry, I taped off the baseboards and any areas I wanted to protect, ensuring crisp edges for my paint job.
Next, I applied a concrete primer to help the paint adhere and last longer. Skipping this step can lead to peeling or chipping down the road, so I made sure to let the primer dry thoroughly. For high-traffic areas, I sometimes use a concrete sealer before priming, which adds an extra layer of protection. This careful prep work paid off with a finish that stayed fresh and vibrant for years.
Choosing the right paint is just as important as prepping the surface. I went with a specialized concrete floor paint, which is tougher than standard wall paint and can handle foot traffic, spills, and cleaning. For garages or basements, I recommend epoxy-based paints for their durability and glossy finish. For living spaces, acrylic or latex paints offer more color choices and quick drying times.
Playing with Patterns and Color
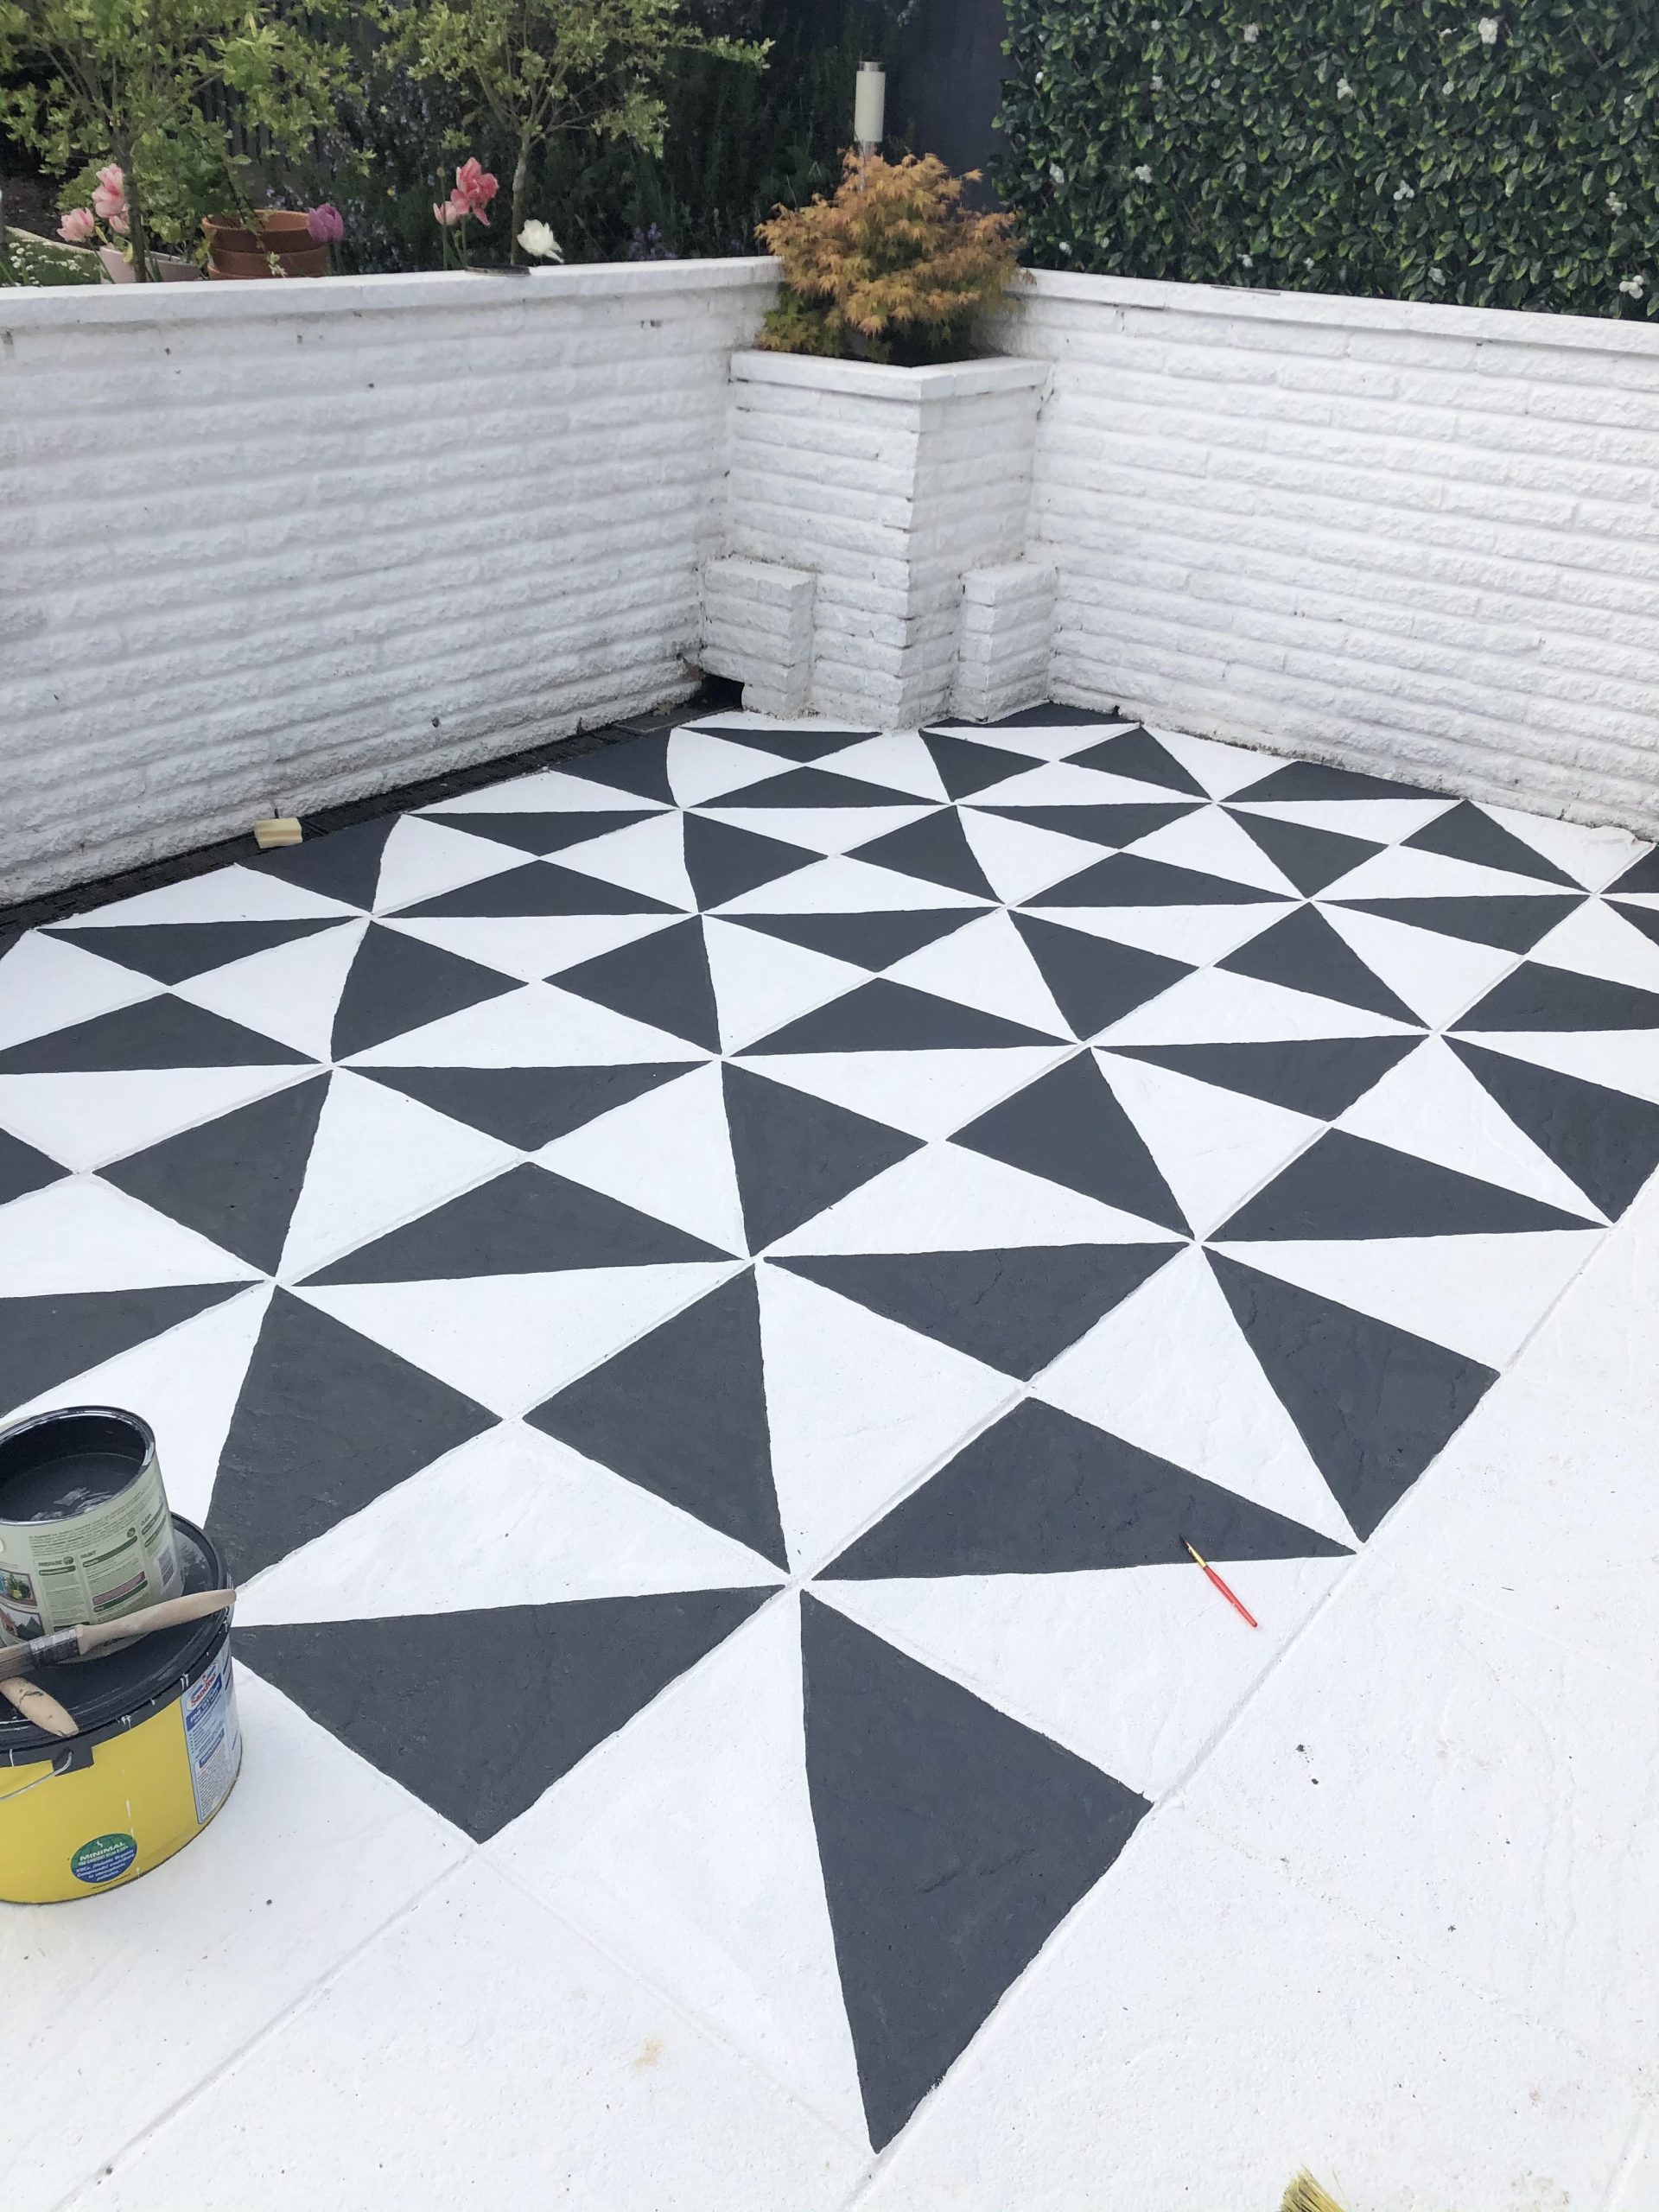
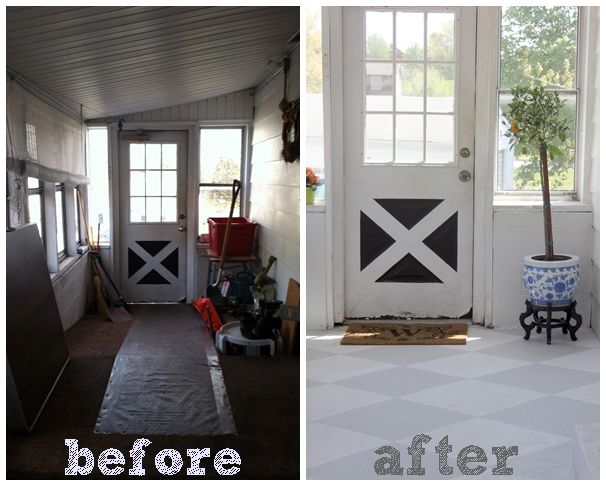
One of my favorite parts of painting concrete floors is the chance to get creative with color and design. I’ve tried bold, solid colors to brighten up dark rooms and subtle earth tones for a more calming effect. Using painter’s tape, I created geometric patterns, stripes, and even faux rugs that added instant personality to the space.
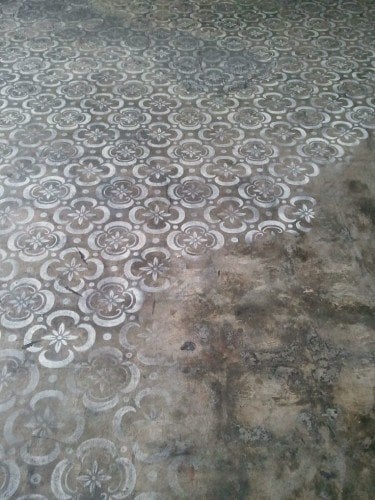
Stencils opened up even more possibilities. I used them to create intricate designs, from classic Moroccan tiles to playful floral patterns. Layering different colors and shapes gave the floor a custom look that you’d never find in a store. For a modern vibe, I tried a checkerboard or chevron pattern, which made the room feel more dynamic and lively.
If you’re feeling adventurous, concrete stains and dyes can create a marbled or mottled effect that mimics natural stone. I found that acid stains produce deep, unpredictable colors, while water-based dyes offer brighter, more uniform shades. Whichever method I chose, sealing the finished design was key to locking in the color and protecting the floor from wear.
Application Tips and Techniques
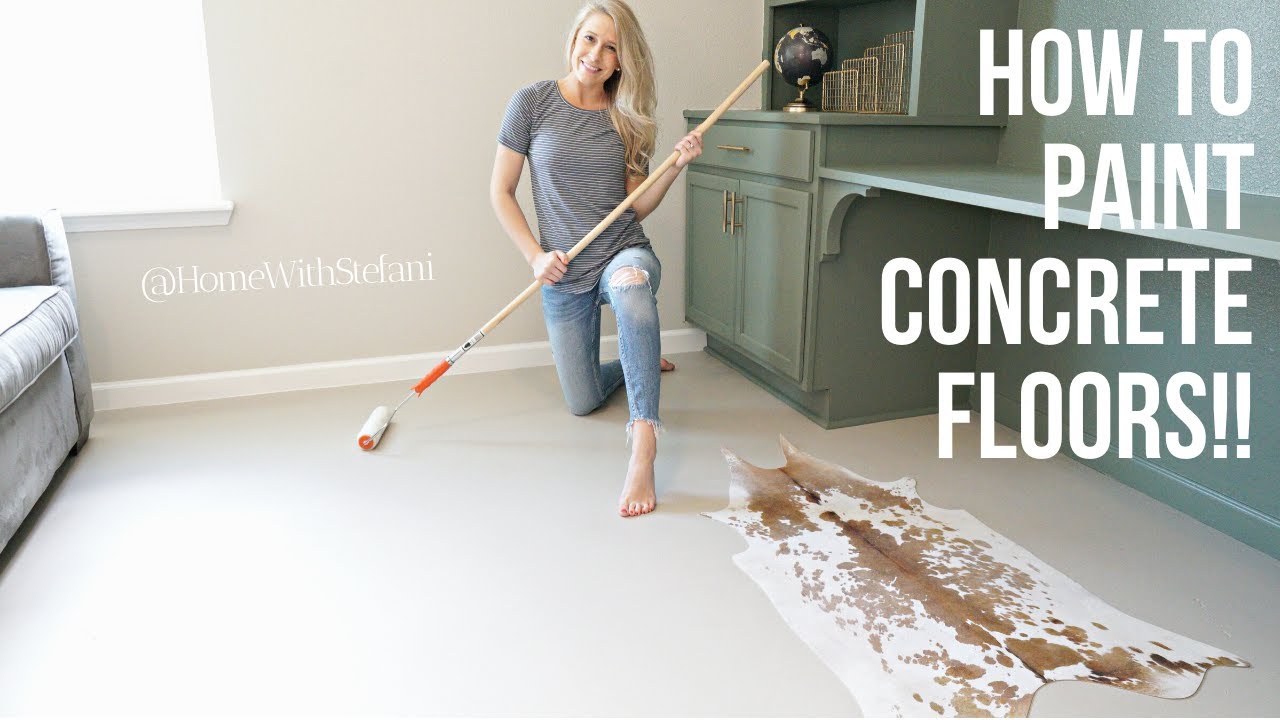
Once the design was mapped out, I started by cutting in the edges with a brush before rolling paint onto the main surface. Working in small sections helped me maintain a wet edge and avoid visible roller marks. I used a microfiber roller for a smooth finish and applied at least two coats, letting each one dry fully before adding the next.
Patience was crucial during drying times. I resisted the urge to rush and waited as long as the paint manufacturer recommended before walking on the floor or moving furniture back in. For outdoor or high-moisture areas, I applied a clear masonry sealer over the paint to guard against water and UV damage, which helped the colors stay true and the finish stay strong.
For touch-ups or repairs, I kept a little leftover paint on hand. Small chips or scratches were easy to fix with a quick dab of paint, keeping the floor looking fresh. I learned that regular maintenance, like sweeping and gentle mopping, helped preserve the finish and prevented dirt from scratching the surface.

Unique DIY Design Ideas
Experimenting with design ideas kept the project fun and personal. In one room, I painted a faux rug under the dining table, using stencils and contrasting colors to define the space without the worry of spills or stains. In another, I created a bold border around the room’s edge, framing the furniture and adding a touch of elegance.
For a playful twist, I painted oversized letters and numbers on a kid’s playroom floor, turning it into an interactive learning space. In my sunroom, I went for a large-scale floral stencil in muted hues, which brought in a cozy, cheerful vibe. The possibilities are endless, and each project gave me a chance to express my style in a truly unique way.
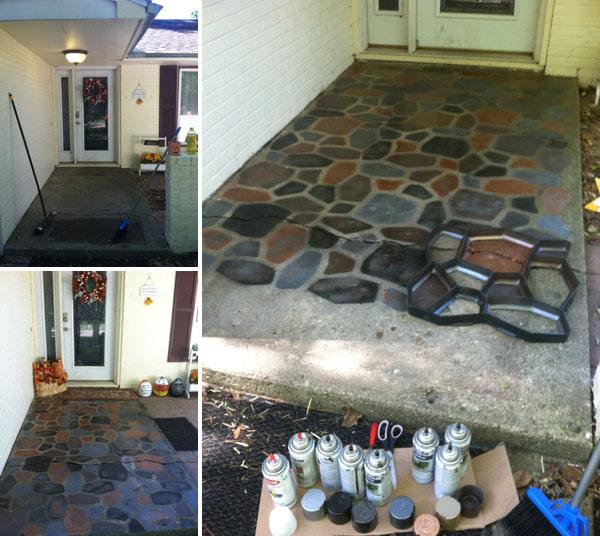
Outdoor spaces can benefit from painted concrete, too. I tried a brick pattern on my patio floor, using warm reds and browns for a welcoming look. For a modern porch, I went with a nautical star in crisp navy and white, creating a focal point that wowed every guest. The best part is that if I ever want a change, repainting is simple and affordable.

Maintenance and Longevity
Keeping painted concrete floors looking great is easier than I expected. I sweep or vacuum regularly to remove dust and grit that could scratch the paint. For mopping, I use a pH-neutral cleaner and avoid harsh chemicals that might dull the finish. Spills are wiped up quickly to prevent staining, and I place mats at entrances to catch dirt and moisture.
Every few years, I check for wear in high-traffic areas and touch up or reseal as needed. This simple routine keeps the paint vibrant and the surface protected. For outdoor floors, I reapply a clear sealer before each rainy season to prevent water damage and fading. With these habits, my painted concrete floors have stayed beautiful and functional year after year.
If I notice chips or scratches, I sand the area lightly, clean it thoroughly, and apply a matching coat of paint. For larger repairs, repainting a whole section is sometimes necessary, but it’s a small price to pay for a floor that looks brand new. Painted concrete is surprisingly resilient, and with a little care, it stands up to daily life with style.
Benefits of Painted Concrete Floors
Painting concrete floors brought so many benefits to my home. The transformation was instant, turning cold, industrial surfaces into warm, inviting spaces. The cost savings were significant, especially compared to installing new flooring. I loved the flexibility to change colors or patterns whenever I felt like refreshing the look.
The smooth, sealed surface made cleaning a breeze, and I no longer worried about dust or moisture getting trapped in the concrete. Painted floors also helped brighten up dark rooms, reflecting light and making spaces feel larger. For anyone with allergies, the lack of carpet fibers and dust traps was a huge plus.
Most of all, I enjoyed the creative freedom. From subtle elegance to bold statements, painted concrete floors let me express my personality in every room. The project was manageable for a weekend DIYer, and the results were truly rewarding. If you’re considering a home update, painting your concrete floors is a project I highly recommend.

What kind of paint should I use for concrete floors?
I always choose paint specifically formulated for concrete, such as epoxy-based or acrylic latex floor paints. Epoxy is ideal for high-traffic or garage areas because of its durability and glossy finish. Acrylic latex works well in living spaces, offering a wide range of colors and quick drying times. Using the right paint ensures your floors stay beautiful and resist wear.
How do I prepare my concrete floor before painting?
Preparation is crucial. I start by removing any old coverings, sweeping, and scrubbing away dirt or stains. Filling cracks and smoothing rough spots creates a perfect canvas. After cleaning, I let the floor dry completely, then applied a concrete primer to help the paint adhere. Taping off baseboards and edges keeps the lines neat and professional.
Can I create patterns or designs on my painted concrete floor?
Absolutely! I love using painter’s tape to create stripes, borders, or geometric shapes. Stencils are great for intricate patterns, and layering colors adds depth. For a unique look, I sometimes use stains or dyes to mimic stone or marble. The creative options are endless, and each design brings a personal touch to the space.
How do I maintain painted concrete floors?
Regular sweeping and gentle mopping keep my floors looking fresh. I use a pH-neutral cleaner and avoid harsh chemicals that could damage the paint. Placing mats at entrances helps catch dirt, and I quickly clean up spills to prevent stains. Every few years, I touch up or reseal high-traffic areas to maintain the finish and protect the surface.

How long does it take to paint and dry a concrete floor?
The process usually takes a few days. Prepping and priming can be done in a day, but I allow each coat of paint to dry fully before adding the next. Most paints require at least 24 hours between coats, and I wait several days before moving furniture back in. Patience during drying ensures a durable, long-lasting finish.
Can I paint over an old painted concrete floor?
Yes, but I make sure to clean and lightly sand the old paint to remove any loose or glossy areas. Filling cracks and priming are still important steps. Applying two fresh coats of concrete floor paint gives the surface a new lease of life. Sealing the finished floor adds extra protection and helps the new paint last even longer.
Painted Concrete Floors, Concrete Floor Paint; Tutorial u0026 Videos
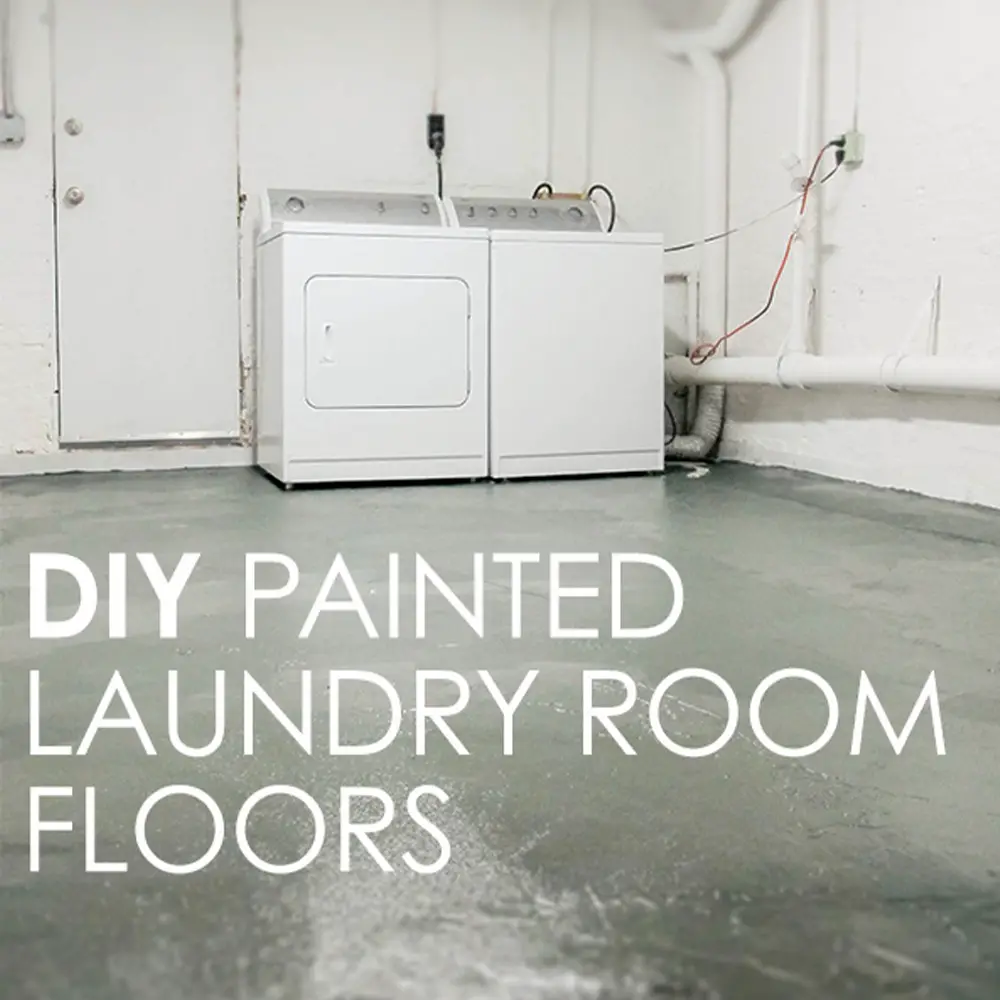
Nothing But Paint! Laundry Room Makeover: Painted Concrete Floors
Painted Concrete Floors, Concrete Floor Paint; Tutorial
Painted Concrete Floors Concrete Floor Ideas Concrete Finishes

Related Posts: