I’ve spent over a decade working with concrete floors, and nothing has impressed me more than epoxy coatings. When I first discovered these remarkable systems, I was skeptical about their durability claims. After installing hundreds of epoxy floors across commercial and residential spaces, I can confidently say they’re game-changers. This comprehensive guide shares my hands-on experience with epoxy concrete floor coatings, covering everything from installation techniques to long-term maintenance strategies.
Understanding Epoxy Floor Coating Basics
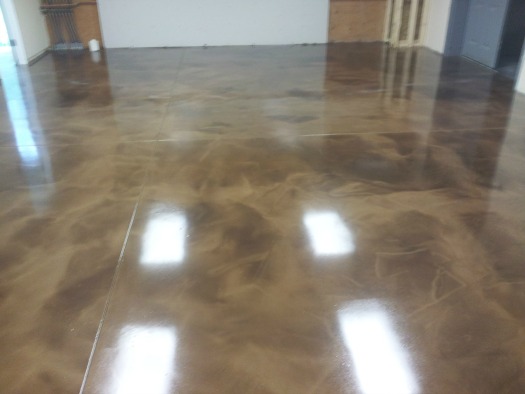
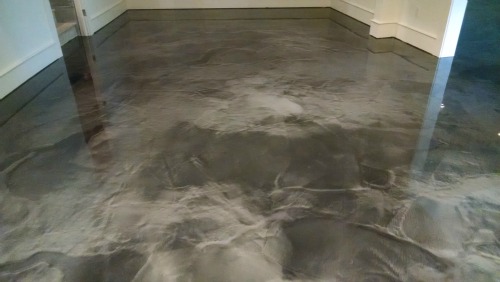
My introduction to epoxy coatings happened during a warehouse renovation project. The client needed a solution that could handle heavy machinery while looking professional. Epoxy consists of resin and hardener that chemically bond when mixed, creating an incredibly strong surface. This thermosetting polymer becomes harder than the concrete itself once cured. I learned that different epoxy formulations serve various purposes, from decorative residential applications to industrial-grade protective systems.
The chemistry behind epoxy fascinates me even today. When resin molecules cross-link with hardener molecules, they form a three-dimensional network that’s virtually impenetrable. This process, called curing, typically takes 24 to 72 hours, depending on temperature and humidity. During my early projects, I made the mistake of rushing this process, leading to soft spots and premature failure. Now I always respect the curing time, regardless of client pressure to reopen facilities quickly.
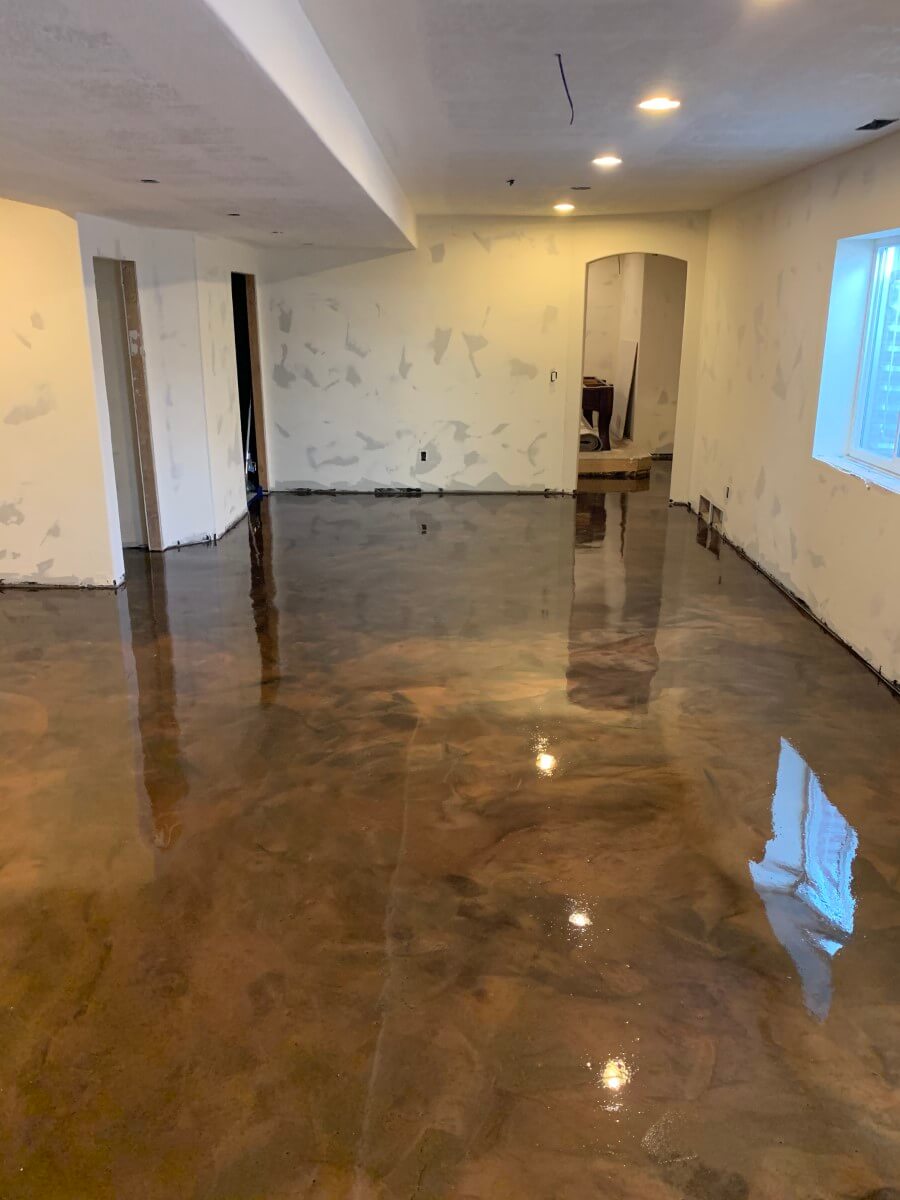
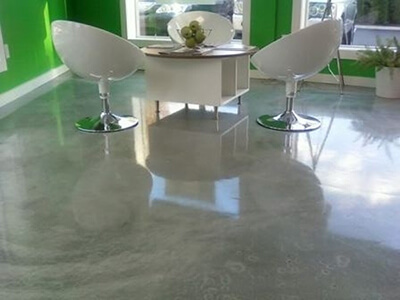
What sets epoxy apart from other floor coatings is its molecular adhesion to concrete. Unlike paint or sealers that sit on the surface, epoxy penetrates concrete pores and creates mechanical bonds. I’ve seen epoxy floors last decades with minimal maintenance when properly installed. The key lies in surface preparation, which I’ll discuss later. This superior bonding explains why epoxy can withstand impacts, chemicals, and abrasion that would destroy conventional floor finishes.
Surface Preparation Techniques I’ve Mastered
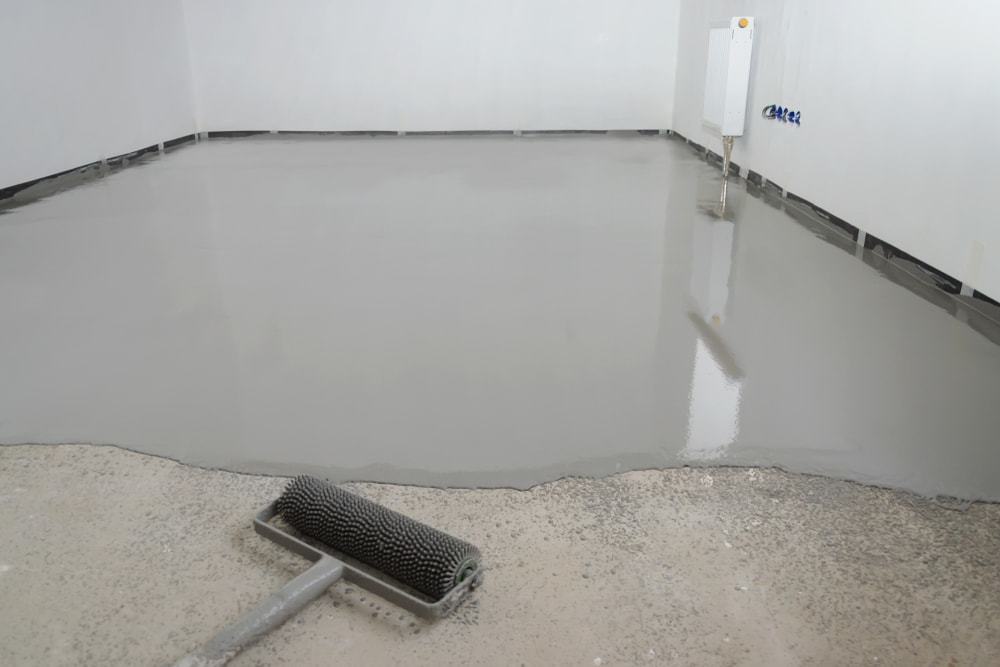
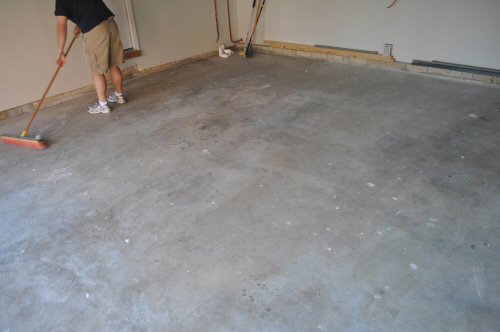
Surface preparation makes or breaks every epoxy installation. I learned this lesson painfully during my second project when inadequate prep caused the entire coating to peel within months. Now I spend 60% of project time on surface preparation because it determines long-term success. The concrete must be clean, dry, and properly profiled to ensure maximum adhesion. I use various mechanical methods, including shot blasting, grinding, and acid etchin,g depending on the substrate condition.
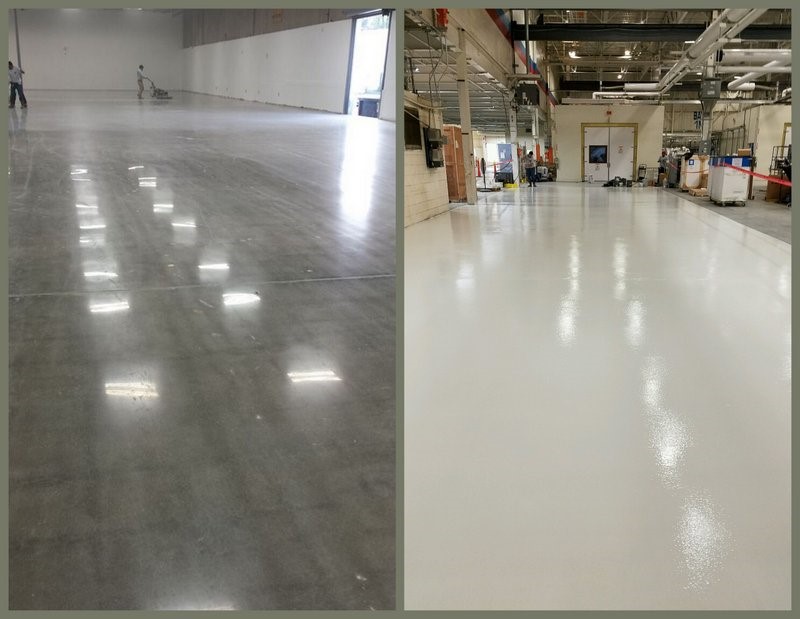
Shot blasting has become my preferred preparation method for most projects. This process removes contaminants while creating the ideal surface profile for epoxy adhesion. I typically achieve a CSP-3 to CSP-4 profile, which provides optimal mechanical bonding. Grinding works well for removing existing coatings or leveling uneven surfaces. For smaller residential projects, acid etching can be effective, though it requires careful neutralization and thorough rinsing. Each method has specific applications based on concrete age, contamination levels, and project requirements.
Moisture testing is crucial yet often overlooked by inexperienced contractors. I always perform calcium chloride tests and plastic sheet tests before applying epoxy. Excessive moisture vapor can cause catastrophic coating failure months after installation. Temperature also plays a critical role, I never install epoxy when surface temperatures are below 50°F or above 90°F. Humidity levels above 85% can cause solvent blushing and poor curing. These environmental factors require careful monitoring and sometimes project delays, but they’re non-negotiable for quality results.
Installation Process From My Experience
My installation process begins with thorough planning and material calculation. I’ve learned to order 10% extra material because waste is inevitable, especially on complex projects with multiple colors or patterns. Temperature control during installation is critical, I often work early mornings or evenings to avoid extreme temperatures. Mixing ratios must be precise, I use digital scales rather than volume measurements for accuracy. Even small deviations can affect curing properties and final performance.
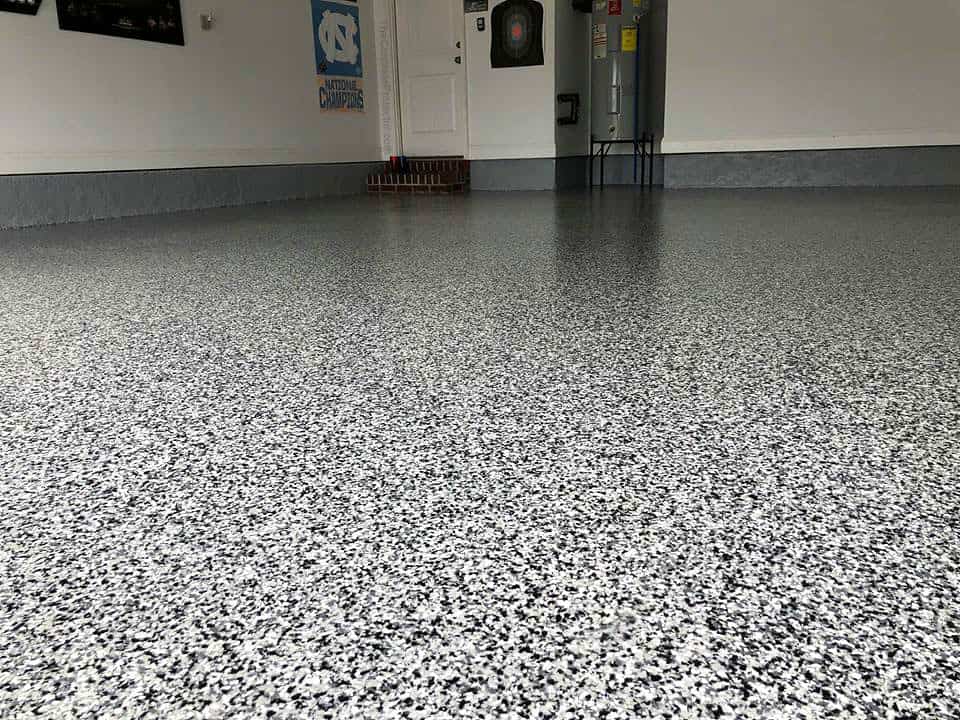
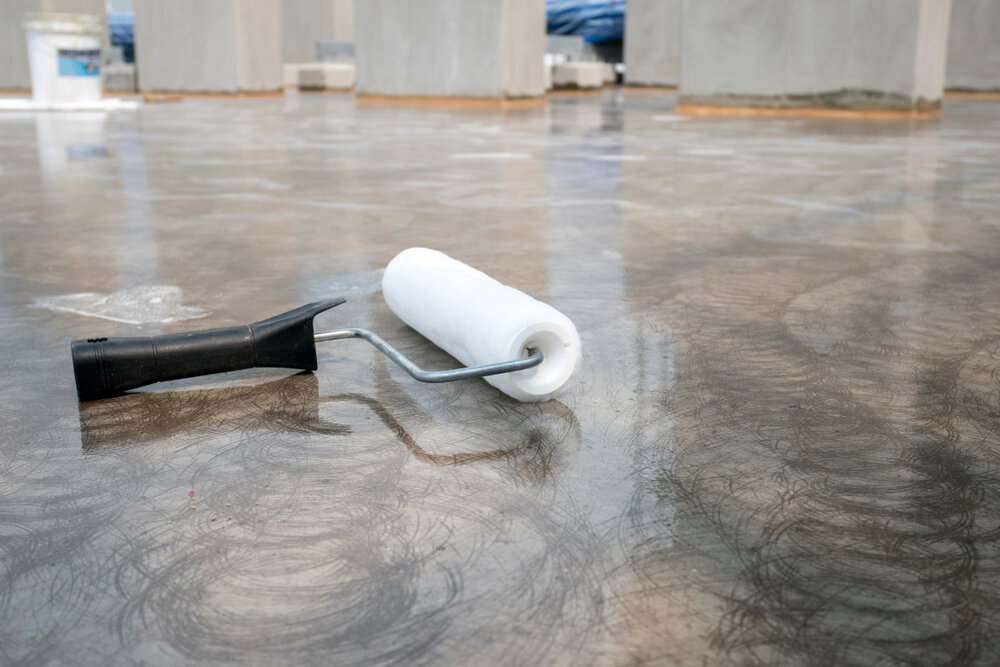
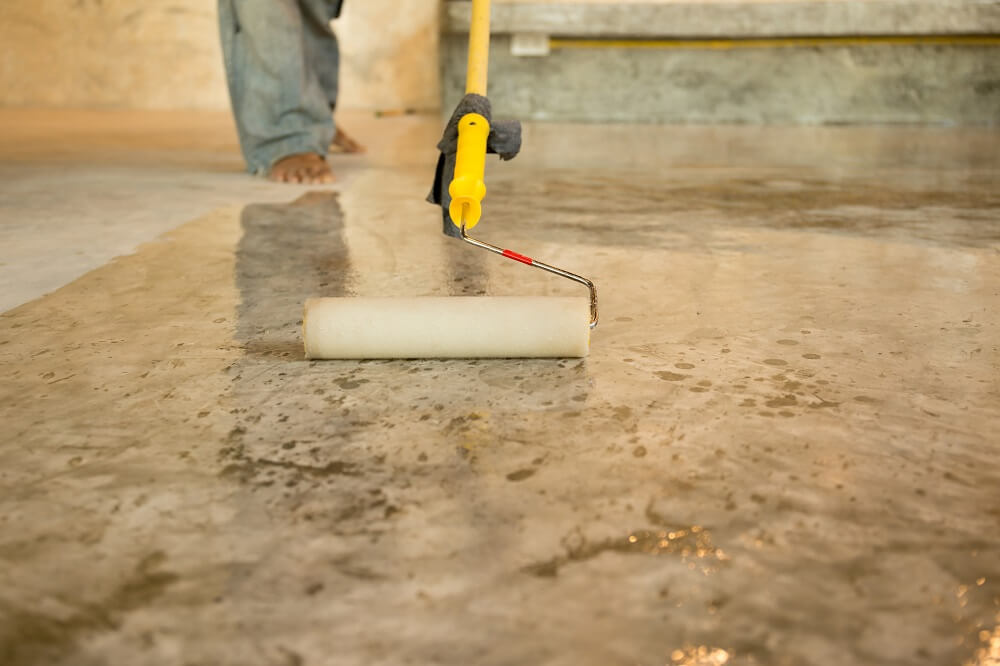
Application technique significantly impacts the final result. I use various tools depending on the project scope: squeegees for large areas, brushes for detail work, and specialty rollers for texture. Working time varies with temperature, typically 20-45 minutes after mixing. I maintain wet edges to prevent lap marks and work systematically across the floor. Back-rolling is essential to eliminate air bubbles and ensure uniform thickness. Multiple thin coats perform better than single thick applications, though this extends project timelines.
Quality control during installation prevents most problems. I inspect each section immediately after application, looking for thin spots, bubbles, or contamination. Any issues must be addressed before the epoxy begins to cure. I document temperatures, humidity, and timing for every project, creating valuable reference data for future installations. Final inspection includes checking for proper cure using simple adhesion tests. Only after complete curing do I allow foot traffic, with full service loads permitted after seven days minimum.
Common Mistakes I’ve Witnessed and Avoided
Temperature-related failures top my list of avoidable mistakes. I’ve seen contractors apply epoxy in freezing conditions, resulting in incomplete curing and soft spots. Conversely, high temperatures cause rapid curing, leaving insufficient time for proper application. I now carry multiple thermometers and refuse to proceed when conditions aren’t optimal. Weather monitoring apps help me plan installations around favorable conditions. Clients initially resist delays, but explaining long-term consequences usually gains their cooperation.
Inadequate surface preparation causes more failures than any other factor. I’ve remediated countless floors where previous contractors skipped crucial prep steps. Oil stains, dust, and moisture are coating killers that must be eliminated. Some contractors use inadequate etching solutions or fail to neutralize acids properly. Others skip primer coats on porous concrete, leading to poor adhesion. These shortcuts might save time initially, but they guarantee expensive callbacks and damaged reputations.
Mixing errors create subtle problems that appear months later. Incorrect ratios cause incomplete curing, resulting in soft or sticky surfaces. Inadequate mixing leaves unmixed material that never cures properly. I’ve seen contractors add solvents to extend working time, compromising coating properties. Poor mixing technique introduces air bubbles that create weak spots. Using contaminated mixing containers or tools can introduce foreign materials that affect curing. These issues are entirely preventable with proper training and attention to detail.
Maintenance Strategies That Actually Work
Preventive maintenance extends epoxy floor life dramatically. I recommend daily sweeping or dust mopping to remove abrasive particles that can scratch the surface. Weekly damp mopping with neutral pH cleaners maintains appearance without damaging the coating. Quarterly deep cleaning removes accumulated soil and restores gloss. I provide detailed maintenance schedules to every client because proper care prevents most premature wear issues.
Chemical resistance makes epoxy floors ideal for many applications, but spills still require prompt attention. I teach clients to clean spills immediately, especially acids, solvents, and hot liquids that can cause permanent damage. For stubborn stains, I recommend specific cleaning products that won’t attack the epoxy matrix. Abrasive cleaners and steel wool should never be used as they scratch the surface and create dirt-trapping locations.
Minor damage can often be repaired without full recoating. Small chips or scratches can be filled with matching epoxy material if addressed quickly. Larger damaged areas require more extensive repair, including surface preparation and spot coating. I maintain repair kits for my clients containing touch-up materials and detailed instructions. Early intervention prevents minor issues from becoming major problems requiring complete floor replacement.
Long-Term Performance Expectations
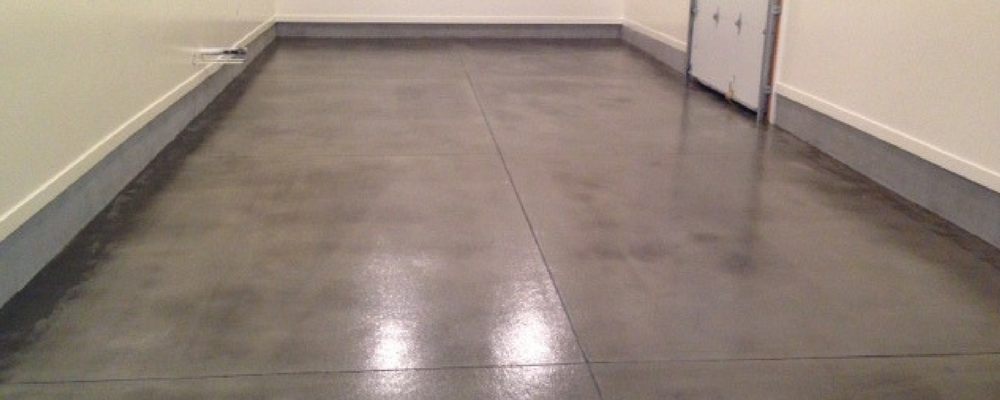
Properly installed epoxy floors routinely last 15-20 years in commercial environments. I’ve inspected floors I installed 18 years ago that still look excellent with proper maintenance. Industrial environments with heavy chemical exposure or extreme temperatures may require recoating every 7-12 years. Residential applications often last even longer due to lighter traffic and fewer contaminants. These performance expectations assume quality materials, proper installation, and adequate maintenance throughout the service life.
Traffic patterns significantly affect wear rates. High-traffic areas show wear first, particularly around doorways and equipment locations. I often recommend adding aggregate or using more durable topcoats in these zones. Fork lift traffic requires special consideration including impact-resistant formulations and thicker build-up. Understanding traffic patterns during design helps optimize coating systems for specific applications.
Environmental factors influence long-term performance more than many realize. UV exposure can cause yellowing in some epoxy formulations, though aliphatic topcoats provide excellent protection. Thermal cycling causes expansion and contraction that can lead to cracking in poorly designed systems. Chemical exposure accumulates over time, potentially affecting coating properties. Regular inspections help identify developing issues before they become serious problems requiring major repairs.
How long does epoxy floor coating installation take?
Installation time varies significantly based on floor size and preparation requirements. Small residential garages typically take 2-3 days, including prep work and curing time. Commercial projects often require 5-7 days due to extensive surface preparation and multiple coating layers. I always factor in weather delays and curing time when scheduling projects. Rushing installation invariably leads to problems, so adequate time planning is essential for success.
Can I install epoxy coating over existing paint or sealers?
Existing coatings must be completely removed before epoxy installation. I’ve never seen successful long-term results when epoxy is applied over paint, sealers, or other coatings. The old coating becomes the weak link, eventually failing and taking the epoxy with it. Proper removal requires mechanical methods like grinding or shot blasting. While this adds cost and time, it’s necessary for reliable adhesion and performance.

What temperature and humidity conditions are required for installation?
Optimal conditions include concrete surface temperatures between 55-85°F with relative humidity below 80%. I monitor these conditions continuously during installation using calibrated instruments. Temperature affects curing speed and working time, while humidity can cause surface defects. I’ve learned to be patient and wait for proper conditions rather than compromising installation quality. Weather delays are frustrating but necessary for long-term success.
How do I maintain my epoxy floor for maximum lifespan?
Daily dry cleaning removes abrasive particles that cause scratches and wear. Weekly damp mopping with neutral cleaners maintains appearance without damaging the coating. I recommend avoiding harsh chemicals, abrasive tools, and excessive water during cleaning. Prompt spill cleanup prevents staining and chemical damage. Quarterly professional cleaning restores gloss and removes embedded soil that regular cleaning misses.
What causes epoxy floors to fail prematurely?
Poor surface preparation accounts for most premature failures in my experience. Contaminated concrete, inadequate cleaning, or insufficient profiling prevent proper adhesion. Environmental conditions during installation also cause problems, including incomplete curing or surface defects. Inadequate maintenance allows damage to accumulate, eventually requiring complete recoating. Using the wrong coating systems for specific applications leads to performance issues and shortened service life.
Is epoxy coating slippery when wet?
Standard smooth epoxy can become slippery when wet, creating safety concerns in some applications. I address this by incorporating anti-slip additives or using textured topcoats where appropriate. The amount of texture depends on the specific application and safety requirements. Light texture maintains cleanability while providing adequate slip resistance. Areas with frequent water exposure may require more aggressive texturing for maximum safety.
Epoxy Coatings: Types of Epoxy Flooring & Self Leveling Epoxy
Lifetime Epoxy – How to Choose the Best Epoxy Floor Coating
Types of Concrete Floor Coatings (And What You Should Know
Epoxy Coatings
Related Posts: