Epoxy floor paint design has become one of my favorite ways to transform plain, boring floors into striking, durable surfaces. Whether I’m working on a garage, basement, or even a living space, the versatility of epoxy allows for endless creativity and customization. Today, I’ll share my experiences and tips for designing with epoxy floor paint, from choosing patterns to applying finishes that wow.
The Art of Pattern and Design
When I first started experimenting with epoxy floor paint, I was amazed by how simple it could be to create patterns that make a space feel unique. I learned that repeating symmetrical designs, like checkerboards or stripes, can instantly add character and dimension to a room. Using painter’s tape to section off areas and careful measurements, I found it easy to achieve clean lines and bold contrasts that catch the eye.
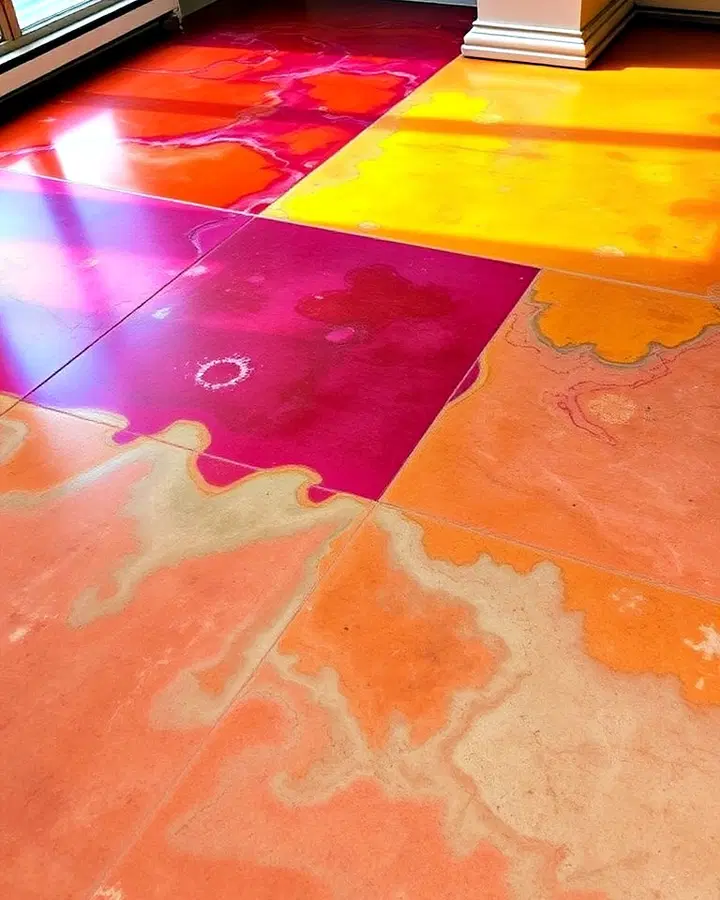
I also discovered the fun of adding decorative elements, such as flecks or swirling effects, which can make a floor look playful or sophisticated depending on the technique. By mixing different colors and layering them in creative ways, I was able to mimic the look of marble, terrazzo, or even cosmic landscapes. The process reminded me of painting a canvas, but on a much larger scale.
For outdoor spaces, epoxy paint offers even more flexibility. I’ve used it to simulate natural stone or wood, blending colors and textures for a seamless transition between indoor and outdoor areas. The key was to embrace imperfections and let the design flow naturally, creating a floor that complements its surroundings and stands up to the elements.
Choosing the Right Colors
Selecting the right colors for my epoxy floor was a challenge at first, but I quickly realized how important it is to consider the mood and function of the space. I experimented with bold metallic shades, like copper and iridescent blue, which added depth and movement to my garage and workshop floors. These modern hues created a dynamic look that made the space feel more energetic.
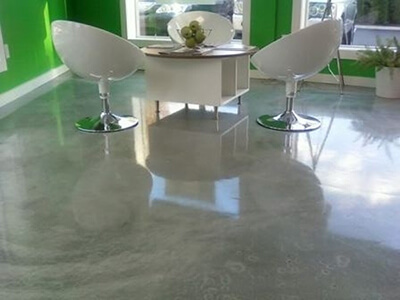
I also explored softer, neutral tones, such as grays and beiges, for areas where I wanted a more calming, minimalist vibe. These colors worked well in living rooms and wellness spaces, blending seamlessly with natural wood furniture and creating a warm, inviting atmosphere. The versatility of epoxy paint means I can easily change the look of a room just by choosing a different palette.
For commercial projects, I found that custom colors and even embedded logos or brand elements can make a powerful statement. I’ve worked with clients who wanted their floors to reflect their business identity, and epoxy paint made it possible to create cohesive, branded spaces that left a lasting impression on visitors.
Surface Preparation and Priming
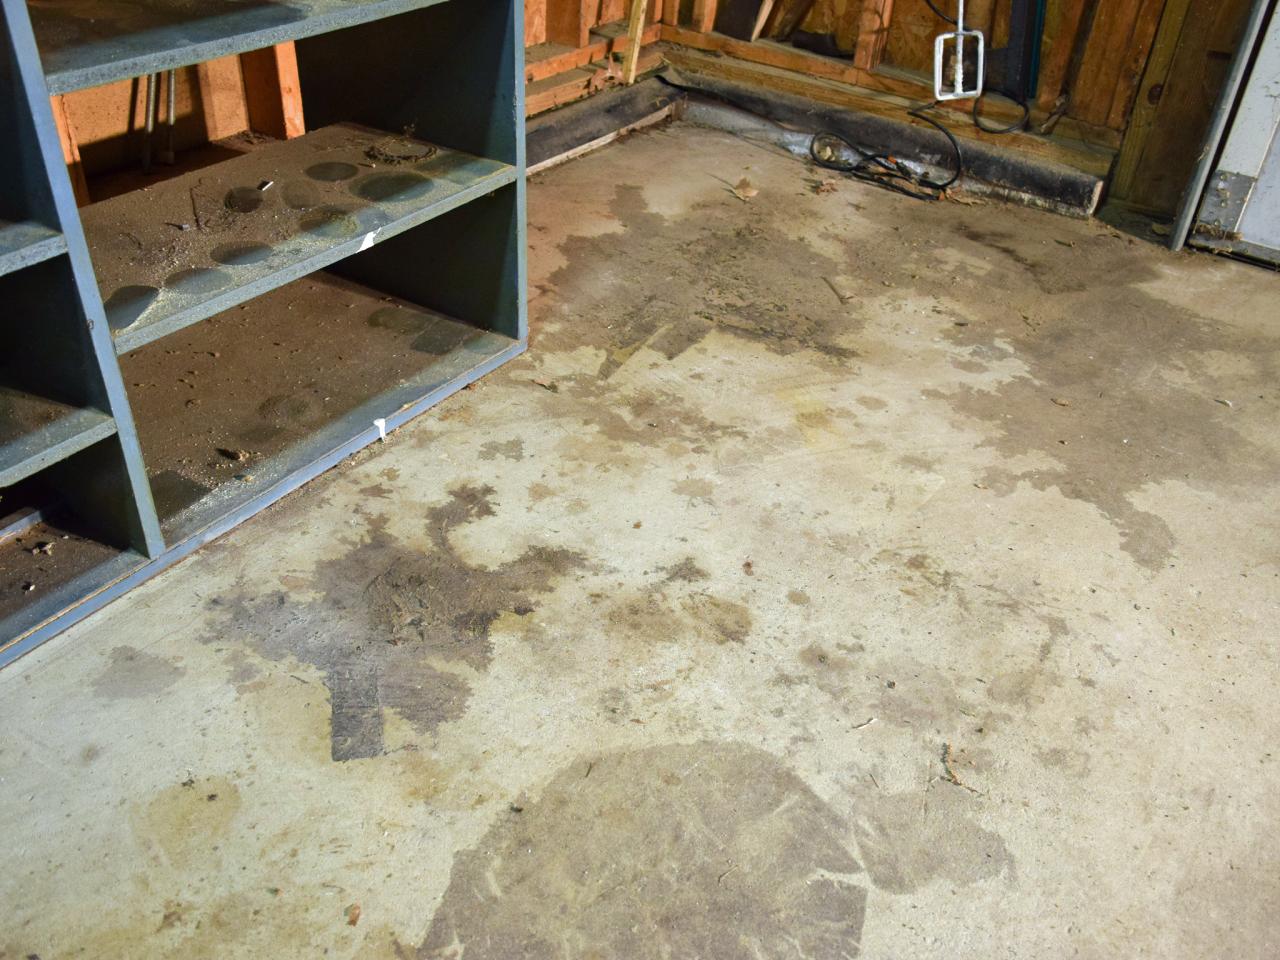
Before I even opened a can of epoxy paint, I learned the hard way that surface preparation is crucial. I always start by thoroughly cleaning the floor, removing all dirt, oil, and grease, and repairing any cracks or imperfections. A clean, dry surface ensures the paint adheres properly and lasts for years.
I also make sure to roughen the surface, either by grinding or sanding, to create a texture that helps the epoxy bond securely. This step is especially important for concrete, which can be smooth and non-porous. I’ve found that skipping this step can lead to peeling or bubbling down the road.
Once the surface is prepped, I apply a high-quality primer to enhance adhesion and ensure an even finish. I always follow the manufacturer’s instructions for mixing and application, as this helps avoid common pitfalls like soft spots or incomplete curing. Proper preparation and priming set the stage for a flawless, long-lasting epoxy floor.

Mixing and Applying Epoxy Paint
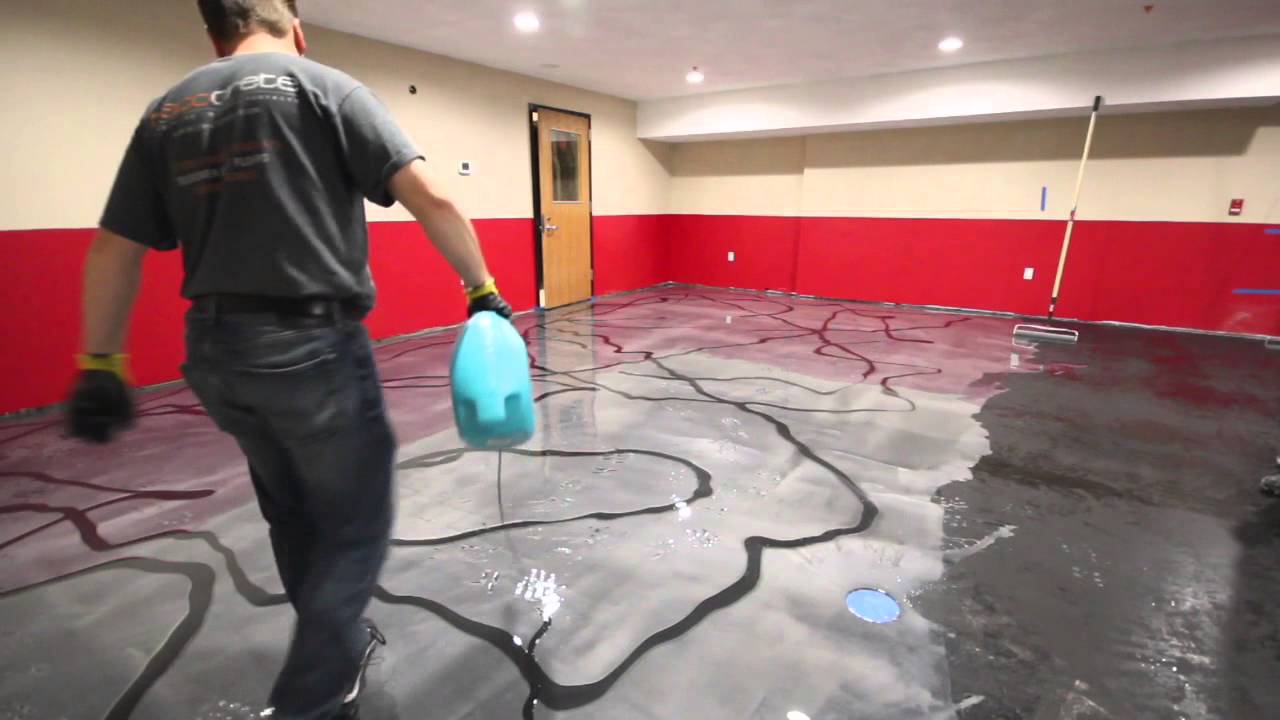
Mixing epoxy paint is a bit more involved than regular paint, but I’ve developed a routine that works for me. I always mix the resin and hardener in the correct ratios, using an electric drill with a paddle mixer for thorough blending. I only mix as much as I can apply within the pot life, usually about 30 minutes, to avoid wasted product.
I start by cutting in around the edges with a brush, then use a heavy-duty roller to apply the paint in thin, even layers. I work in manageable sections, rolling in an M or W pattern to ensure consistent coverage. The first coat often looks patchy on bare concrete, but I know the second coat will even everything out.
I always remove any masking tape before the paint begins to cure, and I make sure to work in a well-ventilated area. I’ve learned to be patient, allowing each coat to dry fully before applying the next. This attention to detail results in a smooth, glossy finish that looks professional and stands up to daily wear and tear.

Creative Techniques and Trends
One of the things I love most about epoxy floor paint is the opportunity to experiment with creative techniques. I’ve tried marbling, swirling, and even embedding natural elements like leaves or pebbles into the epoxy for a truly unique look. These techniques allow me to create floors that are not only beautiful but also conversation starters.
I’ve also kept up with the latest trends, such as metallic epoxy with depth perception and terrazzo-inspired designs. I’ve incorporated recycled materials and personal mementos into my projects, giving each floor a story and a sense of connection. These trends reflect a growing interest in sustainability and individuality in home design.
For open-concept spaces, I’ve used UV-resistant epoxy to create seamless transitions between indoor and outdoor areas. This approach makes rooms feel larger and more cohesive, and it’s perfect for modern homes that blur the line between inside and outside living.

Maintenance and Longevity
Maintaining an epoxy floor is surprisingly easy, which is one of the reasons I recommend it to friends and clients. I simply sweep or mop regularly to keep the surface clean and free of dirt and debris. I avoid harsh chemicals and abrasive cleaners, as these can dull the finish over time.
If I notice any scratches or wear, I can easily touch up the affected area or apply a fresh topcoat every few years. This keeps the floor looking new and protects it from stains and damage. I’ve found that epoxy floors are resistant to moisture, chemicals, and even hot tire pick-up, making them ideal for garages and workshops.
With proper care, an epoxy floor can last for decades. I always follow the manufacturer’s recommendations for maintenance and recoating, and I encourage others to do the same. The result is a floor that stays beautiful, durable, and easy to maintain for years to come.

What is the best way to prepare a concrete floor for epoxy paint?
Preparing a concrete floor for epoxy paint starts with thorough cleaning. I sweep, vacuum, and use a degreaser to remove all dirt, oil, and grease. Next, I repair any cracks or holes with a concrete filler and sand the surface to create a rough texture for better adhesion. Finally, I apply a primer before painting. Proper preparation ensures the epoxy bonds well and lasts for years.
How do I choose the right colors for my epoxy floor design?
I consider the mood and function of the space when choosing colors. For a bold, modern look, I opt for metallic shades like copper or iridescent blue. For a calming, minimalist vibe, I use neutral tones like gray or beige. Custom colors and patterns can also reflect personal style or brand identity, making the floor a focal point in any room.

What tools do I need to apply epoxy floor paint?
I use an electric drill with a paddle mixer to blend the resin and hardener, a brush for cutting in around edges, and a heavy-duty roller for applying the paint. I also use painter’s tape to protect walls and create clean lines. Proper tools ensure a smooth, even finish and make the application process easier.
How do I create patterns or designs with epoxy floor paint?
I use painter’s tape to section off areas and create patterns like checkerboards or stripes. For decorative effects, I add metallic pigments, decorative flecks, or swirls while the paint is wet. I’ve also experimented with embedding natural elements for a unique look. Working quickly and creatively allows for endless design possibilities.
How do I maintain an epoxy floor?
I maintain my epoxy floor by sweeping or mopping regularly to remove dirt and debris. I avoid harsh chemicals and abrasive cleaners, as these can dull the finish. If scratches or wear appear, I touch up the area or apply a fresh topcoat every few years. Proper maintenance keeps the floor looking new and extends its lifespan.
Is epoxy floor paint safe and durable?
Epoxy floor paint is safe once fully cured, but I always work in a well-ventilated area and wear protective gear during application. The cured floor is durable, resistant to moisture, stains, and chemicals, and easy to clean. With proper care, it can last for decades and withstand heavy use in both residential and commercial spaces.
Epoxy Coating & Epoxy Floor Coating Application
Epoxy Flooring Ideas to Extend the Life of Your Floors

How to Resurface a Garage Floor
Top Epoxy Flooring ideas flooring, epoxy floor, epoxy

How to Create Designs With Epoxy Floor Paint

Related Posts: