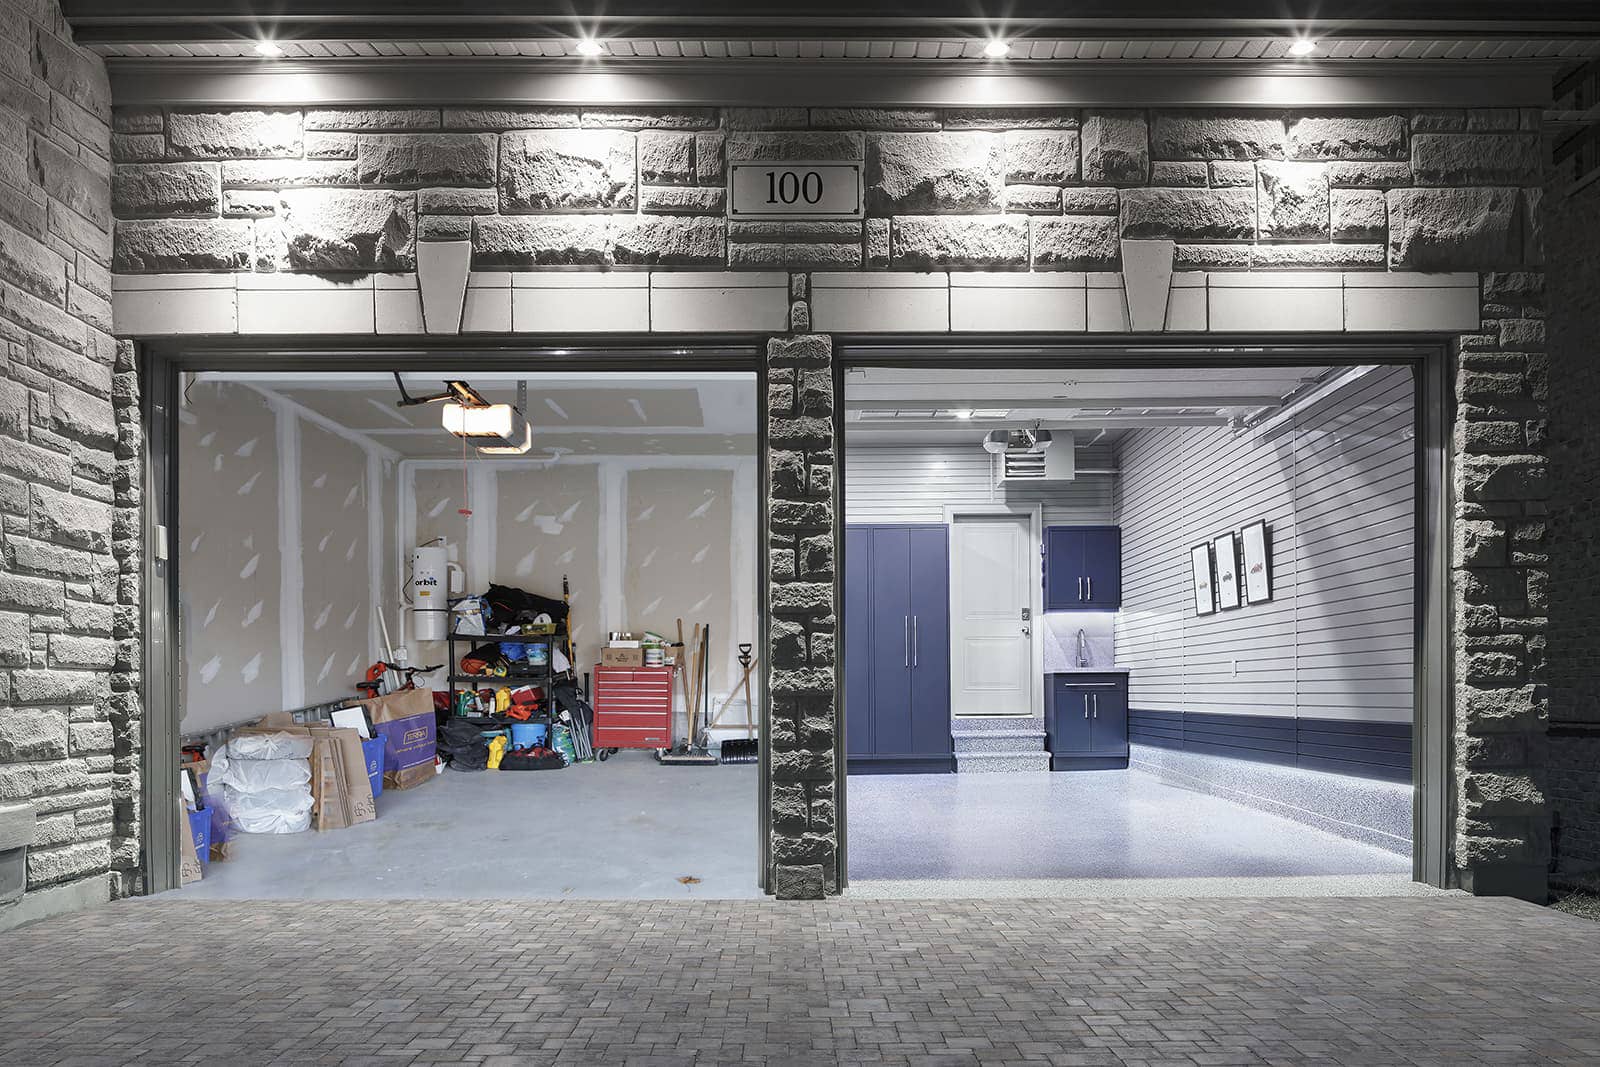
When I bought my house three years ago, the garage floor was an embarrassing disaster of oil stains, cracks, and decades of neglect that made me avoid parking inside altogether. The concrete was so stained and pitted that I actually felt ashamed when neighbors walked past my open garage door. I knew I needed to do something, but the thought of tackling such a large project felt overwhelming until a friend showed me his recent garage floor remodel. Seeing his transformation gave me the confidence to research my options and eventually complete what became one of my most satisfying home improvement projects to date.
Assessing Damage and Planning the Perfect Solution
My journey began with a brutally honest assessment of my garage floor’s condition, armed with a flashlight and notepad to document every crack, stain, and problem area. The previous homeowner had clearly used the garage as an auto repair space, leaving behind oil stains that had penetrated deep into the concrete and several significant cracks that had developed over the years. I spent an entire weekend mapping out problem areas and researching what each type of damage would mean for different flooring solutions.
The planning phase taught me that not all garage floor problems can be solved with a simple coating application. Some of my cracks were structural and required proper repair before any new flooring could be installed, while others were merely surface imperfections that could be addressed during the prep process. I learned to distinguish between active cracks that indicated ongoing settling and old, stable cracks that just needed filling and sealing.
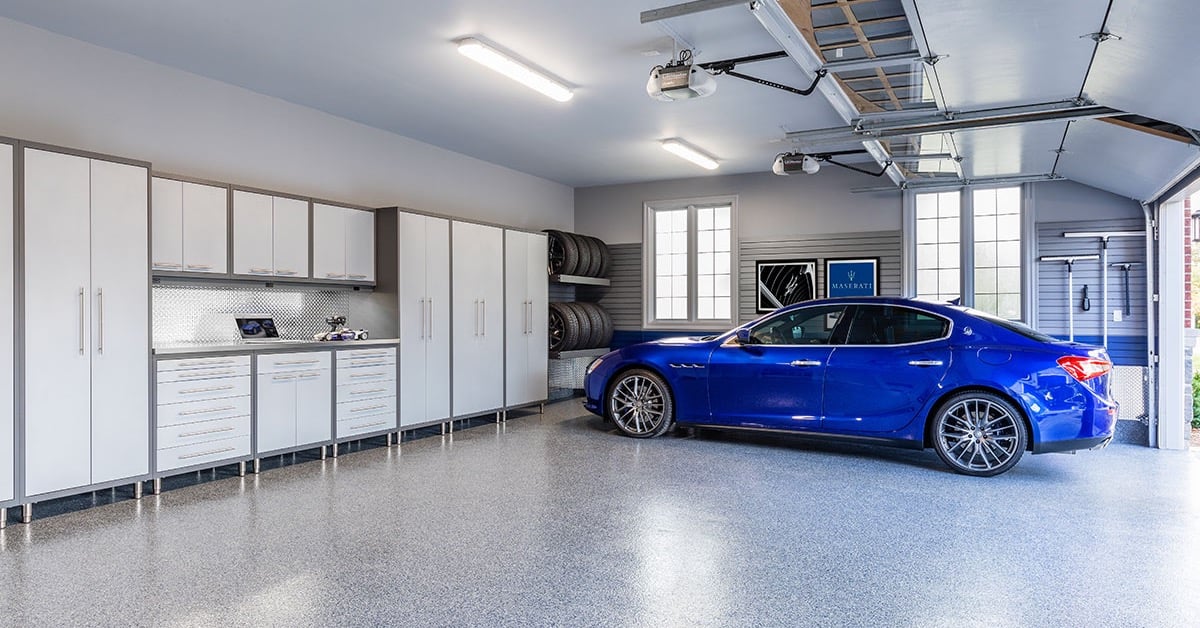
I also had to consider how I actually used my garage space and what I needed from the new floor. Beyond just parking cars, I wanted to use the space for woodworking projects, holiday decoration storage, and general household maintenance tasks. This meant I needed a flooring solution that could handle chemical spills, heavy equipment, temperature fluctuations, and still look good enough that I wouldn’t be embarrassed to have the garage door open during neighborhood activities.
Exploring Different Flooring Options and Their Trade-offs
My research into garage flooring options revealed a surprising variety of choices, each with distinct advantages and limitations that I hadn’t considered initially. Epoxy coatings seemed like the obvious choice based on their popularity, but I learned that quality varies dramatically between DIY kits and professional-grade systems. I spent weeks comparing different manufacturers, reading reviews, and talking to contractors about their preferred products and application methods.
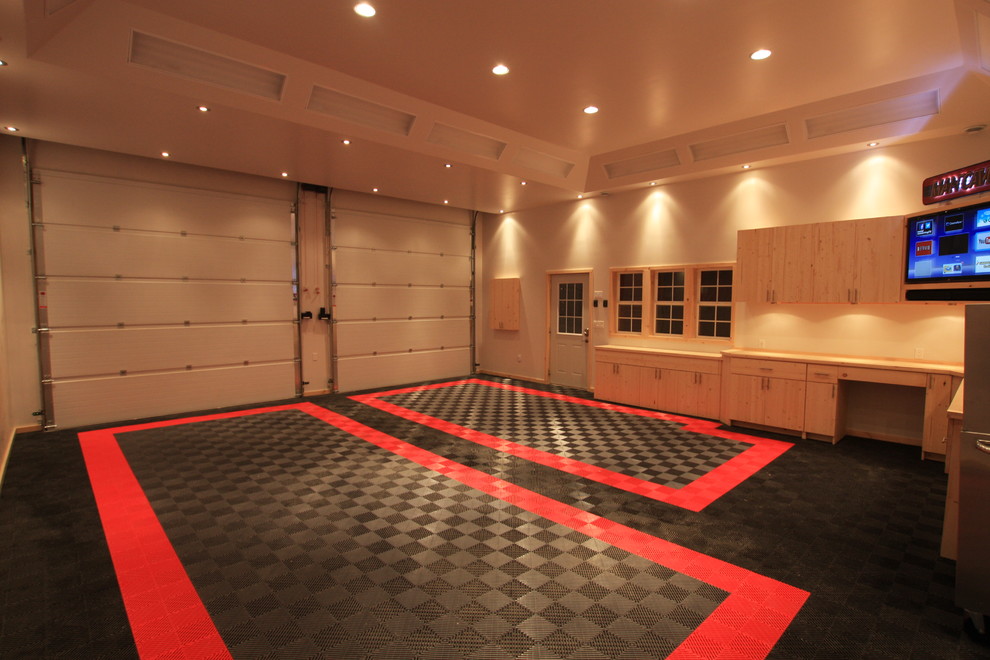
Interlocking garage floor tiles caught my attention as a potentially easier DIY option that wouldn’t require the extensive surface preparation needed for epoxy systems. I ordered samples from several manufacturers and was impressed by the quality and variety of textures and colors available. However, I discovered that these systems work best on relatively level floors and might not be ideal for my garage’s slightly sloped surface, designed for water drainage.
I also considered polished concrete and decorative overlays, but these options required professional installation and exceeded my budget for the project. After weighing factors including cost, durability, appearance, and my comfort level with DIY installation, I narrowed my choices to either a high-quality epoxy system or premium interlocking tiles. The decision ultimately came down to which option would give me the most satisfaction and long-term value for my investment and effort.

Surface Preparation: The Foundation of Success
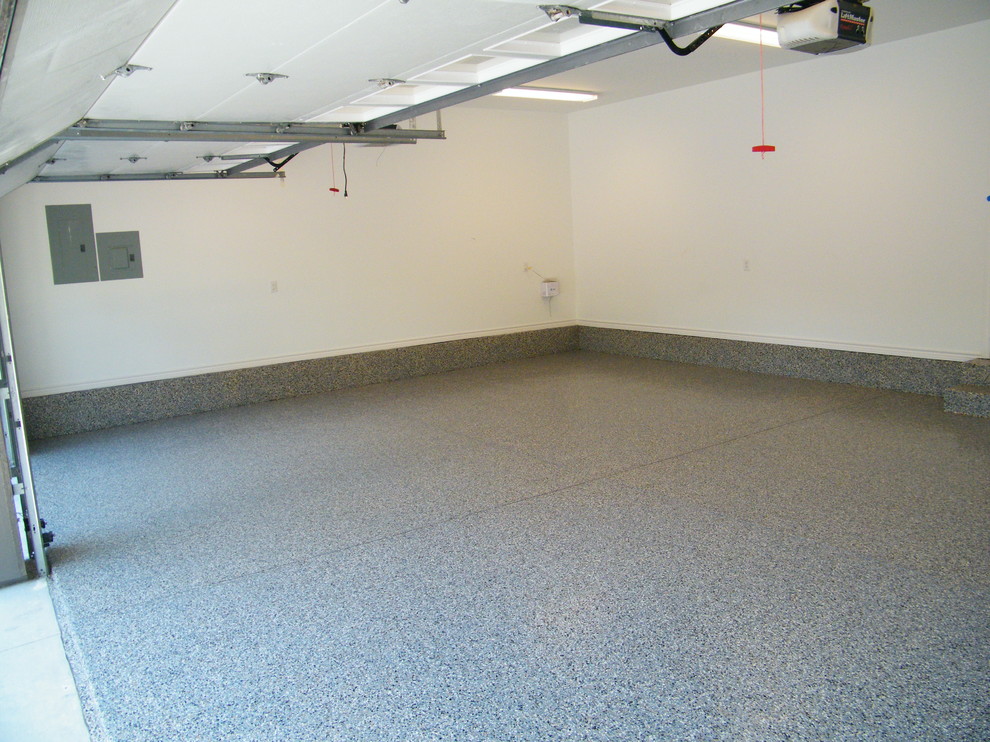
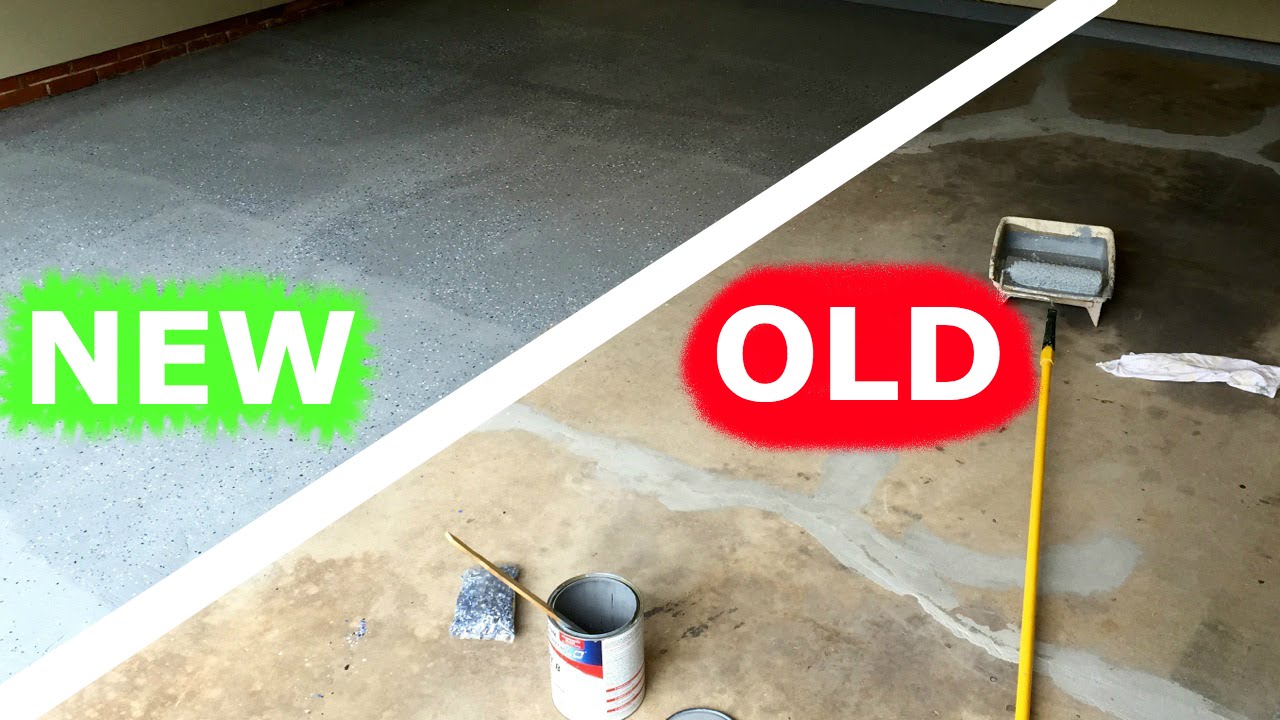
The surface preparation phase proved to be the most labor-intensive part of my entire garage floor project, consuming nearly 60% of my total time investment. I learned that skipping or rushing this phase would virtually guarantee coating failure within a few years, so I committed to doing it right even though it meant weeks of grinding, cleaning, and repair work. The amount of dust and debris generated during this phase was shocking, requiring extensive masking of stored items and multiple shop vacuum rentals.
Crack repair became a project within a project, as I discovered that several cracks were deeper and more extensive than they appeared on the surface. I spent considerable time researching proper concrete crack repair techniques and invested in quality repair compounds designed specifically for structural applications. Some cracks required routing out to create proper repair channels, while others needed injection with specialized crack repair resins to ensure long-term stability.
The final surface preparation step involved acid etching to create the proper surface profile for coating adhesion. This chemical process was more involved than I expected, requiring careful attention to safety protocols and proper disposal of neutralized etching solution. I learned that surface preparation shortcuts that might save a day of work could result in coating failure that would require starting the entire project over, making thorough preparation the best insurance policy for long-term success.

Installation Day: Managing the Process and Timeline
Installation day required careful orchestration of materials, tools, and timing to ensure professional results within the working time constraints of my chosen flooring system. I had learned from online forums that many DIY garage floor projects fail due to poor planning during the application phase, so I created detailed checklists and staged all materials according to the sequence of use. The weather forecast became critically important, as temperature and humidity would directly affect curing times and final appearance.
Working alone on a 500 square foot garage floor taught me the importance of breaking the project into manageable sections while maintaining consistent application techniques throughout. I started with the most visible areas first, reasoning that any learning curve effects would be less noticeable in corners and less prominent sections. The physical demands of the installation process were greater than anticipated, requiring frequent breaks and careful pacing to maintain quality workmanship throughout the long day.
The final hours of installation proved the most stressful, as I raced against the material’s pot life while ensuring complete coverage and proper texture where needed. I learned that having a helper for larger projects makes a significant difference in both efficiency and final quality, especially during the application of decorative flakes or anti-slip additives. Despite the pressure, seeing the transformation take place in real-time provided incredible motivation to push through fatigue and complete the project properly.
:max_bytes(150000):strip_icc()/BW-Garage-Angled-edit-56a344165f9b58b7d0d12d28.jpg)
Curing, Break-in, and Initial Performance Evaluation
The curing period tested my patience more than any other phase of the project, as the new floor looked fantastic but couldn’t be used for several days while the coating reached full strength. I learned that different flooring systems have vastly different cure schedules, with some allowing foot traffic within hours while others require days before any use. Understanding and respecting these timelines proved crucial for achieving the performance characteristics I had invested time and money to obtain.
During the break-in period, I gradually increased the floor’s load and use intensity while monitoring for any signs of premature wear or adhesion problems. The first few weeks taught me how the new surface would respond to typical garage activities like parking cars with wet tires, occasional chemical spills, and the weight of stored seasonal items. I kept detailed notes about performance under different conditions to help me understand what maintenance practices would be most effective.
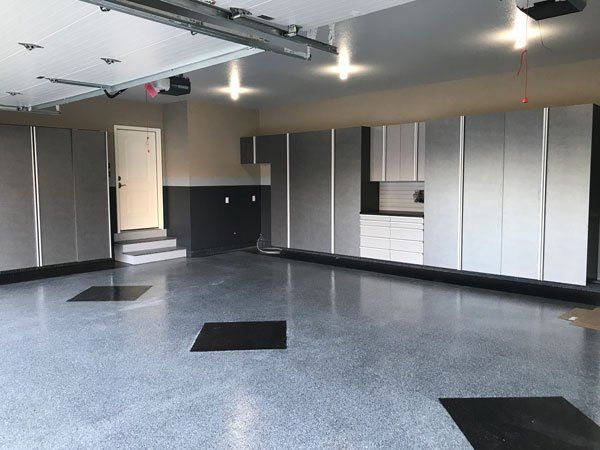
The initial performance evaluation revealed both the successes and shortcomings of my installation technique and material choices. Areas where I had been most careful during surface preparation and application showed flawless performance, while a few spots where I had rushed or cut corners showed minor imperfections that served as learning opportunities. Overall, the transformation exceeded my expectations and provided valuable insights for future projects or maintenance requirements.

Long-Term Maintenance and Lessons Learned
Living with my remodeled garage floor for eighteen months now has provided real-world insight into maintenance requirements and long-term performance under typical residential use. The daily maintenance routine proved much simpler than I expected, with regular sweeping and occasional mopping keeping the floor looking nearly new despite heavy use for automotive work, woodworking projects, and general storage. The improved appearance has encouraged me to keep the entire garage more organized and clean.
I learned that preventive maintenance practices established early make a huge difference in preserving the floor’s appearance and extending its lifespan. Simple measures like using drip pans under vehicles, cleaning spills immediately, and avoiding dragging sharp or heavy objects across the surface have prevented most potential damage. When minor issues do occur, addressing them quickly prevents small problems from becoming major repairs.
The most valuable lesson from this project was understanding that garage floor remodeling is an investment in both property value and quality of life. Beyond the obvious improvements in appearance and functionality, having a floor I’m proud of has transformed how I use and think about my garage space. The project gave me confidence to tackle other home improvement challenges and provided a foundation for turning my garage into a true extension of my living space rather than just a utilitarian storage area.
How much should I budget for a DIY garage floor remodel, and what are the major cost factors?
My 500 sq ft garage cost about $1,200 in materials, with surface prep supplies ($300), quality epoxy system ($600), tools and equipment rental ($200), and miscellaneous items ($100). Labor would have doubled this cost. The biggest variables are floor condition and chosen system quality. Budget 20% extra for unexpected repairs or additional materials. Professional installation runs $3-8 per square foot, depending on complexity and local rates.
What’s the most important factor for long-term success with garage floor coatings?
Surface preparation is absolutely critical and consumed 60% of my project time. Proper cleaning, crack repair, and surface profiling determine whether your coating lasts 2 years or 20 years. I’ve seen beautiful applications fail within months due to inadequate prep work. Don’t rush this phase, even if it means extending your project timeline. The preparation work isn’t glamorous, but it’s the foundation of everything that follows.

How long does the installation process take, and when can I use my garage again?
Plan for 2-3 weekends total: one for assessment and prep work, one for surface preparation and repairs, and one for installation. Cure times vary by system, from 24 hours for light foot traffic to 7 days for full chemical resistance and heavy use. I waited 5 days before parking cars and 2 weeks before resuming heavy projects. Temperature affects curing significantly, so plan accordingly for your local climate.
Should I hire professionals or attempt this as a DIY project?
DIY is definitely possible with proper planning and realistic expectations about the work involved. I saved about $2,000 in labor costs, but invested 4 full weekends in the project. Consider professional installation if you have extensive concrete damage, limited time, or want warranty coverage. DIY makes sense if you enjoy learning new skills and have experience with detail-oriented projects requiring patience and precision.

What maintenance routine keeps the floor looking its best long-term?
Daily: sweep or blow out debris. Weekly: damp mop with pH-neutral cleaner. Monthly: inspect for damage and clean any stains immediately. Annually: deep clean and assess for touch-up needs. I use furniture pads under heavy equipment and drip pans for vehicles during long-term storage. The key is establishing good habits early; most damage prevention requires minimal effort but makes a huge difference in longevity.
What would you do differently if starting this project over?
I’d rent a concrete grinder for surface prep instead of trying to save money with hand tools; the time and effort savings would have been worth the extra cost. I’d also have a helper for installation day to manage timing better. Most importantly, I’d start the project earlier in the year to avoid cool weather that extends curing times. The results exceeded my expectations, but better planning could have made the process much easier.

Why a Garage Floor Replacement May Be Smarter Than a Repair

Things To Look For in a Garage Remodel Company
Garage Makeover: The Floor
Garage Floor – Traditional – Shed
Berman Garage Remodel
HOW TO PAINT YOUR GARAGE FLOOR AMAZING RESTORATION!
Awesome Home Garage Remodel with RaceDeck Garage Flooring
Related Posts: