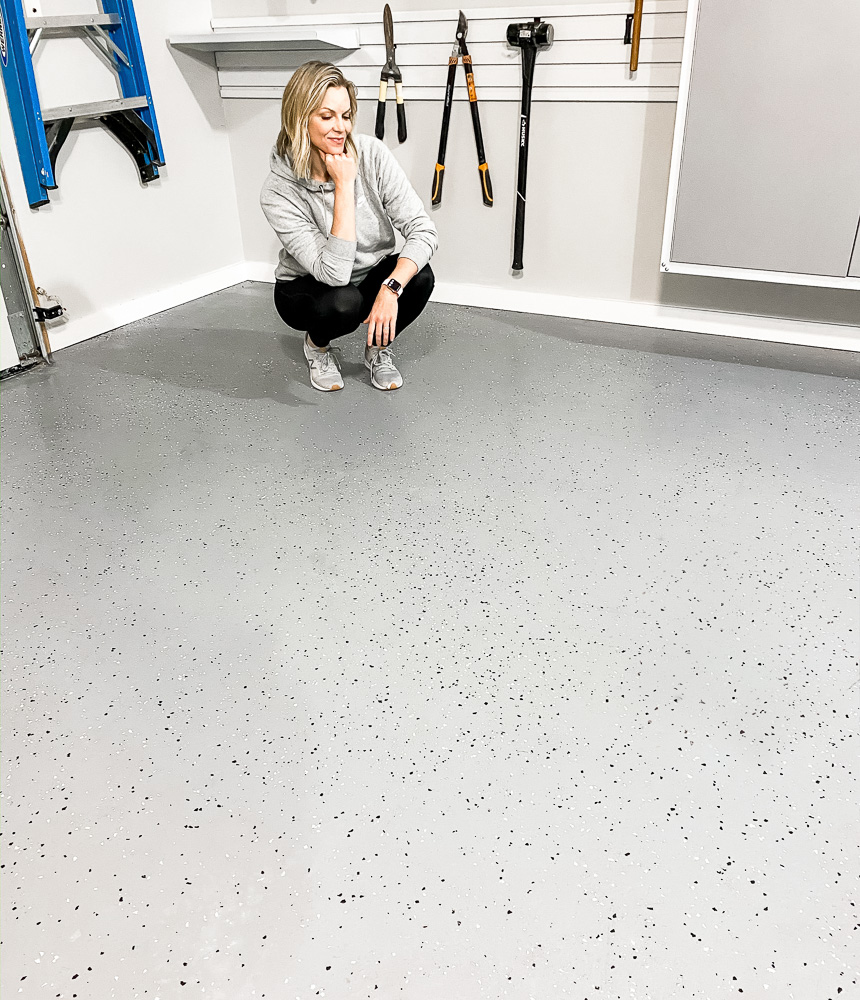
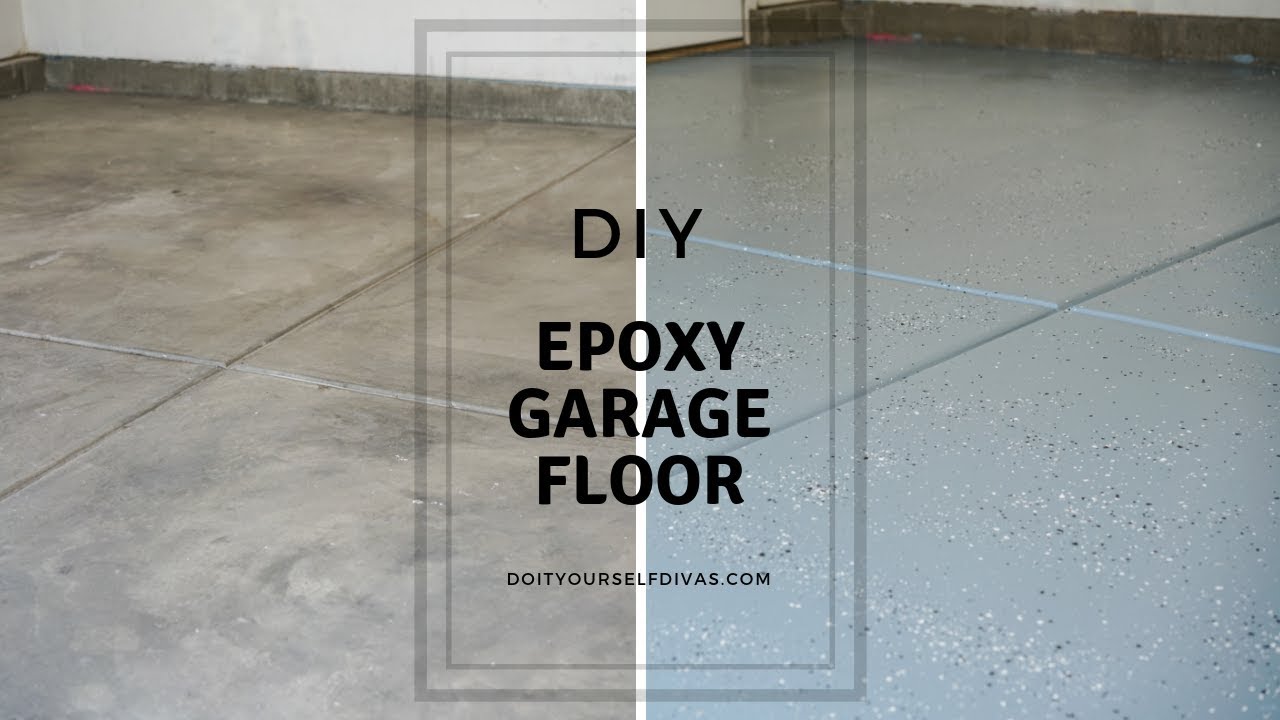
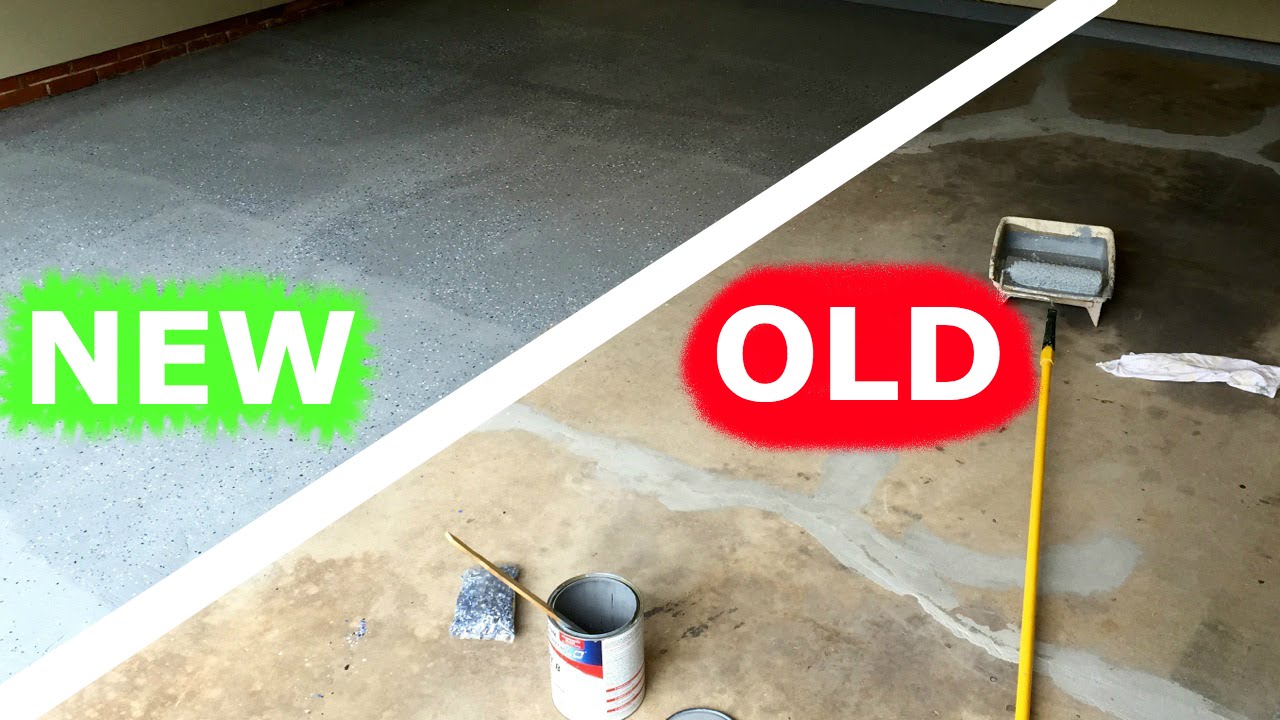
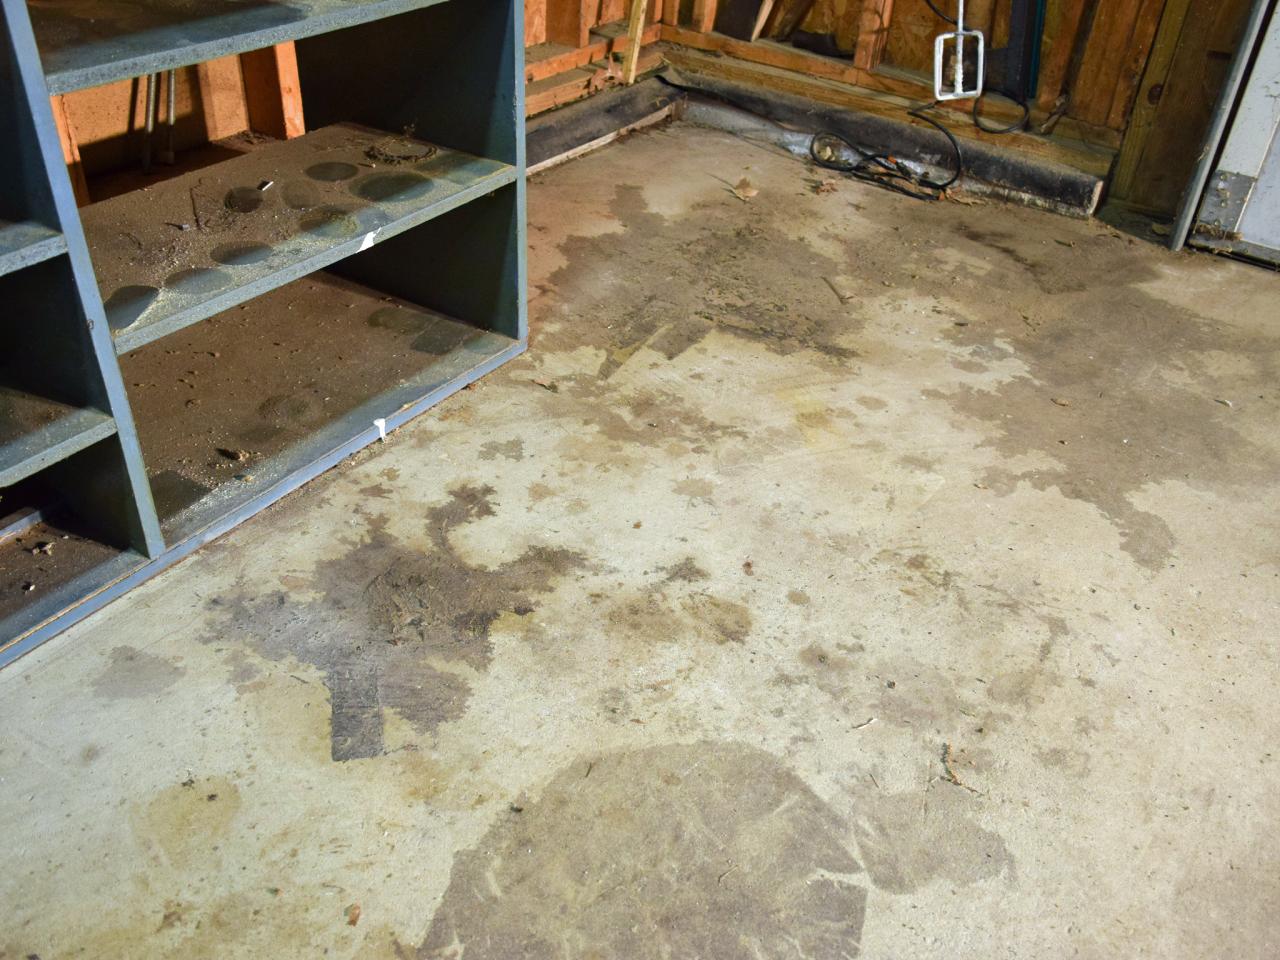
When I first looked at my oil-stained, cracked concrete garage floor five years ago, I knew something had to change. The concrete was absorbing every spill, collecting dust like a magnet, and making the entire space feel dingy and unprofessional. After researching options, I decided to tackle painting it myself. What followed was a journey of trial, error, and eventually triumph that taught me everything about transforming a garage floor from eyesore to showpiece.
Choosing the Right Paint: Learning from My First Mistake
My initial attempt used regular latex floor paint from the hardware store, thinking all garage floor paints were essentially the same. Within six months, tire marks appeared, hot tire pickup occurred regularly, and the paint began peeling in high-traffic areas. I learned that garage floors need specialized coatings designed to handle automotive chemicals, hot tires, and heavy loads. This expensive lesson taught me to invest in quality products from the start.
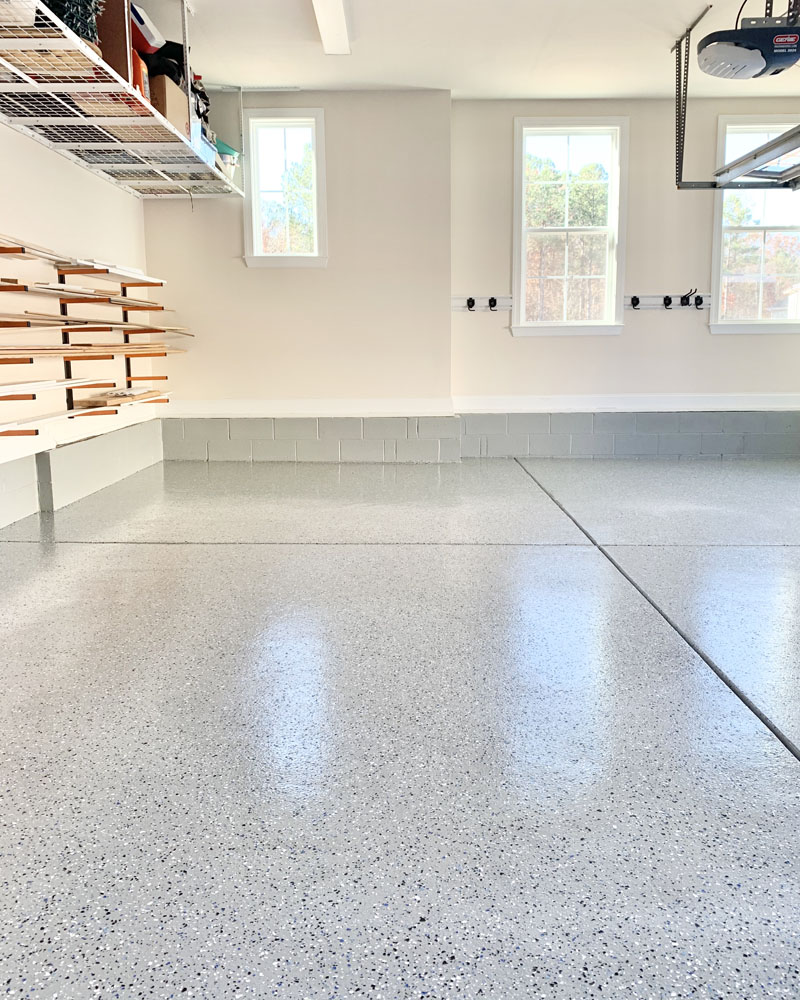
Epoxy paint became my go-to choice after extensive research and talking with professionals. These two-part systems create a chemical bond that’s incredibly durable and resistant to most garage hazards. I discovered that water-based epoxy paints are easier to work with and clean up, while solvent-based versions offer superior durability and chemical resistance. The key is matching the paint system to your specific needs and environmental conditions.
Acrylic garage floor paint offers a middle-ground option that I’ve used successfully in lighter-duty applications. These single-component paints are much easier to apply than epoxy systems and still provide good protection against normal garage use. I recommend them for newer concrete floors or areas that won’t see heavy automotive use. The trade-off is longevity, expect to repaint every 3-5 years versus 7-10 years with quality epoxy systems.
Essential Preparation: The Foundation of Success
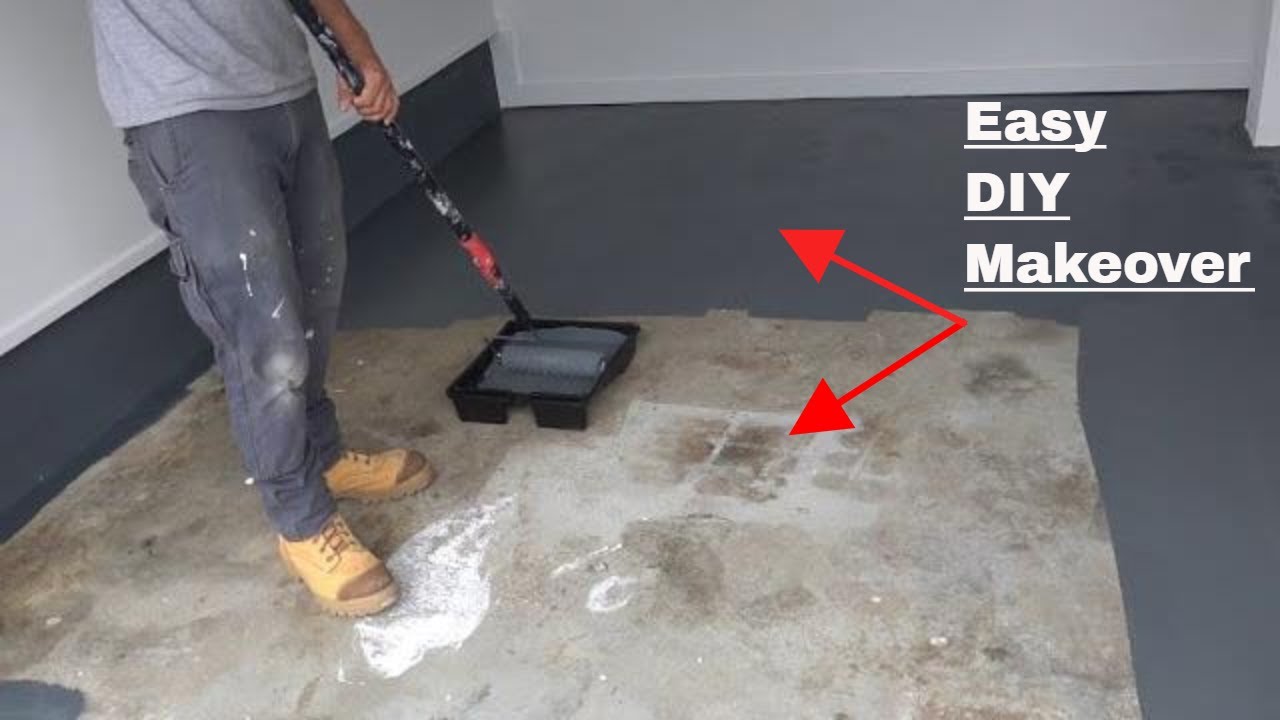
Surface preparation makes or breaks any garage floor painting project, something I learned through painful experience. My first attempt involved basic sweeping and mopping, which resulted in poor adhesion and premature failure. I now spend at least two full days on preparation alone. The concrete must be completely clean, dry, and properly profiled for the paint to bond effectively and last years rather than months.
Concrete etching became a crucial skill I had to master. I use a muriatic acid solution to open the concrete pores and remove any remaining contaminants. The process involves careful mixing, proper ventilation, and thorough neutralization afterward. I always test a small area first to ensure proper etching depth. The concrete should have a light sandpaper texture when properly etched. This step cannot be skipped or shortcuts taken.
Oil stain removal requires patience and the right products. I’ve tried everything from cat litter to commercial degreasers, finding that TSP (trisodium phosphate) works best for most stains. Stubborn stains sometimes need multiple treatments or mechanical grinding. I learned to address every stain before etching, as acid can set certain stains permanently. Taking time for thorough stain removal prevents disappointment later when stains bleed through the new paint.

Weather and Timing: Planning for Perfect Conditions
Temperature and humidity control became my obsession after several failed attempts due to poor environmental conditions. Garage floor paint requires specific temperature ranges, typically 50-80°F, and low humidity for proper curing. I now check weather forecasts for at least a week ahead and plan projects during stable weather periods. Rushing due to weather changes leads to expensive do-overs that I’ve experienced firsthand.
Seasonal timing significantly impacts project success and my comfort during application. Spring and fall offer the best conditions in most climates, avoiding summer heat and winter cold. I learned that concrete temperature matters as much as air temperature; hot concrete from summer sun can cause paint to cure too quickly, creating application problems. I now start early morning during warm weather to avoid these issues.
Ventilation planning became crucial for both safety and paint performance. I set up fans to create cross-ventilation, especially important when using solvent-based products. Proper air circulation helps maintain ideal humidity levels and removes harmful vapors. I learned to check wind direction and adjust fan placement accordingly. Good ventilation also speeds curing time and improves final finish quality, making the extra effort worthwhile.
Tools and Materials: Building Your Success Kit
Quality tools make an enormous difference in final results and application ease. I initially tried using cheap brushes and rollers, which left streaks, shed fibers, and made the job much harder than necessary. I now invest in high-quality nap rollers specifically designed for garage floor paint. Good brushes for cutting in around edges and proper mixing equipment are equally important for professional-looking results.
Safety equipment protects both health and the project itself. I wear respirators rated for paint vapors, chemical-resistant gloves, and safety glasses throughout the process. Knee pads save tremendous discomfort during detail work. I also keep neutralizing agents handy for acid etching and first aid supplies readily available. Taking safety seriously prevents accidents and allows focus on achieving quality results.
Measuring and mixing tools ensure proper paint ratios and coverage calculations. I use graduated mixing containers and precise measuring cups for two-part systems. A drill-mounted mixing paddle creates thorough, lump-free mixtures essential for proper curing. I calculate square footage carefully and order 10-15% extra paint to account for concrete porosity and touch-ups. Having proper quantities prevents color-matching problems later.
Application Techniques: Achieving Professional Results
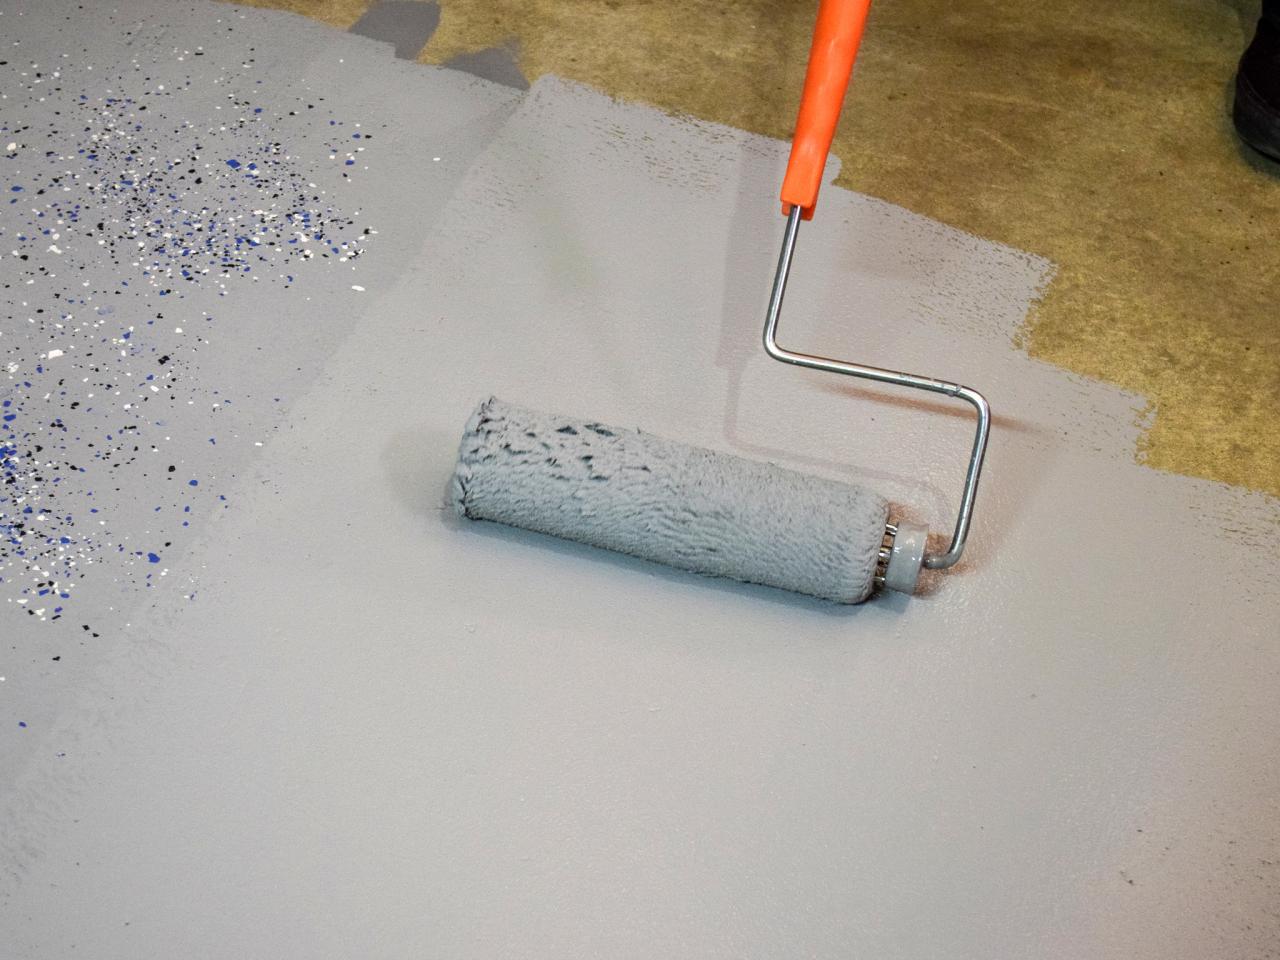
Paint mixing requires precision and timing that I learned through experience. Two-part epoxy systems have limited working time once mixed, so I prepare everything before combining components. I mix only what I can apply within the pot life, typically 30-45 minutes, depending on temperature. Thorough mixing is critical; I use a drill mixer for at least three minutes to ensure complete chemical reaction and uniform color throughout.
Application technique determines the final appearance and durability. I start with cutting in around edges using a quality brush, then use a roller to apply paint in overlapping patterns. Maintaining a wet edge prevents lap marks and ensures a uniform appearance. I work in manageable sections, usually 4×4-foot areas, to maintain control and quality. Proper roller technique creates the texture that helps hide minor imperfections while providing good coverage.
Timing between coats requires careful attention to manufacturer specifications and environmental conditions. I learned that applying second coats too early can cause solvent entrapment and poor adhesion. Too late, and the coats may not bond properly. I test tackiness with a clean finger in an inconspicuous area. The surface should be tacky but not wet, typically 4-8 hours depending on conditions. Patience during this phase prevents costly mistakes.
Maintenance and Longevity: Protecting Your Investment
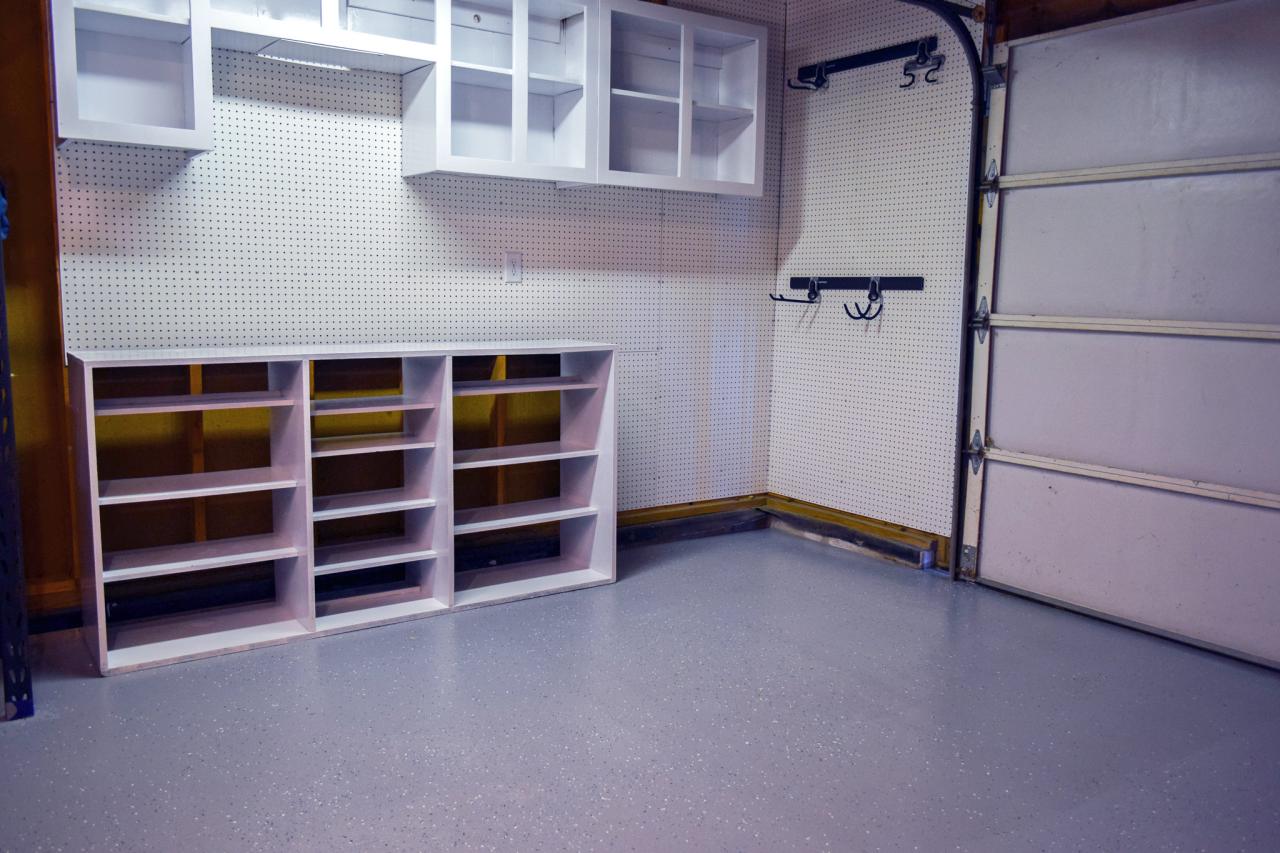
Daily maintenance routines keep painted garage floors looking great for years. I sweep regularly using a dust mop to prevent abrasive particles from wearing the paint surface. For deeper cleaning, I use mild detergent solutions and avoid harsh chemicals that can damage the paint film. Hot water and gentle scrubbing handle most automotive spills effectively. Consistent maintenance prevents small problems from becoming major issues requiring repainting.
Preventive measures extend paint life significantly beyond basic cleaning. I place mats under vehicles during winter to catch salt and moisture. Drip pans under classic cars prevent oil stains that can soften paint over time. I inspect the floor regularly for chips or scratches, addressing them immediately with touch-up paint. These small efforts prevent water infiltration and paint failure that would require complete refinishing.
Long-term care includes periodic deep cleaning and assessment for recoating needs. I perform thorough cleaning twice yearly, checking for wear patterns and areas needing attention. High-traffic areas typically show wear first and may need touch-ups every few years. I keep leftover paint properly sealed for these maintenance needs. Planning for eventual recoating helps budget for long-term garage floor maintenance and keeps the space looking professional.
How long should I wait before driving on freshly painted garage floors?
I always wait at least 72 hours before driving on newly painted floors, though I prefer a full week for complete cure. The paint may feel dry after 24 hours, but the full chemical cure takes longer. Hot tires on incompletely cured paint cause permanent damage. I learned this lesson the hard way with my first project when I got impatient and left permanent tire marks.
What’s the best way to handle existing oil stains before painting?
I use TSP (trisodium phosphate) for most oil stains, applying it as a paste and letting it sit overnight before scrubbing. Stubborn stains sometimes need multiple treatments or mechanical grinding. The key is removing as much oil as possible before etching, because acid can set certain stains. I always test stain removal methods in small areas first.
Can I paint over previously painted concrete, or do I need to remove old paint first?
It depends on the old paint’s condition and type. If it’s adhering well with no peeling, I lightly sand and clean before applying new paint. Peeling or incompatible paint must be completely removed first. I use chemical strippers or mechanical grinding, depending on the situation. Proper adhesion testing prevents future failures that are expensive to fix.
How do I know if my concrete is ready for paint after etching?
Properly etched concrete should have a light sandpaper texture and absorb water readily. I test by sprinkling water on the surface; it should soak in rather than bead up. The concrete should also be completely neutral. I test pH with strips to ensure all acid residue is removed. Any white powdery residue must be cleaned off completely before painting.

What temperature and humidity conditions work best for garage floor painting?
I aim for temperatures between 60-80°F with humidity below 85% for best results. Concrete temperature matters too; I avoid painting when the concrete is hot from direct sunlight. I check weather forecasts for stable conditions lasting at least three days. Poor environmental conditions cause application problems and poor curing, which lead to premature paint failure.
How often will I need to repaint my garage floor with proper maintenance?
Quality epoxy paint systems last 7-10 years with proper preparation and maintenance in typical residential garages. Acrylic paints need repainting every 3-5 years. Factors affecting longevity include traffic levels, chemical exposure, and maintenance consistency. I touch up high-wear areas as needed and perform deep cleaning twice yearly to maximize paint life and appearance.

DIY Epoxy Garage Floors
How to Resurface a Garage Floor
How to paint concrete floors – DIY makeover
How to Paint a Garage Floor – Clean and Scentsible

How to Resurface a Garage Floor
Related Posts: