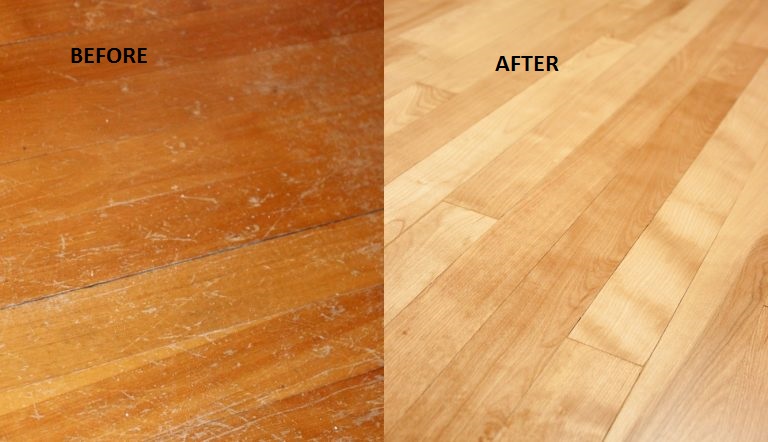
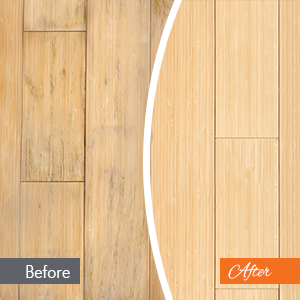
After eight years of heavy use, my bamboo floors desperately needed refinishing. The high-traffic areas near doorways had worn through the finish completely, scratches covered the surface, and the once-beautiful honey color had faded unevenly from sun exposure. I considered replacing the floors entirely, but after getting quotes and researching my options, I decided refinishing would save me thousands of dollars while giving me essentially new floors.
The project took me two full weekends and tested my patience, but seeing the transformation from dull and damaged to gleaming and beautiful made every hour worthwhile. I learned so much about bamboo’s unique properties and the specific techniques required for successful refinishing. Let me share my complete experience and the lessons that will help you achieve professional results.
Determining If Your Bamboo Floors Can Be Refinished
Not all bamboo flooring can be refinished, and this was the first critical lesson I learned. Solid bamboo floors with adequate thickness can typically be refinished one to three times depending on how much material exists above the tongue-and-groove joint.
I measured my planks at the heating vents where I could see the cross-section, confirming I had solid bamboo that was thick enough to sand. Engineered bamboo with a thin wear layer often cannot be refinished because sanding would cut through to the substrate layers beneath.
I used the paper test to estimate remaining thickness before committing to refinishing. I slipped a business card into gaps near walls and vents, measuring how far it inserted before hitting the tongue. This crude measurement gave me confidence that I had at least 3mm of material above the tongue, enough for one refinishing. Professional floor installers can provide more precise measurements, and I consulted one who confirmed my floors were good candidates for refinishing.
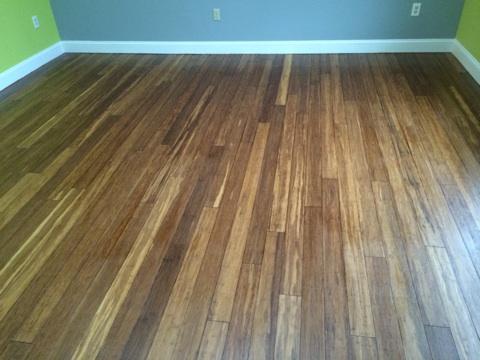
Strand-woven bamboo, which I have throughout most of my home, is actually the best type for refinishing because of its extreme density and thickness. The compressed fiber construction means you can sand more aggressively without risking damage.
Horizontal and vertical bamboo constructions are softer and thinner, requiring gentler sanding techniques and potentially limiting how many times they can be refinished. Understanding your bamboo type helps set realistic expectations for the refinishing process and results.
Preparing Your Space and Gathering Equipment
Preparation was absolutely essential for successful refinishing, and I spent nearly as much time prepping as actually sanding. I completely emptied my living room and dining room, moving furniture to the garage and covering it with tarps. Bamboo dust is incredibly fine and gets everywhere, so I sealed doorways to other rooms using plastic sheeting and painter’s tape. I also covered HVAC vents with plastic and tape to prevent dust from circulating throughout my entire home.
Renting professional-grade equipment was one of the best decisions I made. I rented a drum sander for the main floor area and an edge sander for corners and borders from my local tool rental center. The rental cost about $120 for the weekend, including sandpaper in various grits. I also rented a buffer for applying the final finish coats. Attempting this project with consumer-grade tools would have taken exponentially longer and produced inferior results.
I gathered all necessary supplies before starting: sandpaper in 36, 60, 80, and 120 grits, wood filler that matched my bamboo’s color, tack cloths, vacuum with HEPA filter, respirator mask rated for fine dust, safety goggles, knee pads, and several gallons of water-based polyurethane. Having everything on hand prevented mid-project trips to the hardware store. I also borrowed a moisture meter from a friend to verify my floor’s moisture content was appropriate for refinishing.
Sanding Your Bamboo Floors Properly
I started sanding with 36-grit paper to remove the old finish and level any minor warping or cupping. The drum sander is powerful and can damage floors quickly if you’re not careful, so I practiced in my closet first. I learned to keep the sander moving constantly, never letting it sit in one spot, and to overlap each pass by about half the sander’s width. I worked with the grain direction, which in my case meant parallel to the longest walls.
The initial sanding pass removed most of the old finish but left some stubborn spots, particularly in corners and along walls where the drum sander couldn’t reach. I used the edge sander for these areas, blending carefully into the drum-sanded sections to avoid creating obvious transitions. This edge work required patience and multiple passes with different grits to achieve smooth results. I vacuumed thoroughly after each grit change, using my HEPA vacuum to capture the incredibly fine bamboo dust.
I progressively worked through 60, 80, and 120-grit sandpaper, each pass smoothing the surface further and removing scratches from the previous grit. After the final 120-grit sanding, I examined the floor carefully under bright lighting, looking for any remaining scratches, stains, or uneven areas. I spot-sanded problem areas by hand using 120-grit paper wrapped around a sanding block. The floor felt silky smooth when I ran my hand across it, indicating I was ready for finishing.
Applying Stain and Finish Coats
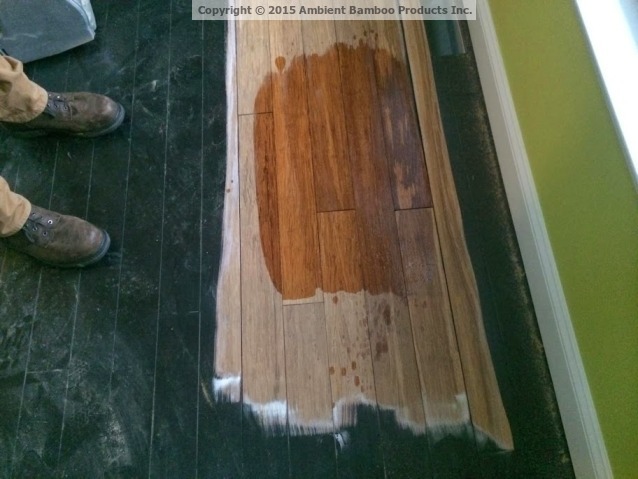
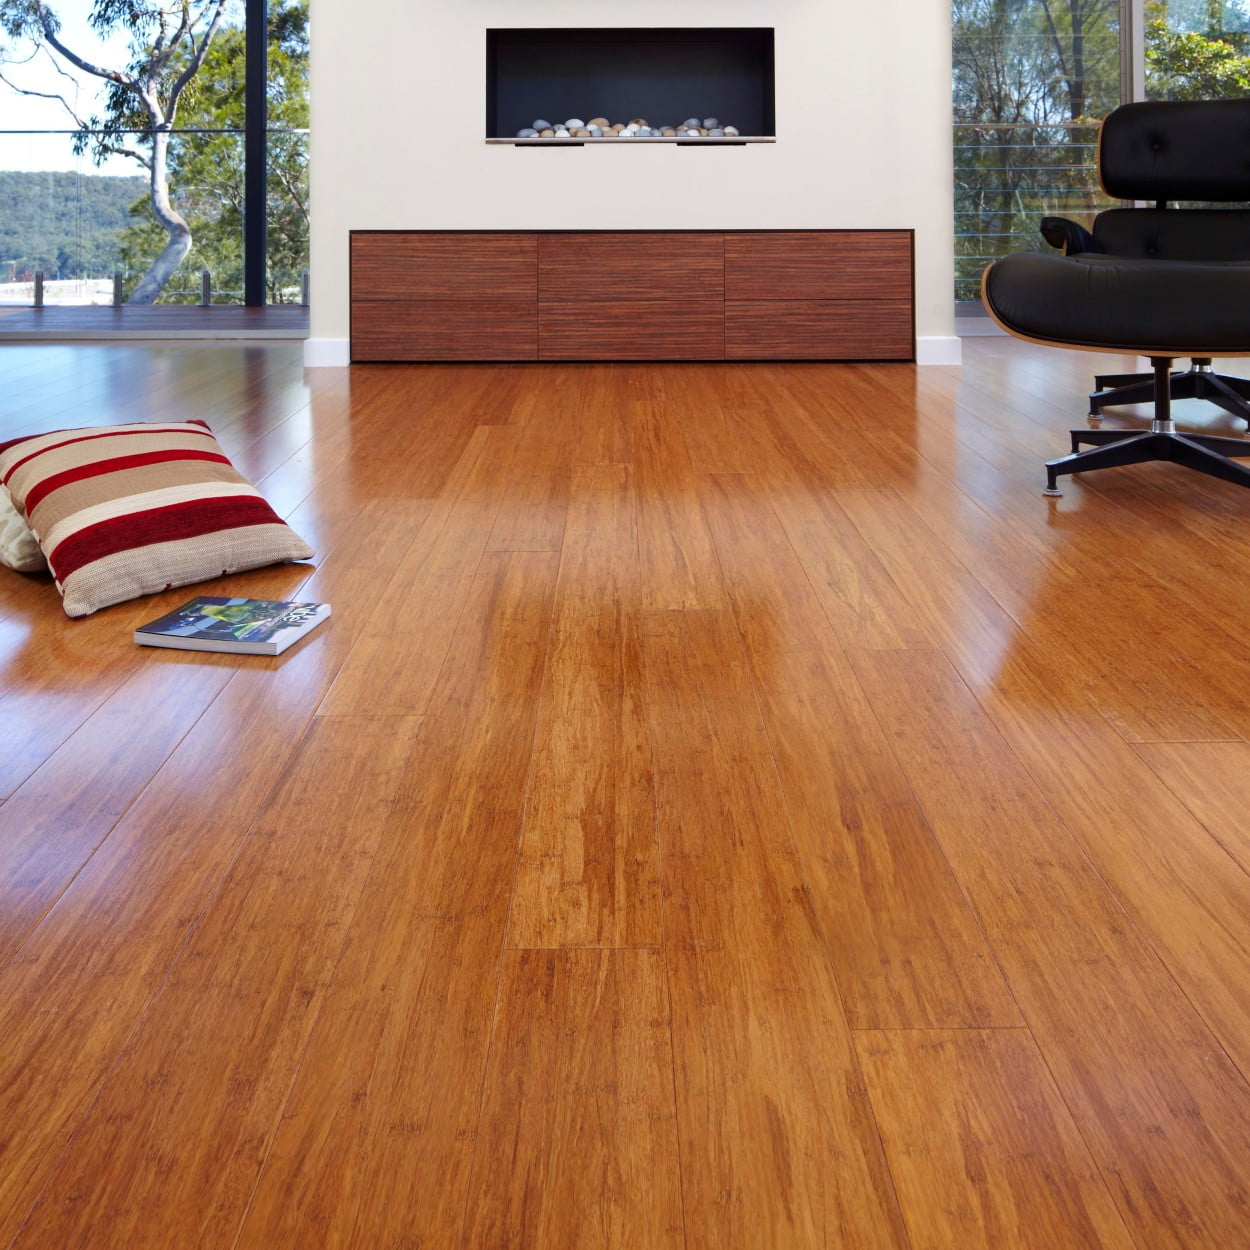
I decided against staining my bamboo, preferring to maintain its natural honey color. However, if you want to change your floor’s color, staining must happen after sanding and before applying polyurethane. I tested stain samples on scrap pieces and areas inside closets before committing. Bamboo absorbs stain differently than hardwood, often blotching if you don’t use pre-stain conditioner, so experimentation is crucial if you’re considering this option.
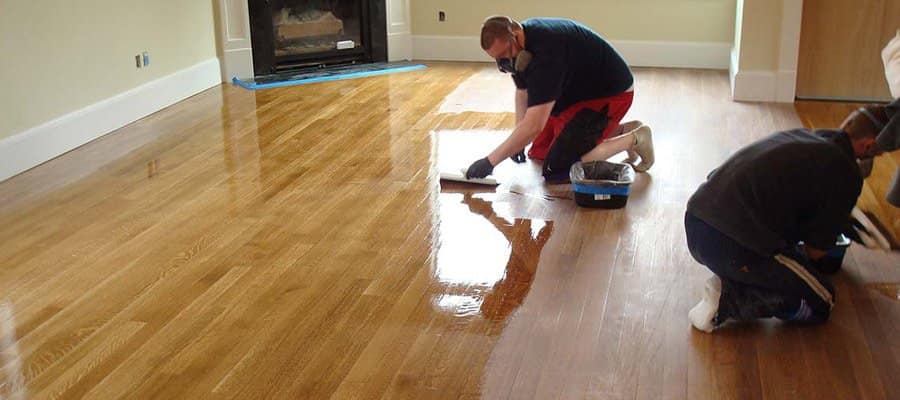
For the finish, I chose water-based polyurethane over oil-based because it dries faster, has less odor, and doesn’t yellow bamboo over time. I applied the first coat using a lamb’s wool applicator attached to a long handle, working in sections and maintaining a wet edge to prevent lap marks. Applying polyurethane requires working quickly but smoothly, avoiding over-brushing that creates bubbles. I learned to load the applicator moderately and apply thin, even coats.
After the first coat dried for four hours, I lightly sanded the entire floor with 220-grit sandpaper using the rented buffer with a screen pad attachment. This abrading step, called screening, removes any dust particles or imperfections that settled into the wet finish and provides tooth for the next coat to grip. I vacuumed thoroughly and wiped everything with tack cloths before applying the second coat. I applied three coats total, screening between each, for maximum durability and depth of finish.
Managing Dust and Maintaining Air Quality
Bamboo dust is notoriously fine and pervasive, creating challenges I hadn’t fully anticipated. Even with plastic sheeting sealing doorways, I found dust migrating to other rooms through the smallest gaps. I learned to wet down the plastic barriers periodically, which helped trap dust particles. I also placed a box fan in a window blowing outward to create negative pressure, pulling dust outside rather than letting it infiltrate the rest of my home.
Wearing proper respiratory protection was absolutely critical. I used an N95 respirator mask rated for fine particles throughout the entire sanding process. The dust is so fine that standard dust masks provide inadequate protection. My neighbor attempted refinishing without proper protection and experienced respiratory irritation for days afterward. I also wore safety goggles to protect my eyes, even though I initially thought this was overkill.
I ran my HEPA vacuum constantly during sanding, emptying the canister frequently because bamboo dust quickly fills vacuums. Between sanding sessions, I sealed the room and ran a HEPA air purifier for several hours to clear airborne particles. Before applying finish coats, I vacuumed multiple times and wiped the floor with damp tack cloths to ensure an absolutely dust-free surface. Any dust particles that settle into wet polyurethane create bumps and imperfections in the final finish.

Curing, Protecting, and Maintaining Your Refinished Floors
After applying the final polyurethane coat, I had to exercise patience during the curing process. Water-based polyurethane dries to the touch in a few hours, but it takes 3-7 days to cure enough for light foot traffic and up to 30 days to fully cure and harden. I waited 48 hours before walking on my floors in socks, a week before replacing furniture with felt pads, and a full month before placing area rugs or allowing shoes on the surface.
I protected my investment during the curing period by maintaining consistent temperature and humidity levels. I kept windows closed to prevent dust, pollen, or moisture from settling on the curing finish. I ran my HVAC system to maintain stable conditions and used fans for gentle air circulation without directing air directly at the floor. These environmental controls ensured the polyurethane cured properly without cloudiness, bubbles, or other imperfections.
For long-term maintenance of my newly refinished floors, I implemented strict protocols. I placed high-quality mats at all entrances, added felt pads to every piece of furniture, and instituted a no-shoes policy in my home. I clean weekly using a pH-neutral bamboo floor cleaner and immediately wipe up any spills. I avoid steam mops, excessive water, and harsh chemicals that could damage the new finish. With proper care, my refinished floors should maintain their beauty for another 7-10 years before needing attention again.
How many times can bamboo flooring be refinished during its lifetime?
Solid bamboo can typically be refinished 1-3 times depending on thickness. My strand-woven bamboo can probably handle two refinishings total given its density and thickness. Each refinishing removes about 1-2mm of material, so you need adequate thickness above the tongue-and-groove joint. Engineered bamboo with thin wear layers often cannot be refinished at all. A professional can measure your specific floors to determine refinishing potential.
Can I refinish bamboo floors myself or should I hire professionals?
I successfully refinished my floors myself, saving approximately $3-4 per square foot compared to professional refinishing. The project requires physical stamina, attention to detail, and comfort using power tools. Renting quality equipment is essential for good results. If you’re uncomfortable with the process, have limited time, or your floors have severe damage, hiring professionals might be worth the cost for guaranteed results and warranty protection.

How long does the bamboo floor refinishing process take from start to finish?
I completed the refinishing over two weekends: the first weekend for sanding and initial finish coats, the second for final coats and screening. Active work time was about 20-25 hours for 500 square feet. However, the curing period adds significant time before you can fully use the floors. Plan for 48 hours before walking on them, one week before replacing furniture, and 30 days for complete cure.
What’s the difference between screening and full sanding when refinishing bamboo?
Screening is a light abrasion using fine-grit screens that roughens the existing finish without removing it, allowing new finish coats to adhere. I use screening between polyurethane coats during refinishing. Full sanding removes all finish down to bare bamboo, necessary when floors are heavily damaged or you want to change stain color. My floors needed full sanding, but floors in better condition might only need screening.
Is water-based or oil-based polyurethane better for refinishing bamboo floors?
I chose water-based polyurethane because it dries faster, has minimal odor, and doesn’t yellow bamboo over time. It’s also easier to clean up and more environmentally friendly. Oil-based poly provides slightly more durability and depth but takes much longer to dry, has strong fumes, and can amber bamboo’s natural color. For DIY refinishing, water-based is more forgiving and practical.
How do I prevent dust from refinishing from spreading throughout my entire house?
I sealed doorways with plastic sheeting and tape, creating complete barriers to adjacent rooms. I placed a box fan in a window blowing outward to create negative pressure. I also sealed HVAC vents and used wet barriers that trapped dust particles. Despite these precautions, some dust still escaped. Consider moving sensitive items, electronics, and covering everything nearby. Professional refinishers have dust containment systems that control this better.

Related Posts: