When I moved into my eco-friendly home five years ago, the cork flooring in the kitchen and dining areas was one of the features that sold me on the house. The natural material felt wonderful underfoot, provided excellent insulation, and aligned perfectly with my commitment to sustainable living. However, after years of daily foot traffic, spills from cooking adventures, and the occasional furniture rearrangement mishap, my once-beautiful cork floors were looking tired and worn. I knew cork could be refinished, but I had no idea what I was getting myself into when I decided to tackle this project myself instead of hiring professionals.
Assessing the Condition and Deciding Whether to Refinish
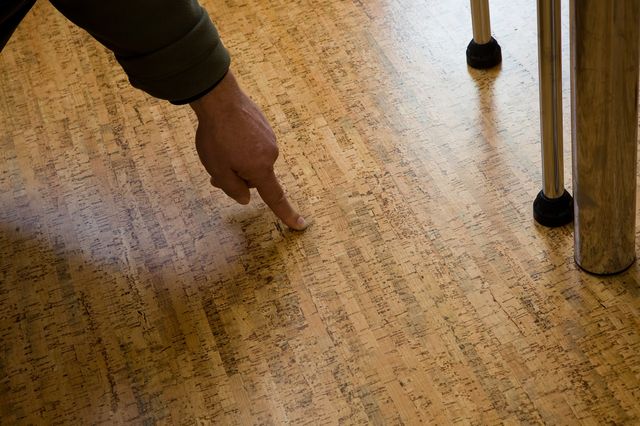
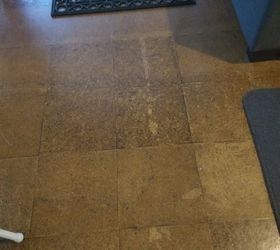
My first step was honestly evaluating whether my cork floors were good candidates for refinishing or if replacement would be more practical. I spent an entire weekend on my hands and knees, examining every square foot for deep gouges, water damage, or areas where the cork had started to separate from the subfloor. The good news was that most of the damage was surface-level wear and minor scratches that had accumulated over the years.
I learned that cork floors can typically be refinished 3-4 times during their lifespan, depending on the thickness of the wear layer and the extent of previous refinishing work. Since these floors had never been refinished and the original cork layer was still substantial, I felt confident moving forward. The main areas of concern were around the kitchen sink, where water damage had caused some slight discoloration, and near the patio doo,r where sand and grit had created more significant wear patterns.
The deciding factor came when I got quotes from professional refinishing services that ranged from $8-12 per square foot for my 400 square foot space. With materials costing around $300 for quality cork-specific products, I calculated I could save over $2,500 by doing the work myself. More importantly, I wanted to learn the process so I could maintain these floors properly in the future and potentially help friends with similar projects.
Gathering the Right Tools and Materials for Cork Refinishing
Shopping for cork refinishing supplies taught me that not all floor refinishing products are created equal, and using the wrong materials could permanently damage my floors. Cork requires specialized treatments that preserve its natural flexibility and cellular structure, unlike hardwood floors that can handle more aggressive sanding and harsh chemical strippers. I spent considerable time researching cork-specific products and consulting with specialty flooring suppliers.
My essential tool list included a drum sander with fine-grit abrasives, a detail sander for edges and corners, a shop vacuum with HEPA filtration, tack cloths, natural bristle brushes, foam rollers, and plenty of drop cloths. The most important purchase was a cork-specific polyurethane finish that would flex with the natural movement of the material without cracking or peeling over time. I also invested in a moisture meter to ensure the cork was properly dried before applying finish coats.
The material costs added up more than I initially expected, with high-quality water-based polyurethane designed for cork running $80 per gallon. I needed three gallons for multiple coats on my 400 square foot area, plus sandpaper, wood filler specifically formulated for cork, cleaning supplies, and protective equipment. The total material investment was around $450, still significantly less than professional installation but more than basic hardwood refinishing products would have cost.
Surface Preparation and Sanding Techniques for Cork
The sanding process required a completely different approach than I had used on hardwood floors in previous projects. Cork’s cellular structure meant I needed to use much finer grits and lighter pressure to avoid tearing or gouging the surface. I started with 100-grit sandpaper on the drum sander, but quickly learned that even this was too aggressive for the softer cork material, requiring me to switch to 120-grit for the initial pass.
Working with the drum sander on cork taught me patience and control, as the material removed much more quickly than hardwood and could be easily damaged by lingering in one spot too long. I practiced in a closet area first to get comfortable with the pressure and speed needed to achieve even results. The key was keeping the sander moving constantly and overlapping passes by about half the sander’s width to avoid creating ridges or low spots.
The detailed work around edges and in corners proved even more challenging, as hand-sanding cork required an extremely light touch to avoid creating depressions or uneven areas. I used 150-grit sandpaper on a detail sander for most edge work, followed by hand sanding with 220-grit to blend the machine-sanded areas seamlessly. This process took much longer than expected, but rushing would have created visible inconsistencies that would show through the final finish.
Dealing with Stains, Scratches, and Deep Damage
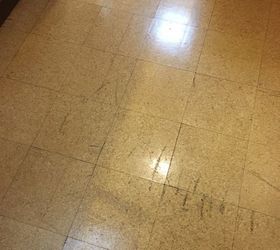
The water stains around my kitchen sink area required special attention beyond simple sanding. Cork’s absorbent nature meant that some stains had penetrated deeply into the material, creating dark areas that wouldn’t disappear with surface preparation alone. I tried several approaches, starting with oxalic acid wood bleach applied carefully to avoid lightening surrounding areas too much.
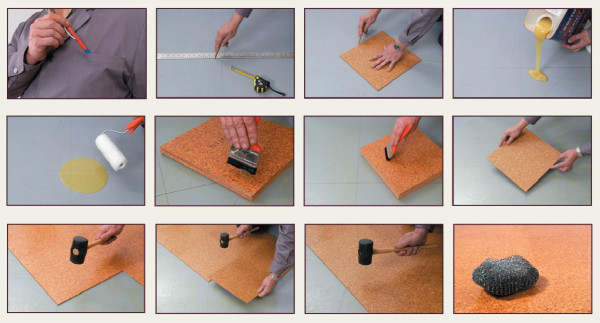
For deeper scratches and gouges, I used cork-specific wood filler that matched the natural color of my floors. This material had a different consistency than standard wood filler, designed to flex with the cork’s natural movement without cracking or falling out over time. Applying the filler required patience, as it needed to be slightly proud of the surface to account for shrinkage during curing, then carefully sanded flush once completely dry.
The most challenging repair involved an area near the back door where a heavy appliance had been dragged across the floor, creating several deep gouges that went through the wear layer into the structural cork beneath. These required multiple applications of filler, careful color matching with cork stain, and meticulous blending to make the repairs invisible. The process taught me that prevention is much easier than repair when it comes to cork flooring maintenance.

Applying the Finish: Techniques for Even, Durable Results
The finishing process turned out to be the most critical phase of the entire project, as cork’s absorbent nature meant I had only one chance to achieve even coverage before the polyurethane started to set. I learned that working in small sections and maintaining a wet edge was essential to prevent lap marks and ensure a uniform appearance across the entire floor surface.
My first coat application was nerve-wracking, as the cork absorbed the finish much more quickly than hardwood, requiring faster work and constant attention to avoid creating thick spots or missed areas. I used a high-quality natural bristle brush for cutting in edges and a foam roller for the main field areas, working parallel to the cork grain pattern to minimize visible brush marks. The key was applying thin, even coats rather than trying to build up thickness in a single application.
Between coats, I lightly sanded with 220-grit sandpaper to remove any raised grain or surface imperfections, followed by thorough vacuuming and tack cloth wiping to remove all dust particles. I applied three coats total, allowing 24 hours between applications and maintaining consistent temperature and humidity throughout the curing process. The final coat required perfect conditions, as any imperfections would be permanently visible in the finished surface.
Maintenance and Long-Term Care After Refinishing
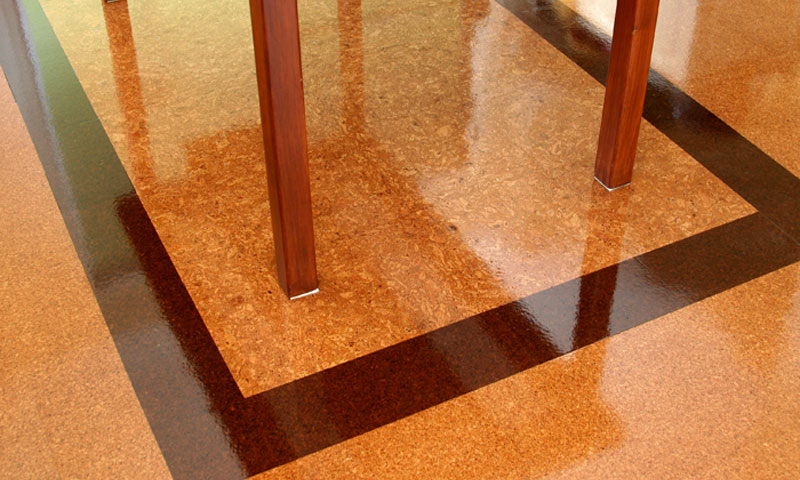
Living with my newly refinished cork floors for eight months now has taught me valuable lessons about proper maintenance and what to expect from the refinished surface. The new polyurethane finish has proven much more resistant to water damage and stains than the original factory finish, but it still requires thoughtful care to maintain its appearance and protect the underlying cork material.
I developed a daily maintenance routine that includes sweeping with a microfiber dust mop and immediately cleaning any spills with a barely damp cloth. Weekly cleaning involves a pH-neutral floor cleaner specifically designed for polyurethane-finished floors, applied with a well-wrung microfiber mop. I learned to avoid excessive water, as moisture can still penetrate through microscopic gaps in the finish and cause cork to swell or stain.
The refinished surface has held up remarkably well to normal household traffic, showing minimal wear even in high-traffic areas like the kitchen walkway. I use furniture pads religiously and have implemented a no-shoes policy to prevent grit and debris from scratching the finish. Based on the current wear rate, I expect this refinishing job to last 8-10 years before needing attention, making the DIY investment well worth the effort and cost savings.

How much does it cost to refinish cork floors yourself versus hiring professionals?
I spent about $450 in materials for my 400 sq ft project, while professional quotes ranged from $3,200-4,800. The DIY savings were substantial, but factor in tool rental costs ($150 for weekend sander rental) and your time commitment. The project took me four full weekends, including prep work. Professional work includes warranties and expertise, but DIY gives you control over material quality and timing while saving thousands of dollars.
Can all cork floors be refinished, or are there types that can’t handle the process?
Most solid cork tiles and planks can be refinished 3-4 times, but thin veneer cork over composite backing typically can’t be sanded without damaging the substrate. I checked my floor thickness with a small hole in an inconspicuous area and confirmed at least 3mm of solid cork above the backing. Floating cork floors with click-lock systems are generally not refinishable. When in doubt, consult the manufacturer or test a small hidden area first.
How long does the refinishing process take, and when can I use the floors again?
My project took four weekends: one for prep and assessment, two for sanding and repairs, and one for finishing. Each polyurethane coat needs 24 hours before the next application, and I waited 72 hours after the final coat before walking on the floors. Full cure takes 30 days, so I avoided heavy furniture and area rugs during this period. Plan for at least two weeks of limited floor access, longer if you encounter unexpected repairs.
What’s the biggest challenge when refinishing cork floors compared to hardwood?
Cork’s cellular structure makes it much more delicate than hardwood during sanding. I had to use lighter pressure, finer grits, and move more slowly to avoid gouging or tearing the surface. The material also absorbs finish much faster, requiring quicker application and more attention to avoid lap marks. Cork-specific products cost more but are essential; standard hardwood refinishing materials can damage cork’s natural flexibility and appearance.

How do I know if my cork floors need refinishing or if they’re beyond repair?
Look for wear patterns where the original finish has worn through to bare cork, water stains that don’t clean off, or scratches that catch your fingernail. If more than 30% of the floor shows significant wear, refinishing is probably worthwhile. However, if there’s extensive water damage, loose tiles, or previous refinishing attempts that went too deep, replacement might be more practical. I tested a hidden area to confirm adequate cork thickness before committing to the project.
What maintenance routine keeps refinished cork floors looking their best?
Daily dust mopping and immediate spill cleanup are essential. I use pH-neutral cork floor cleaner weekly with a barely damp microfiber mop, avoiding excess water that can penetrate the finish. Furniture pads prevent scratches, and I reapply a maintenance coat of polyurethane every 3-4 years in high-traffic areas. The key is prevention; once the finish is damaged, spot repairs are difficult to blend seamlessly. Proper care has kept my floors looking newly refinished eight months later.

Can a cork floor be whitewashed?
Cork Flooring-What To Know

Related Posts: